Ella - Responsive Shopify Theme User Guide
- Created: May 05, 2017
- Version: 2.0.8
- Email: support@halothemes.com
Thank you for purchasing Ella template. If you have any doubt about this template or you find an issue, please read our FAQs issue page: https://ella-demo-8.myshopify.com/pages/theme-faqs.
If you cannot find your answer, please feel free to send us a message: support@halothemes.com
Below you will find the documentation for how to use the template.
Installation
SHOPIFY
We advise reading and familiarizing yourself with the Shopify Manual. It is an extremely well written and thorough guide to understand the Shopify platform, written by Shopify themselves. It will help you understand many aspects of customization for your theme as well as using Shopify in general.
1/ Download the package from themeforest.net (the file is in zip format)
2/ Extract the file you've just downloaded.
3/ Find this file: ella-1.0.0-sections-ready.zip in the folder Ella Sections Ready 1.0.0, then you just need to upload ella-1.0.0-sections-ready.zip file to your Shopify store.
4/ If you would like to use Center header instead of Default header. Please find this file: ella-1.0.0-sections-ready-center-header.zip in the folder Ella Sections Ready 1.0.0 Center Header, then you just need to upload ella-1.0.0-sections-ready-center-header.zip file to your Shopify store.
5/ If you would like to use Ella RTL version. Please find this file: ella-1.0.0-sections-ready-rtl.zip in the folder Ella Sections Ready 1.0.0 RTL, then you just need to upload ella-1.0.0-sections-ready-rtl.zip file to your Shopify store.
6/ If you would like to use Ella RTL Center Header version. Please find this file: ella-1.0.0-sections-ready-center-header-rtl.zip in the folder Ella Sections Ready 1.0.0 Center Header RTL, then you just need to upload ella-1.0.0-sections-ready-center-header-rtl.zip file to your Shopify store.
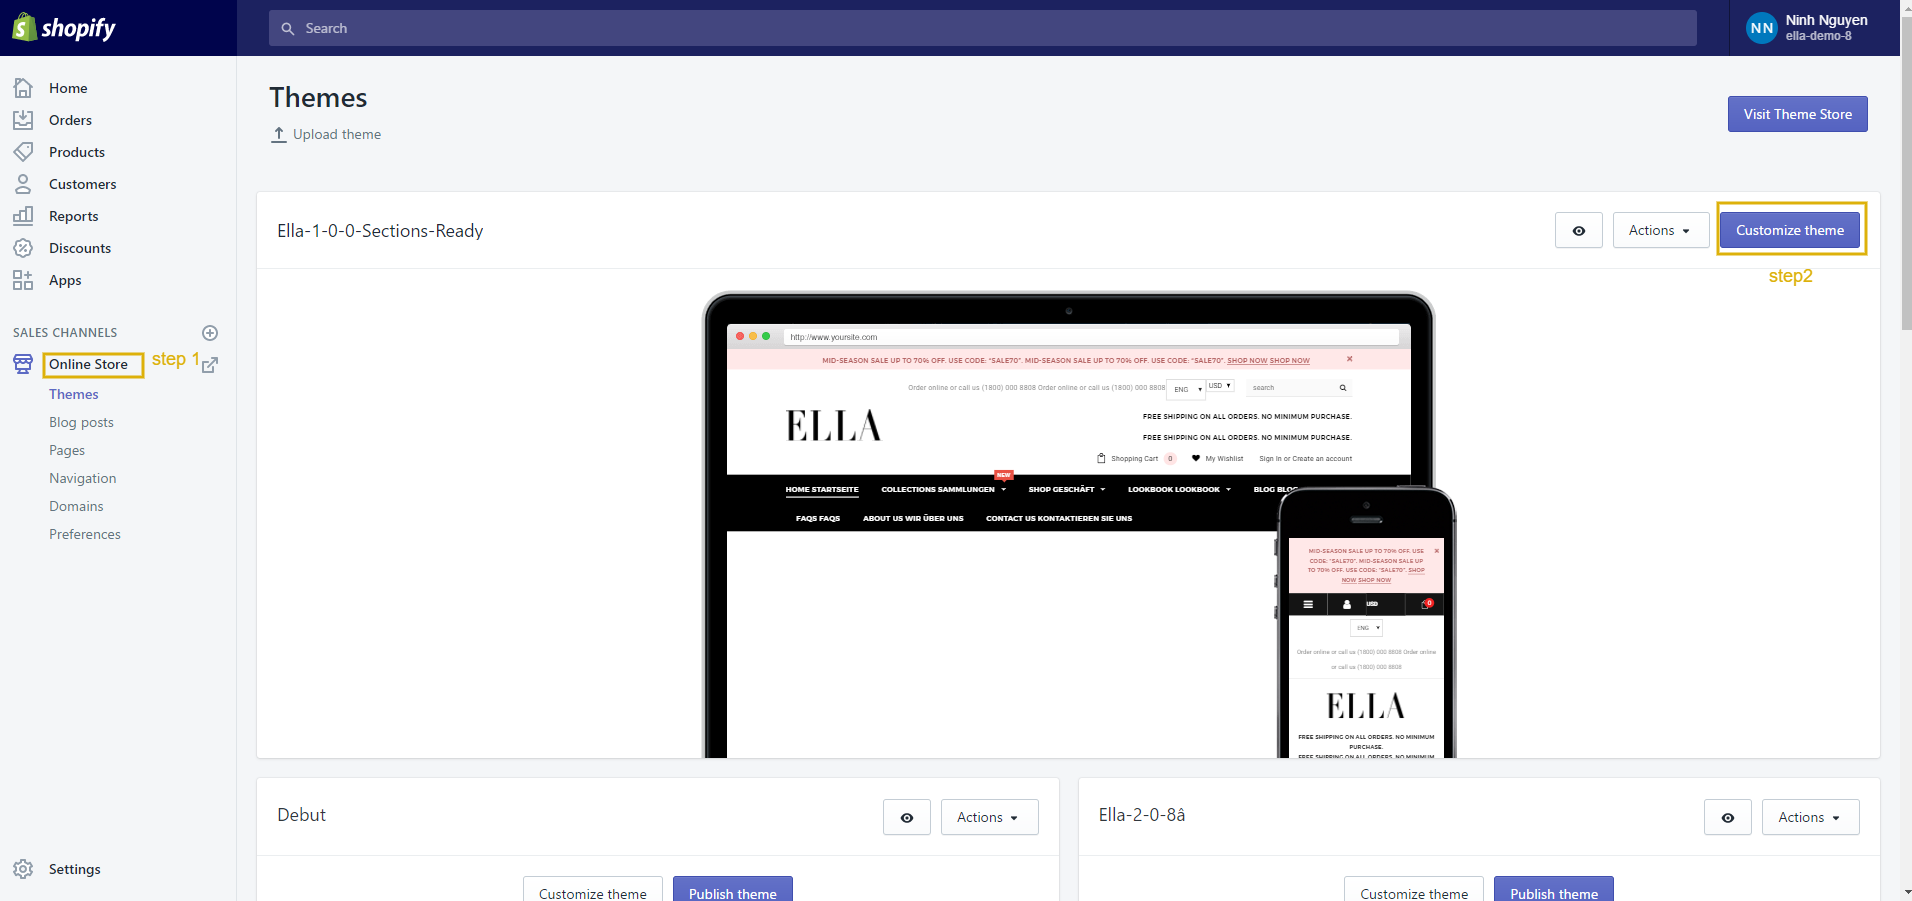
Install Theme
To install the theme:
-
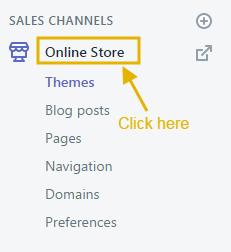
Please log in to your Shopify store, click Online Store.
-
From there, click Upload theme on the top left-hand corner.

-
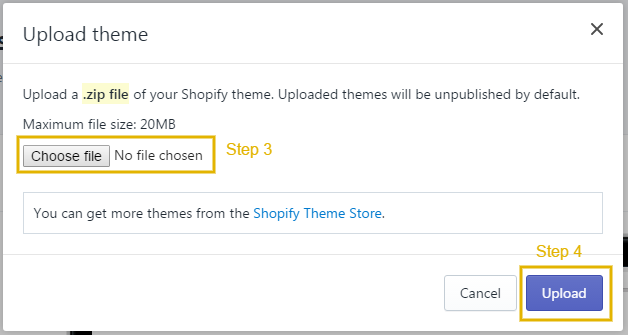
The Upload Theme dialog displays. Click Choose File to select the .zip file you want to upload, then click Upload.
-
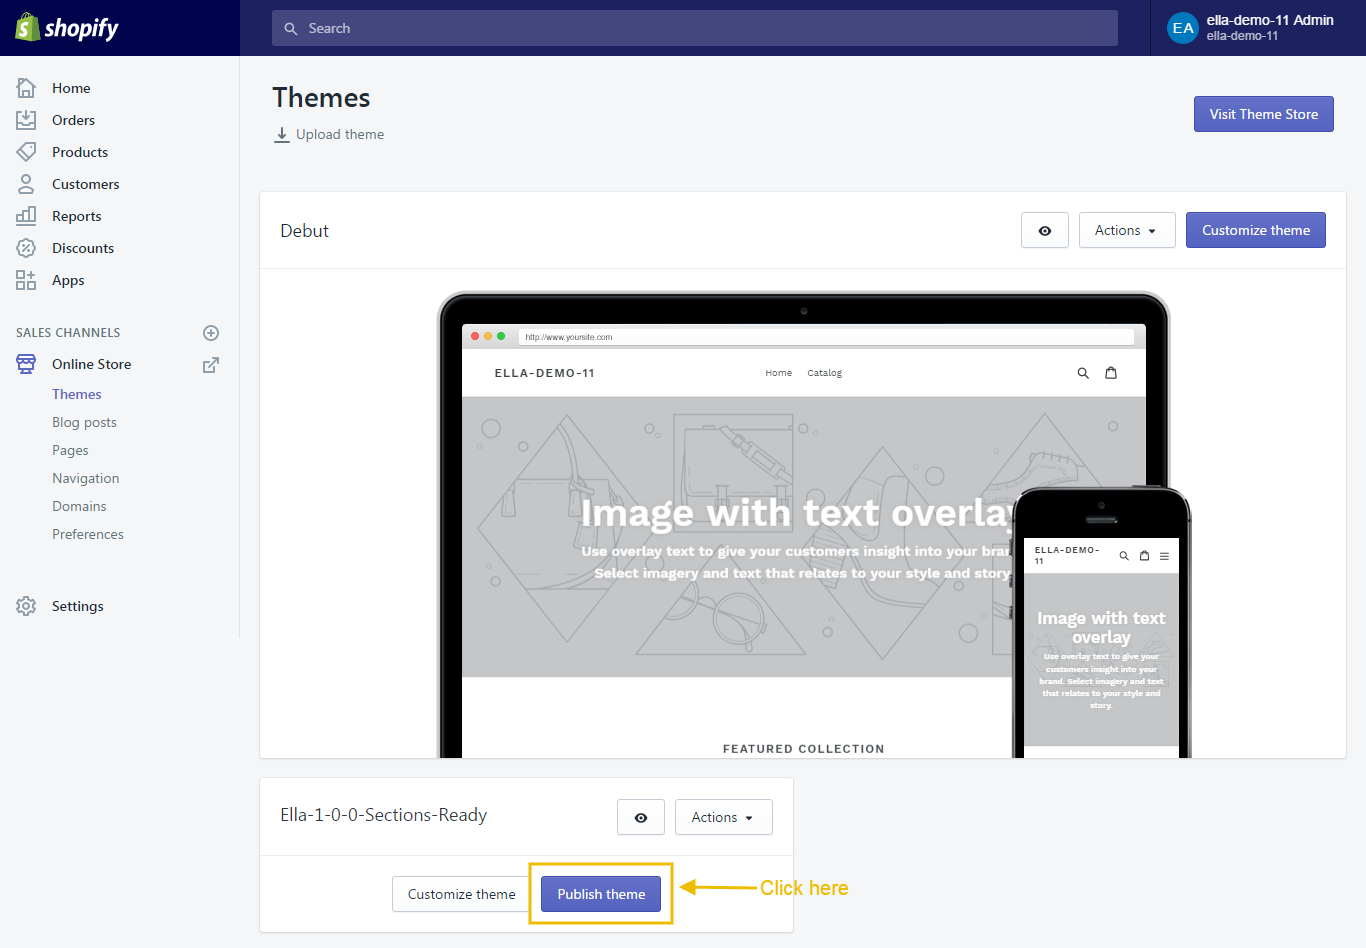
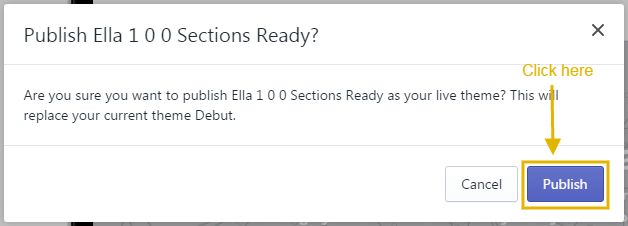
If your store is currently active and is using a different theme, you can select Publish theme button to publish what you have just uploaded to be an active theme.
Install Apps
Set Product Review
To have product review feature, you can install this free app below:
Configuration
Enable Customer Registration Form
-
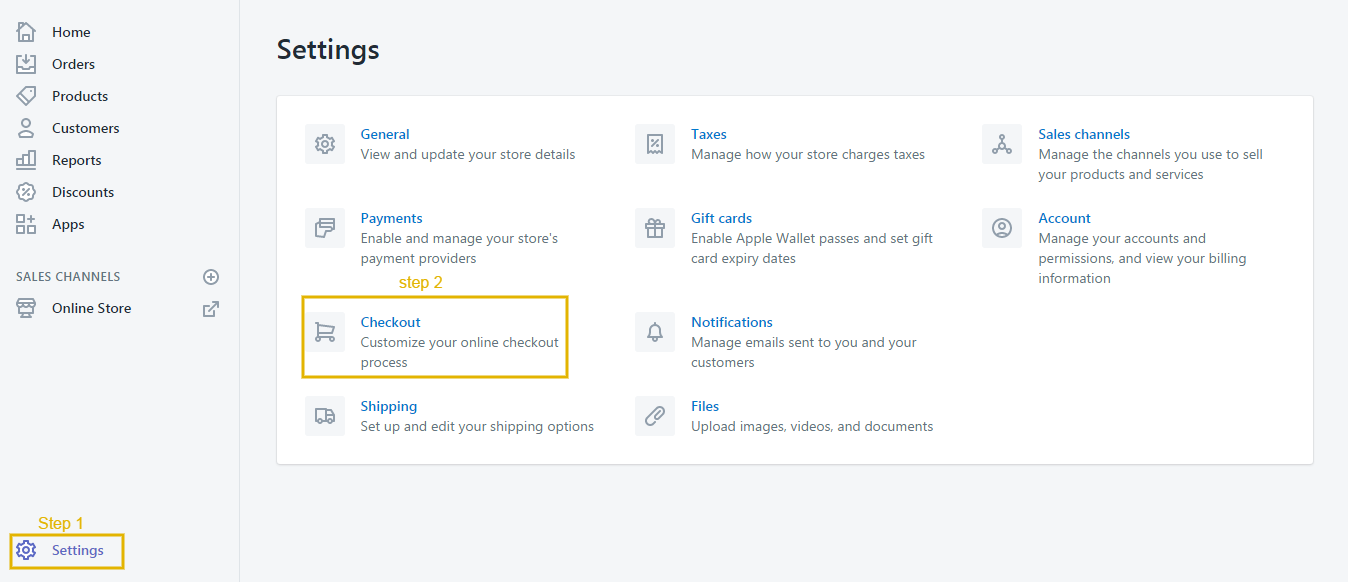
From your Shopify admin, click Settings, then click Checkout.
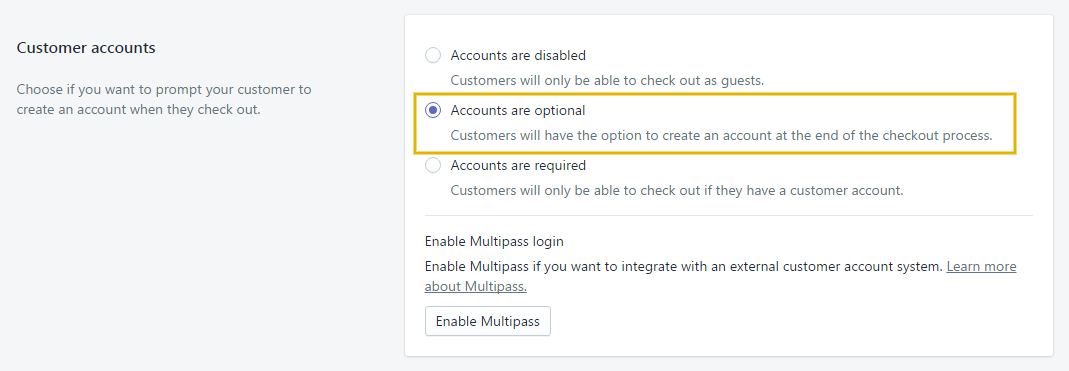
- Scroll down to the Customer accounts sections.
-
Check Accounts are optional and click Save.
Setup shipping rates
To enable shipping calculator, please configure your shipping rates by following below guide:
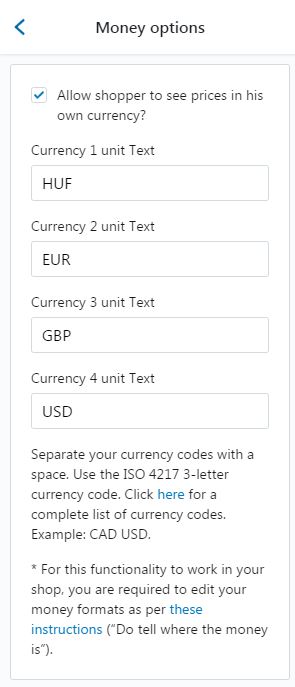
Configure Multiple Currencies
Editing the HTML for currency formatting
-
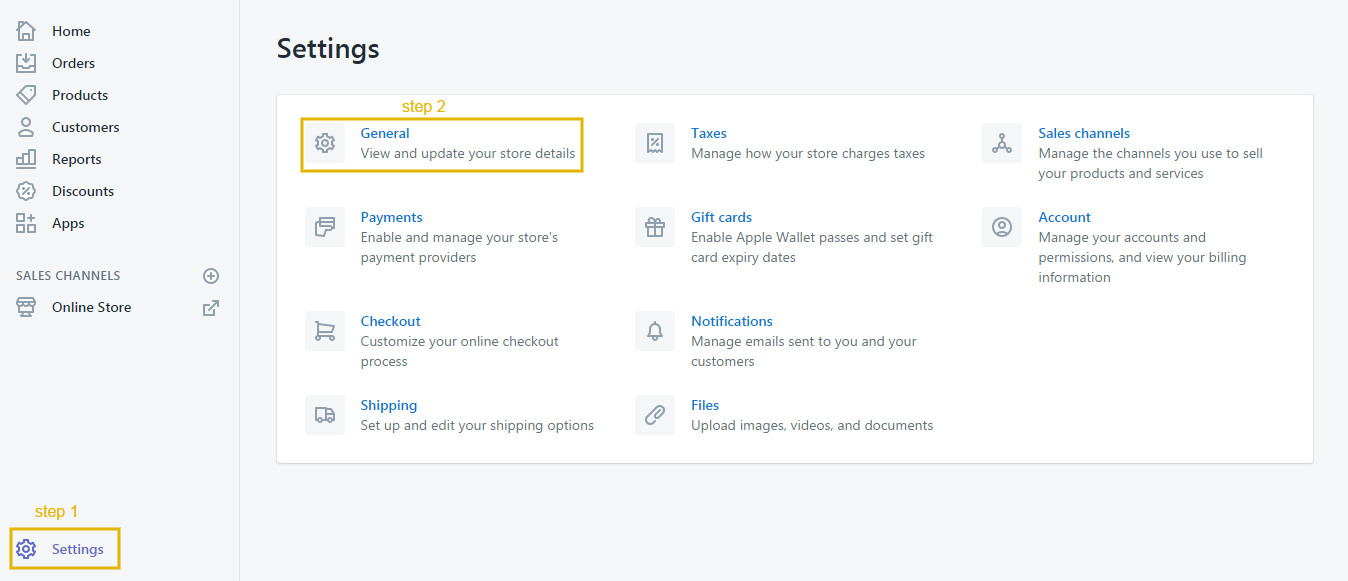
From your Shopify admin, click Settings, then click General:
-
Scroll down to Standards & formats area, you'll see your Currency setting.

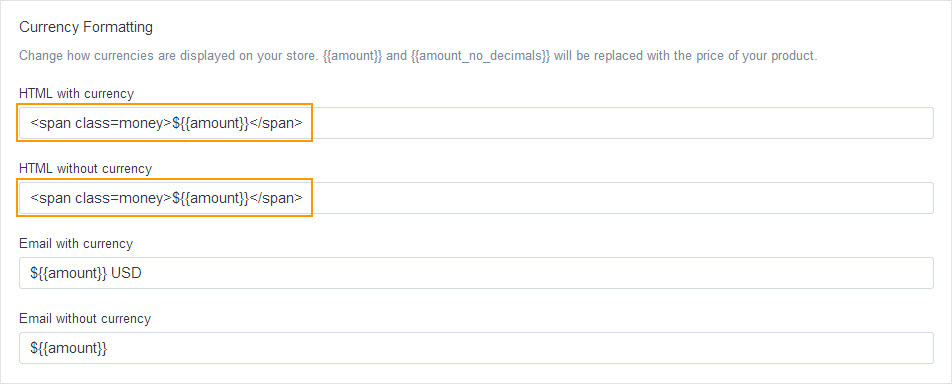
- Click change formatting to open the Currency Formatting sections.
-
Find HTML with currency and HTML without currency formats in the sections.
Configure Countdown
If you have limited time offer for any product, please use below rule to display the Countdown on the product detail page:

How to configure it in your site.
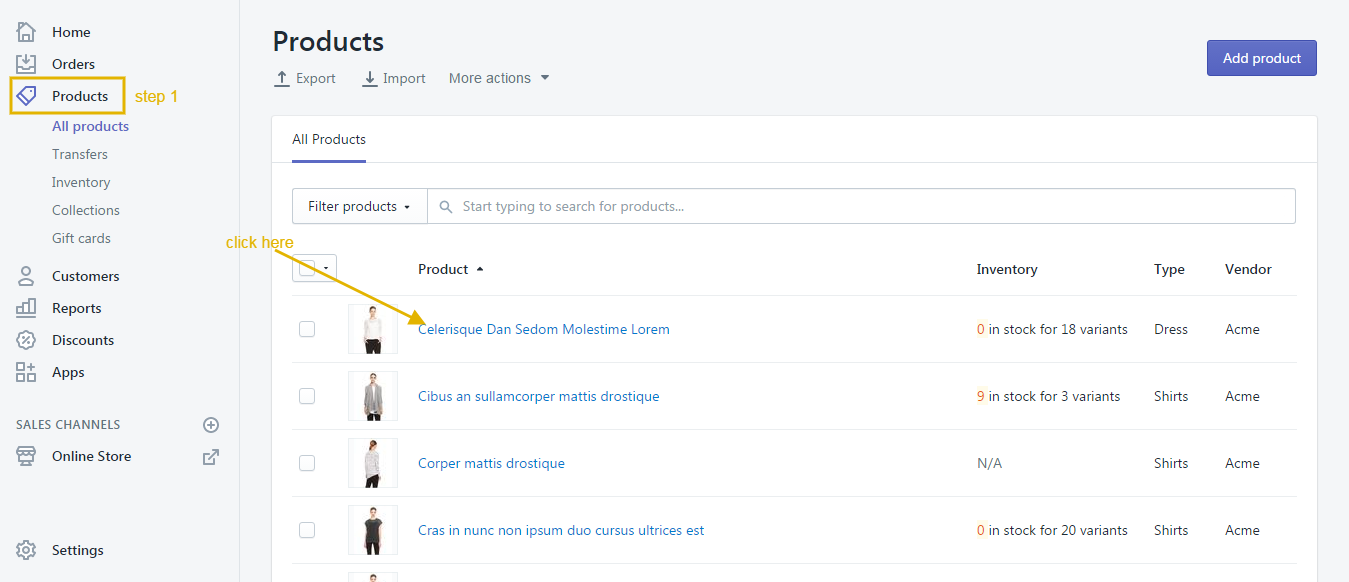
1. From your Shopify admin, click Products, then click on the product you'd like to show the countdown.
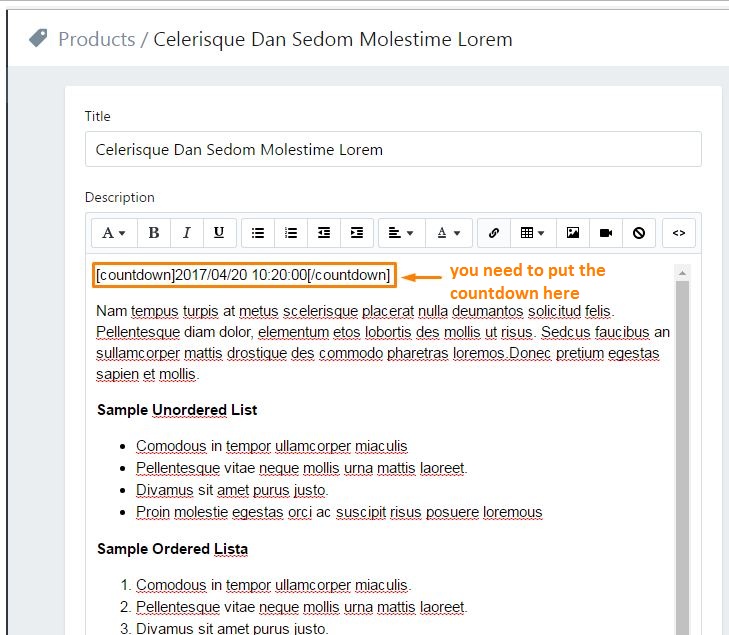
2. In description field of your products, please use this below structure/rule to insert countdown for your product. You need to insert this countdown structure at the beginning of product description
Please use this exact format: yyyy/mm/dd hour/minute/second.
Examle: 2017/04/20 10:20:00.
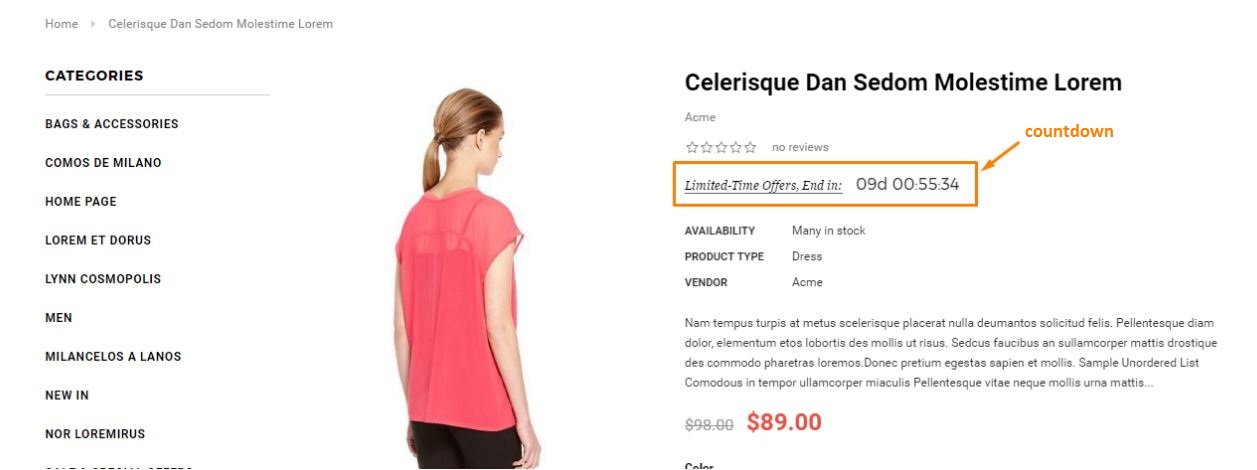
The product will be displayed with the countdown like this:
Configure MailChimp
Could you please refer this link for your reference to create a Mailchimp account.
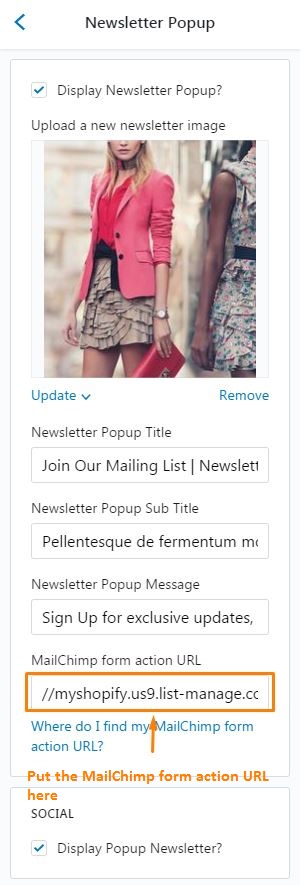
After creating the mailchimp account, you need to copy the URL to MailChimp form action URL in the setting to show your own mailchimp.
Please follow below guide:
From your Shopify admin, click Online Store. Click Customize theme for the theme you want to customize. In General Settings Tab -> Newsletter Popup.
You can read more at here and do follow it to get the action URL.
Home Page
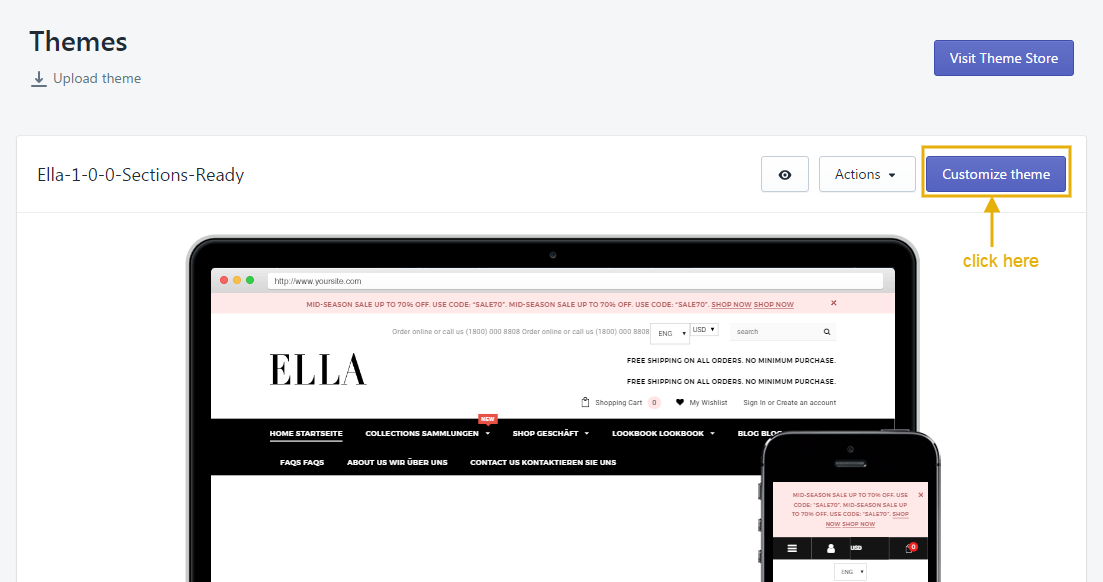
1. From your Shopify admin, click Online Store.
2. Click Customize theme for the theme you want to customize.
For more information regarding Shopify theme settings, please refer to Theme Setting Guide.
Header And Logo
Here is a video for your reference.

1. From your Shopify admin, click Online Store.
2. Click Customize theme for the theme you want to customize.
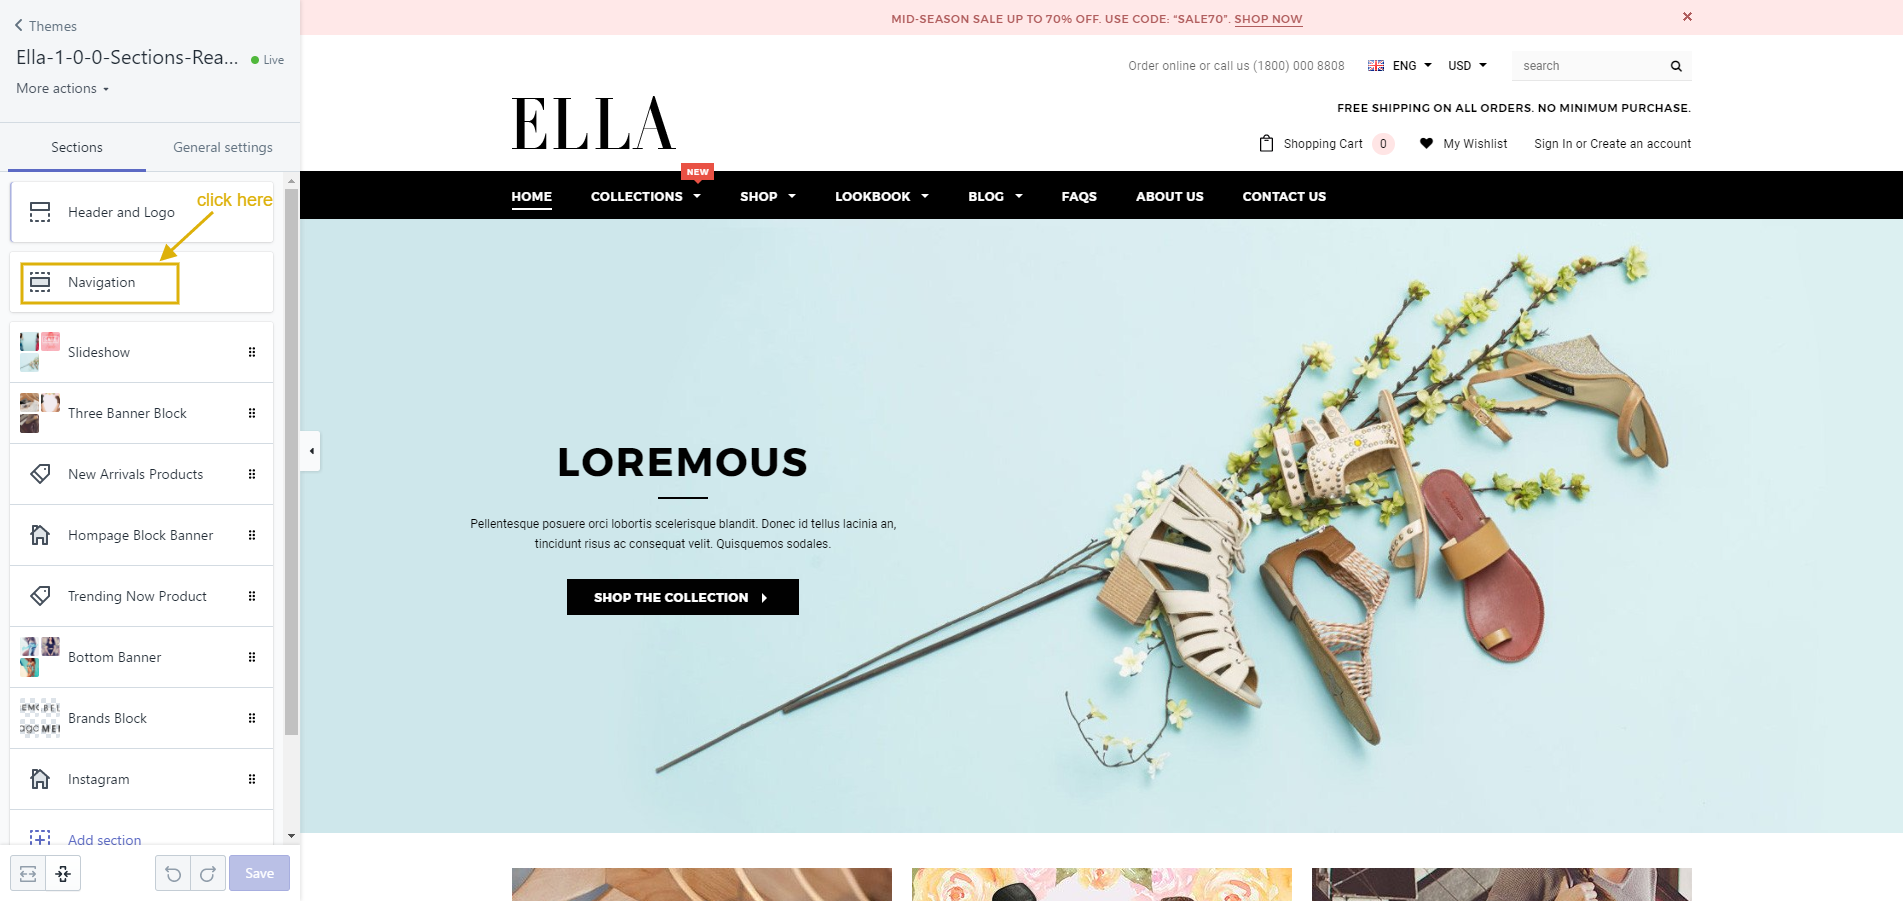
3. At Sections click "Header and Logo" tab.
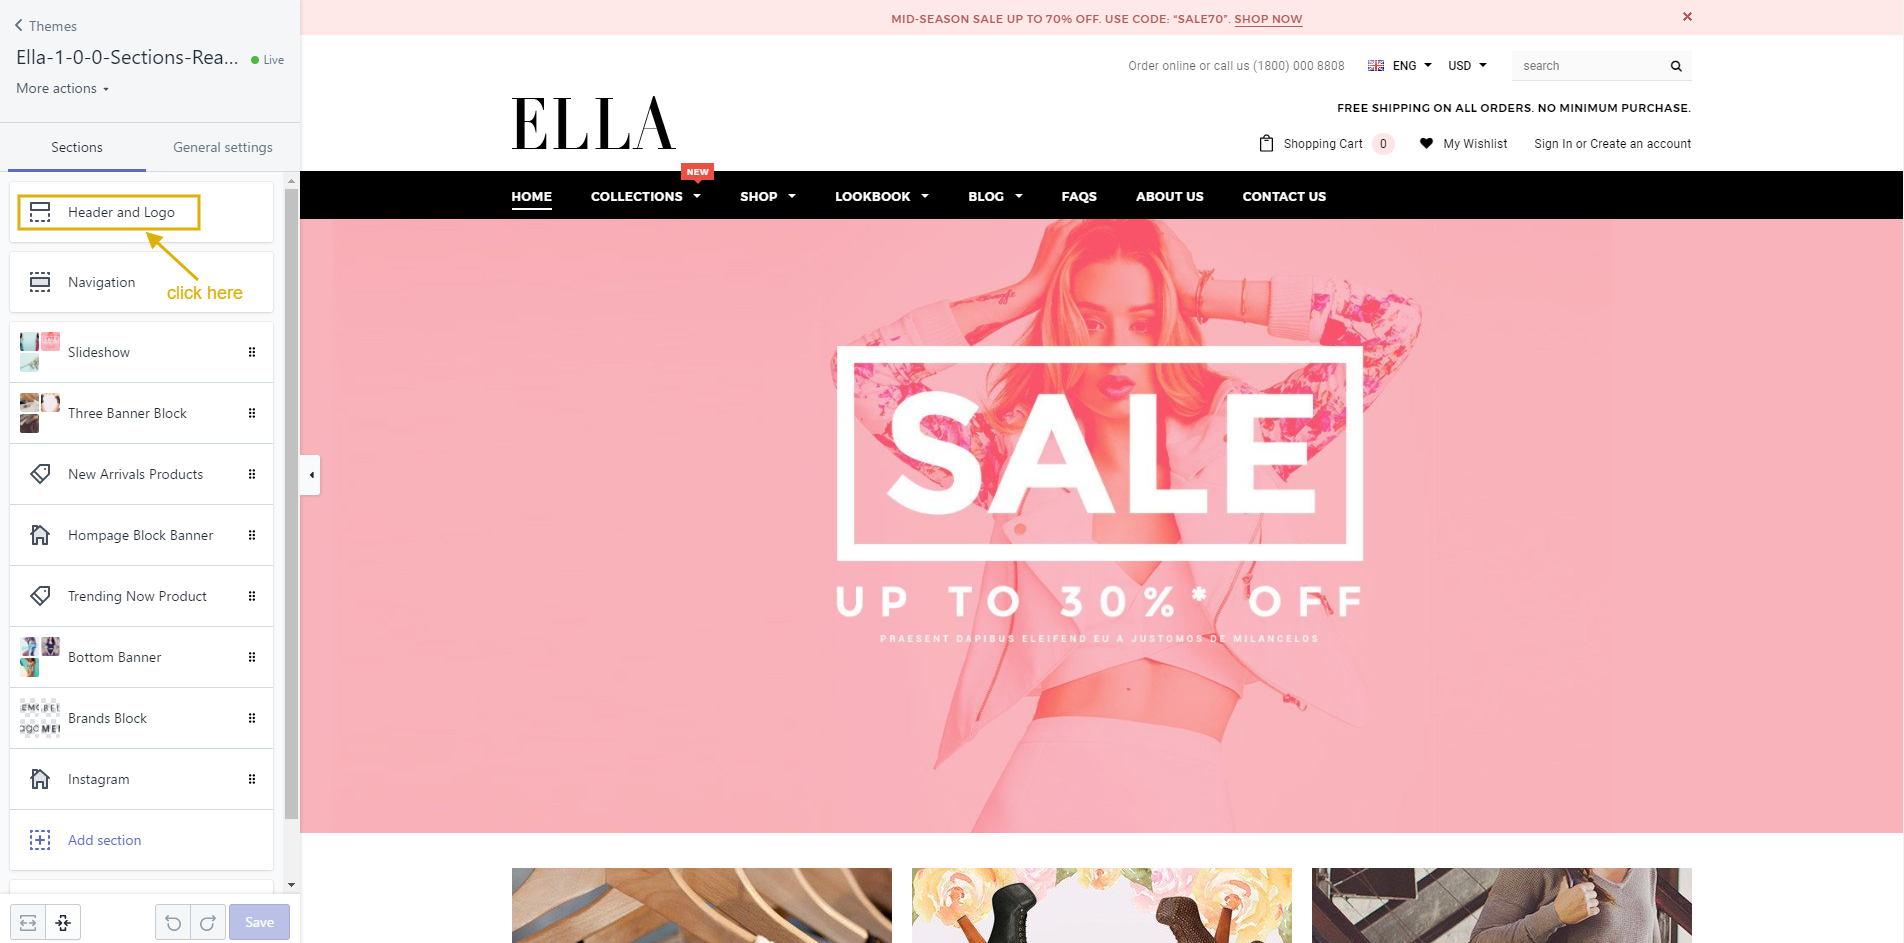
4. At Header and Logo tab, you can set up these below things:
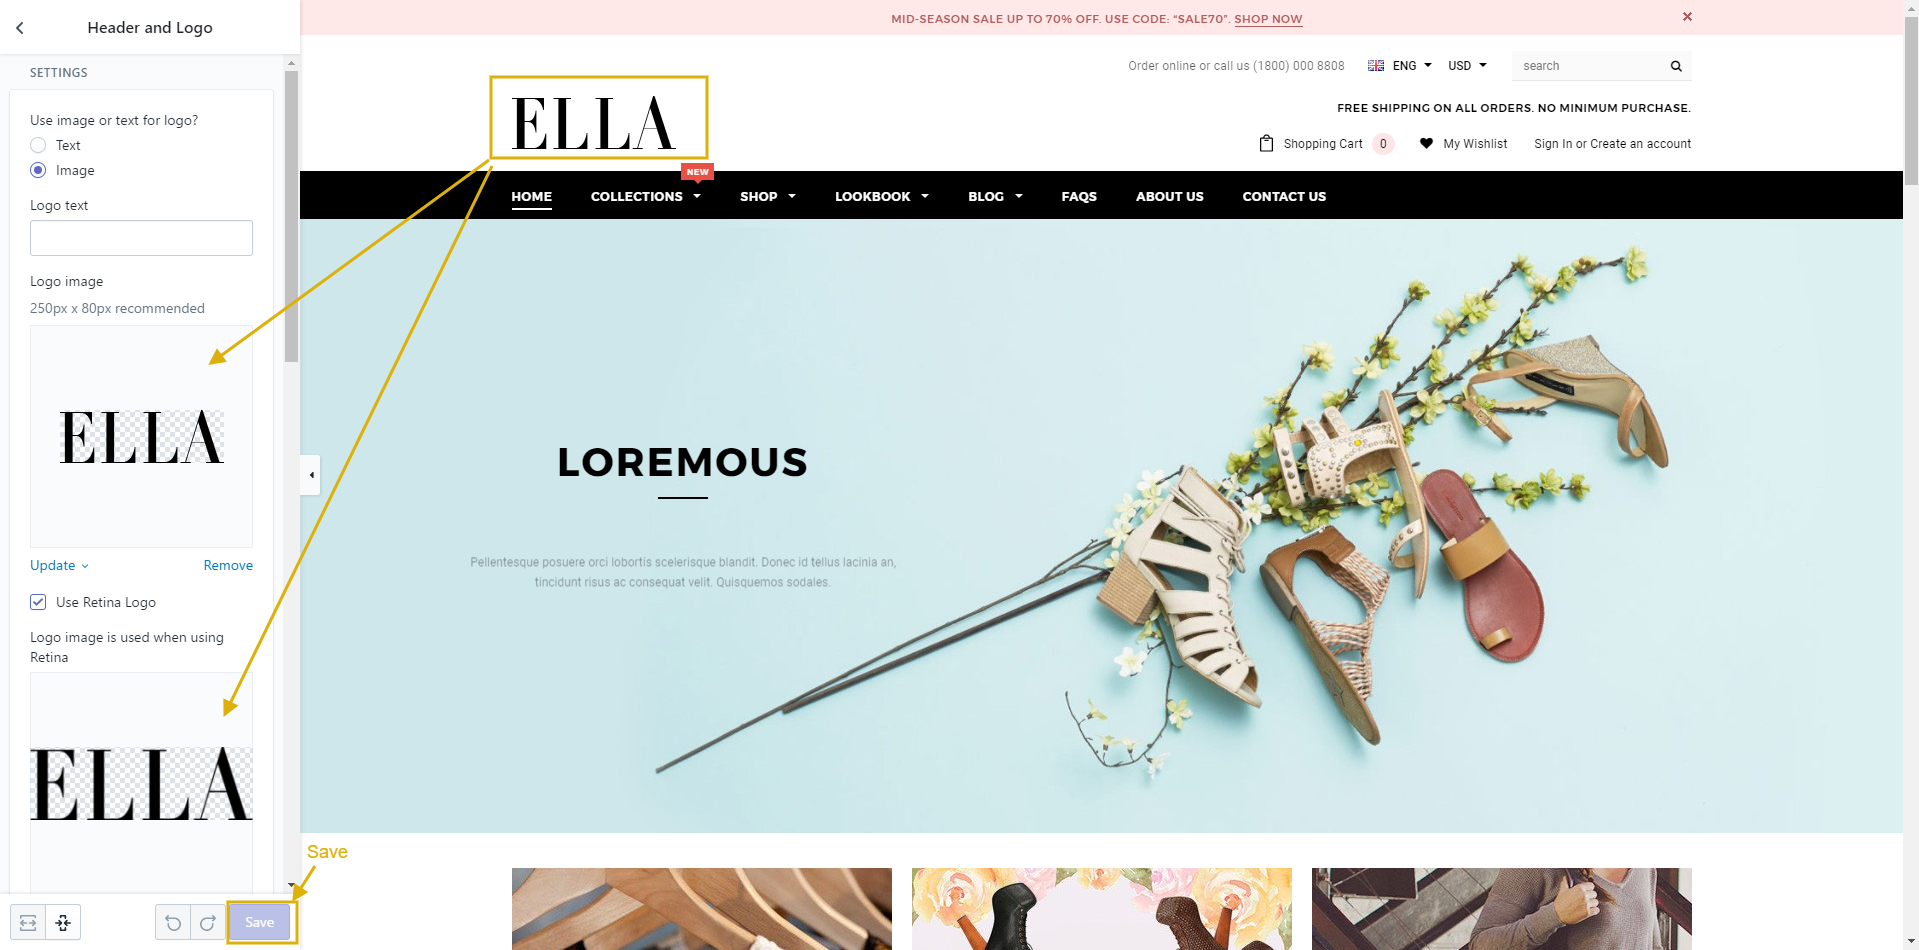
UPLOADING YOUR CUSTOM LOGO
You will find a select box that allows you to choose between using a textual logo and a picture. If you select the picture, you can upload it using the upload form below.

Optimized logo size on Ella theme: 250 × 80 pixels
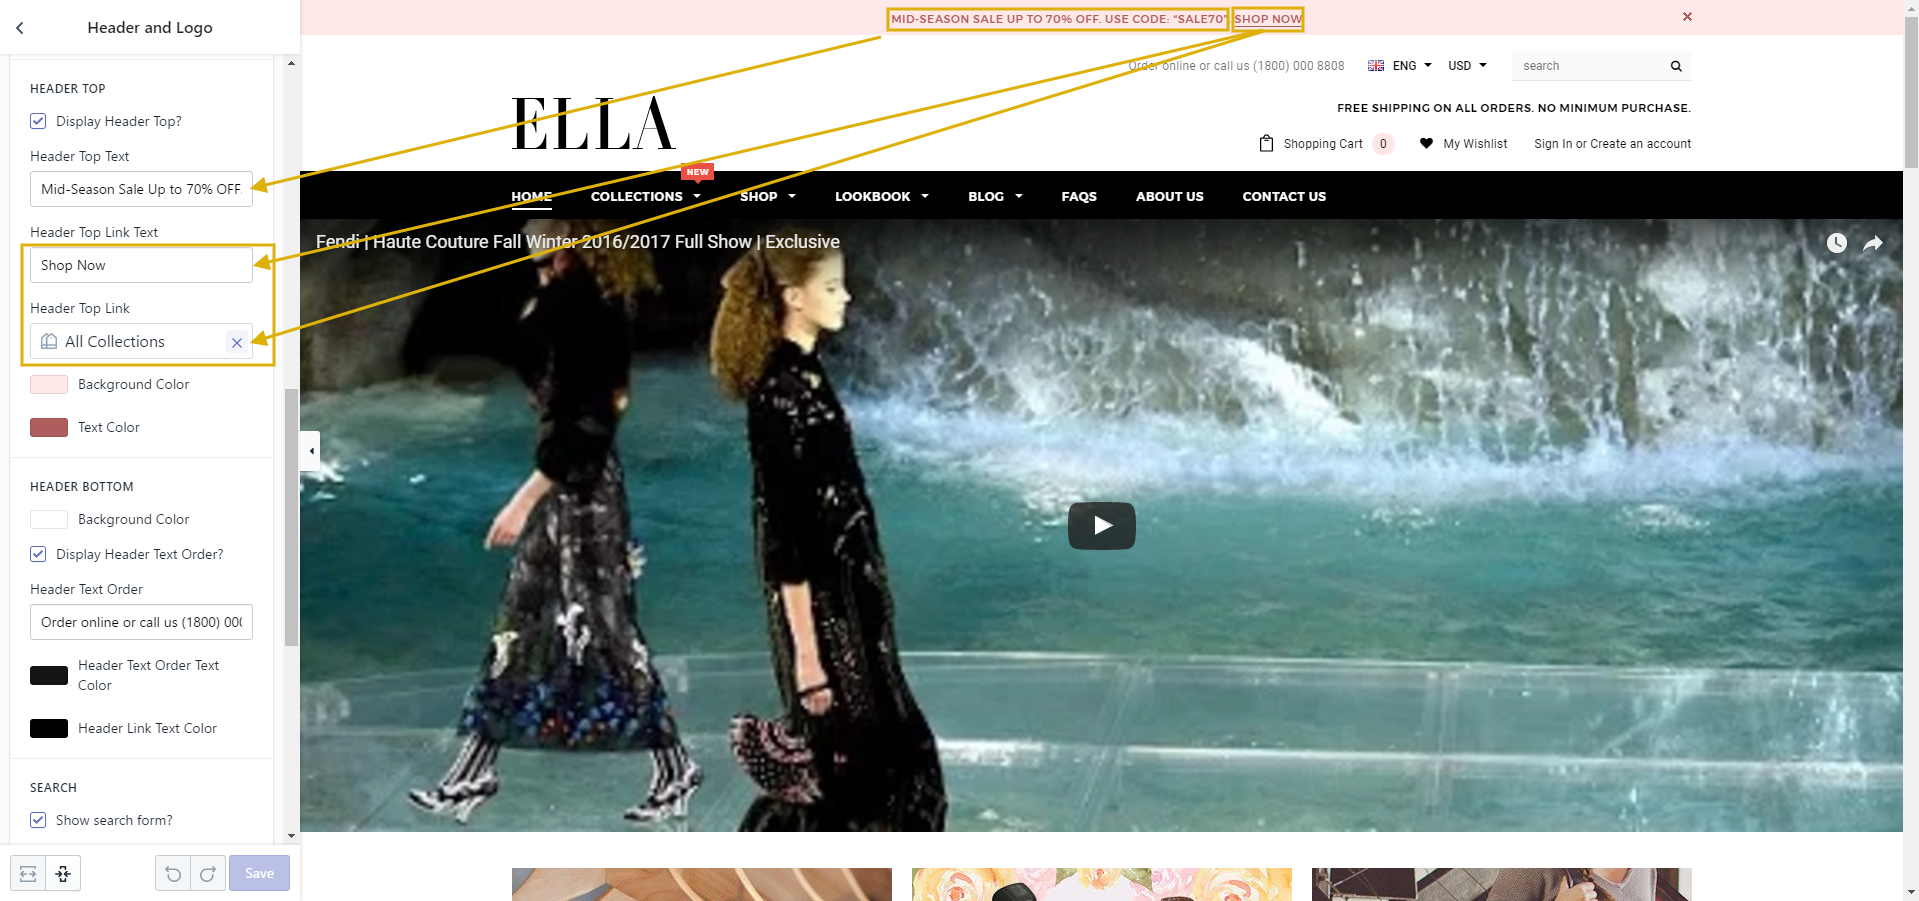
EDIT HEADER TOP

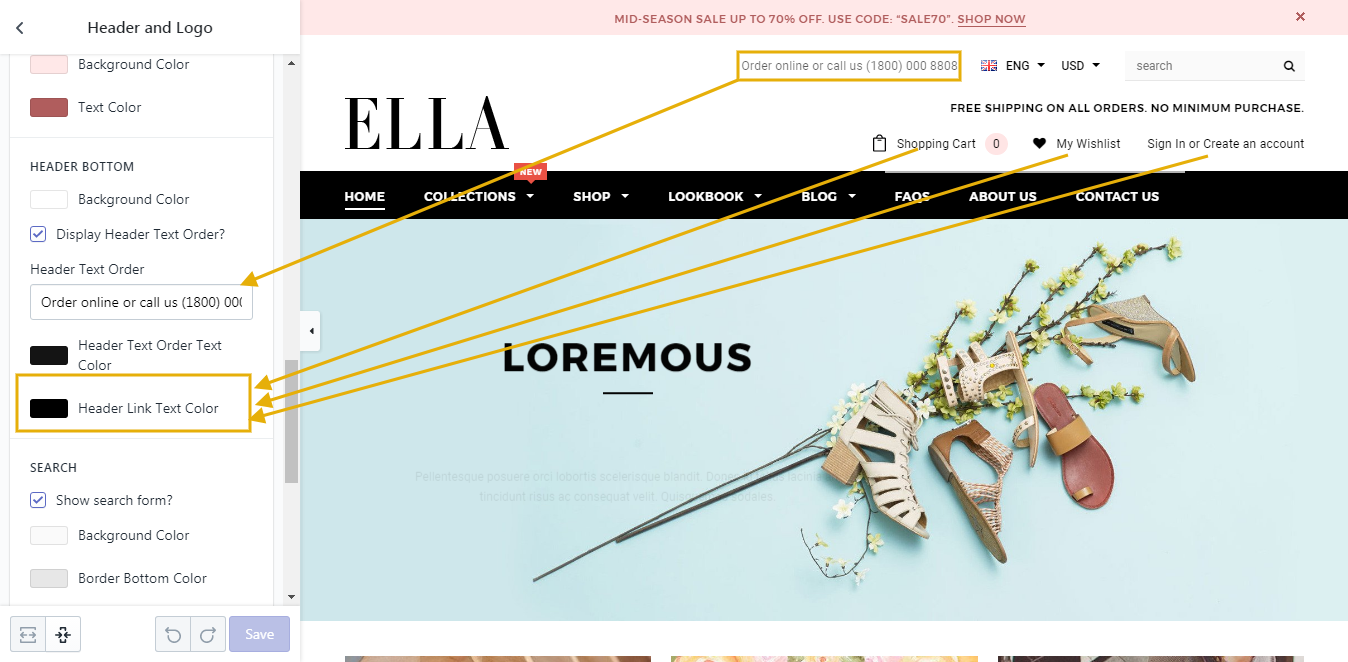
EDIT HEADER BOTTOM
Follow to edit text color in header. Example: Sign in / Create an account text color or Shopping Cart, My wishlist.
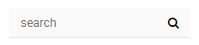
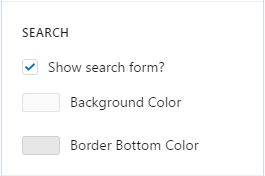
SEARCH FORM
This check box will allow you to choose between showing and hiding search form in header. If you check in check box, search form will show in header and you can edit text of search form by inputing in Placeholder text field.
EDIT HEADER FREE SHIPPING
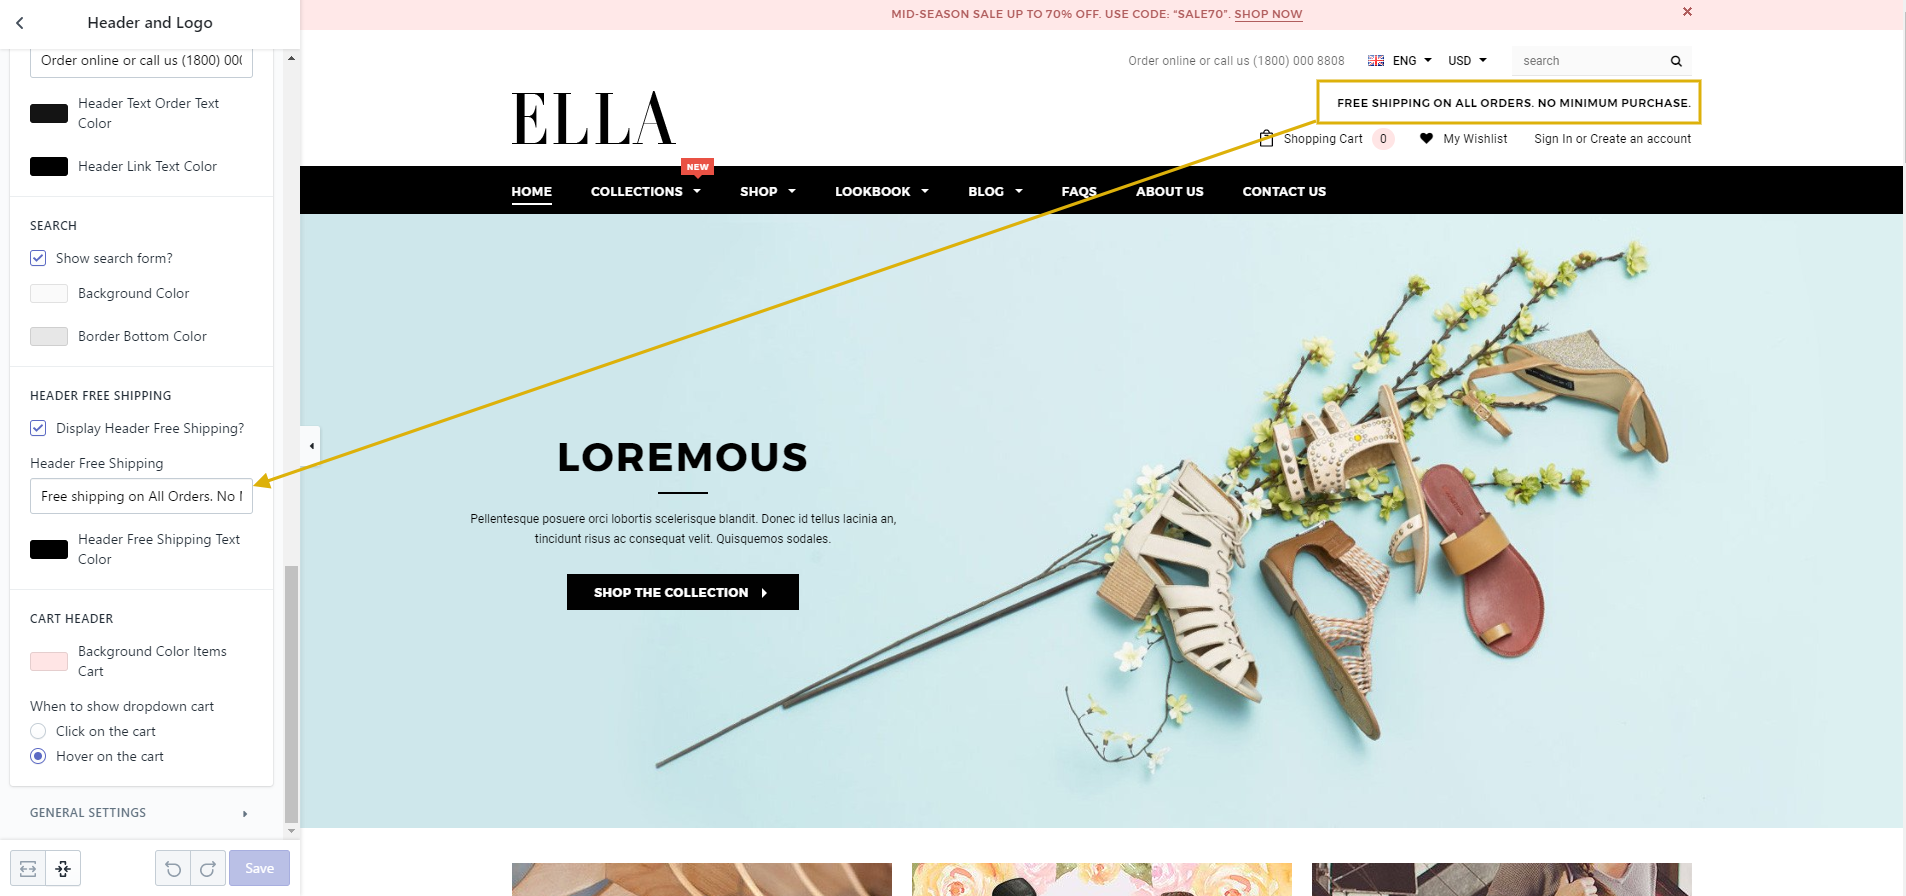
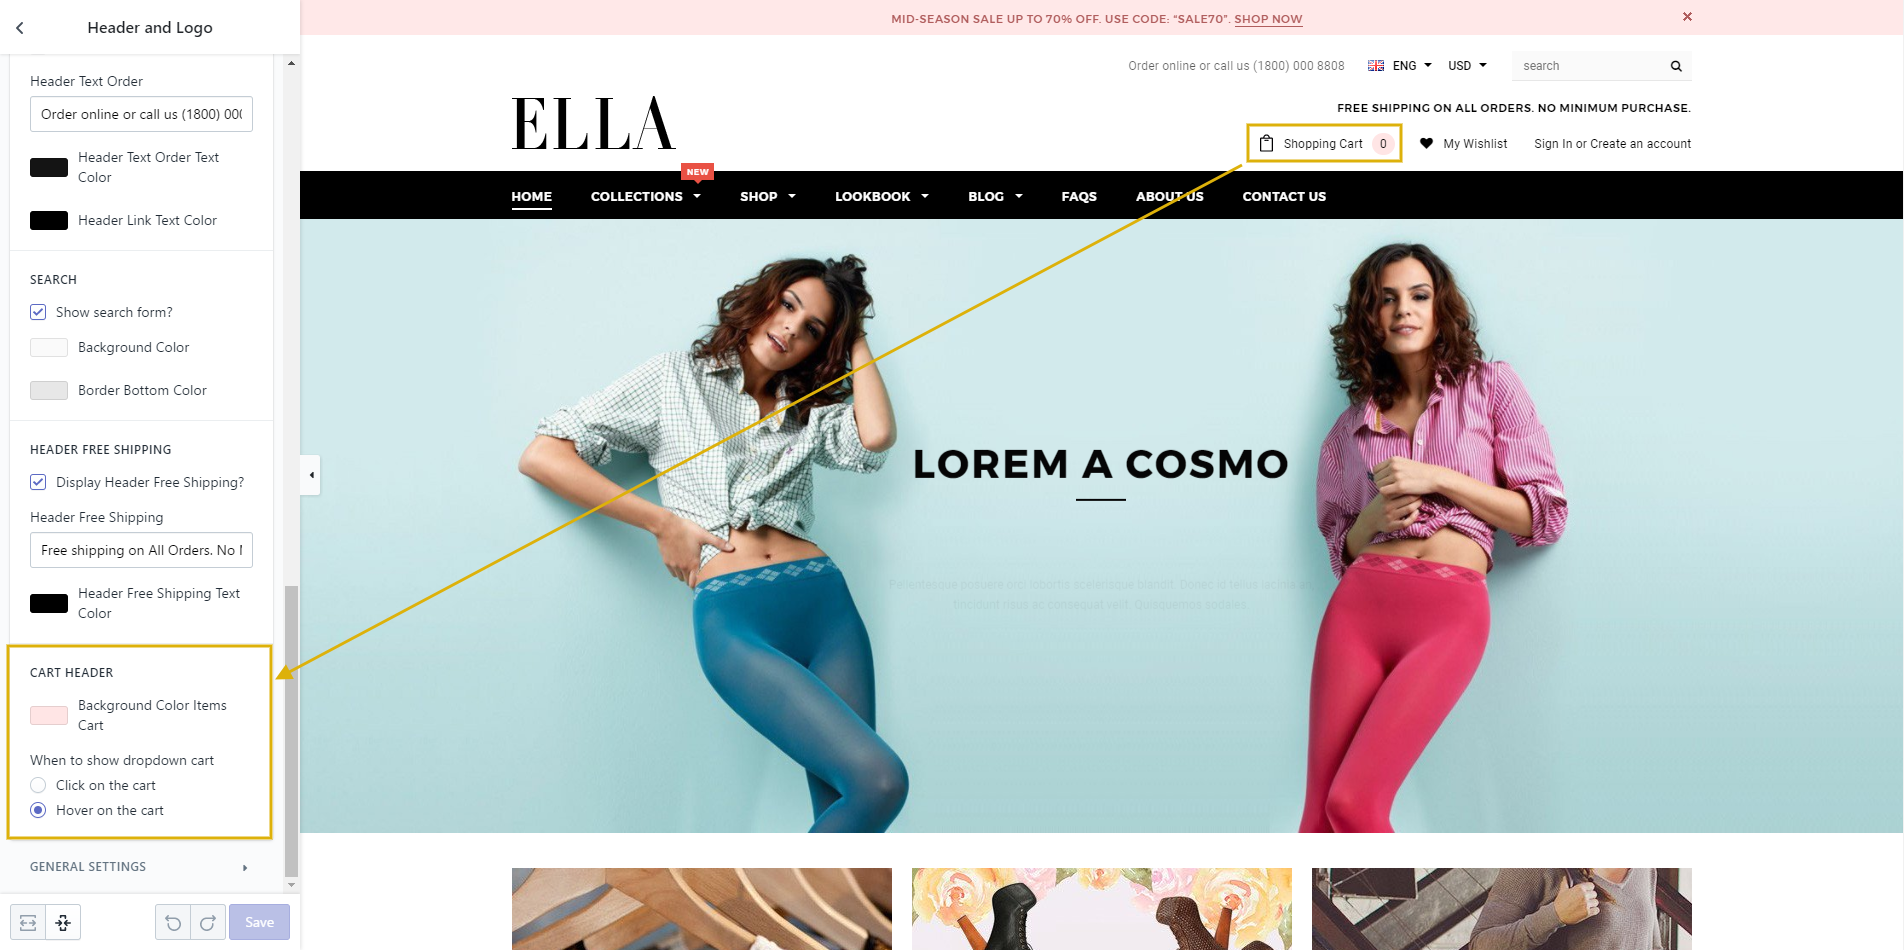
CART HEADER
The check box that allows to choose between "Click on the cart" or "Hover on the cart" at dropdown cart in header.
Setup of Navigation
SETUP
To customize the theme, go to your Themes Page in your stores Admin Panel. Next to the theme you would like to customize, there are two links: 'Theme Settings' and 'Theme Editor', click 'Theme Settings'.
Before you begin customizing your store, we would like to notice that this section will help you to have some collections and products added and a blog article written. So if you already had an active store and you are just updating your design, you don't need to read this part. Otherwise, here are some links to help you to set up your new store:
- How to create a collection
- How to create a smart collection
- How to create a product and add it to a collection
- How to create a blog and write an article
Create a menu
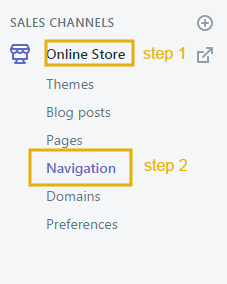
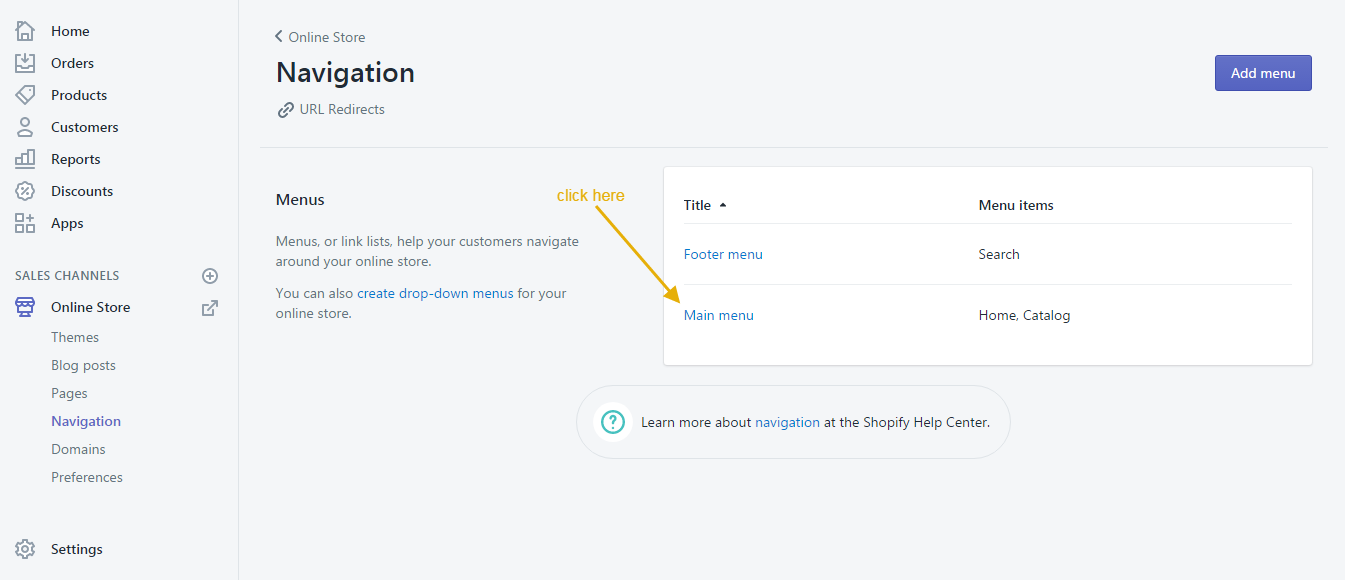
1. From your Shopify admin, click Online Store, then click Navigation:
2. On Main Menu menu, click Edit menu.
3. Click Add menu item to create a link in main menu.

4. Input Name and select link options.

Create multi-level drop-down menu
You can refer at here.
1. From your Shopify admin, click Online Store, then click Navigation.
To add a drop-down menu from the main menu of your online store:
- From your Shopify admin, go to Online Store > Navigation.
Click the title of your main menu.
Choose one of the menu items to be the header for your drop-down menu, or add a new menu item to be the header. If you don't want the header to link to anything, then you can enter
#in the Link field when you add the menu item.Add menu items to include in the new drop-down menu. Click Add menu item, enter the name of the menu item, and enter or select a destination for the link.
Click and drag the menu items to nest below the header item:
Click Save menu.
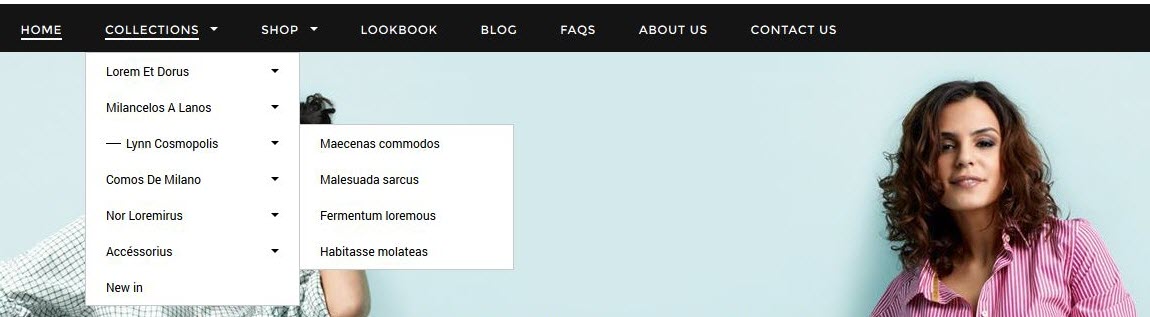
How to show Mega Menu
Step 1: You need to create multi-level drop-down menus.
Step 2: In Theme Settings, you need to check on Display Mega Menu?.
Step 3: Put items you'd like to show as Mega Menu at Mega Menu Style 1, Mega Menu Style 2, Mega Menu Style 3 ... and choose the Style Which is suitable for your option in Settings.
Step 4: On your site, it will have 4 styles of Dropdown Mega Menu.
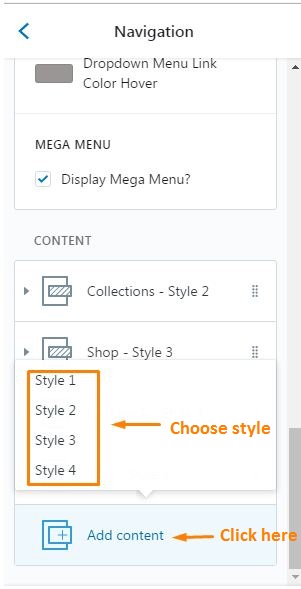
Step 5: In Themes --> Customize theme -> Sections -> Navigation, at Content click add content to choose style.
Mega Menu Style 1
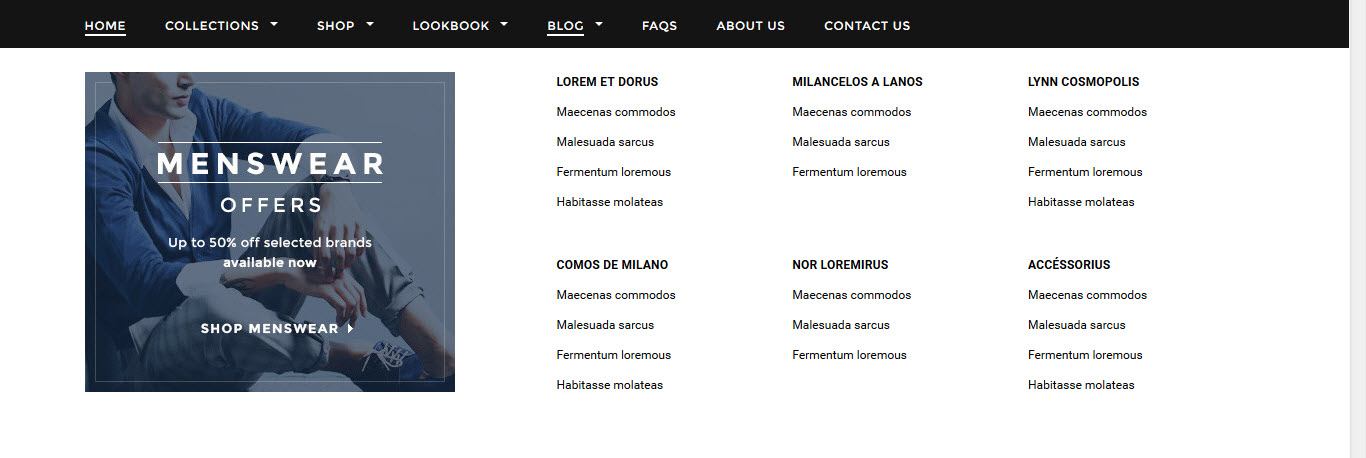
You'd like to display Blog as Mega Menu Style 1, you need to:
- Create the Blog menu in Navigation and the multi-level drop-down menu belongs to Blog (How can I do that?).
-
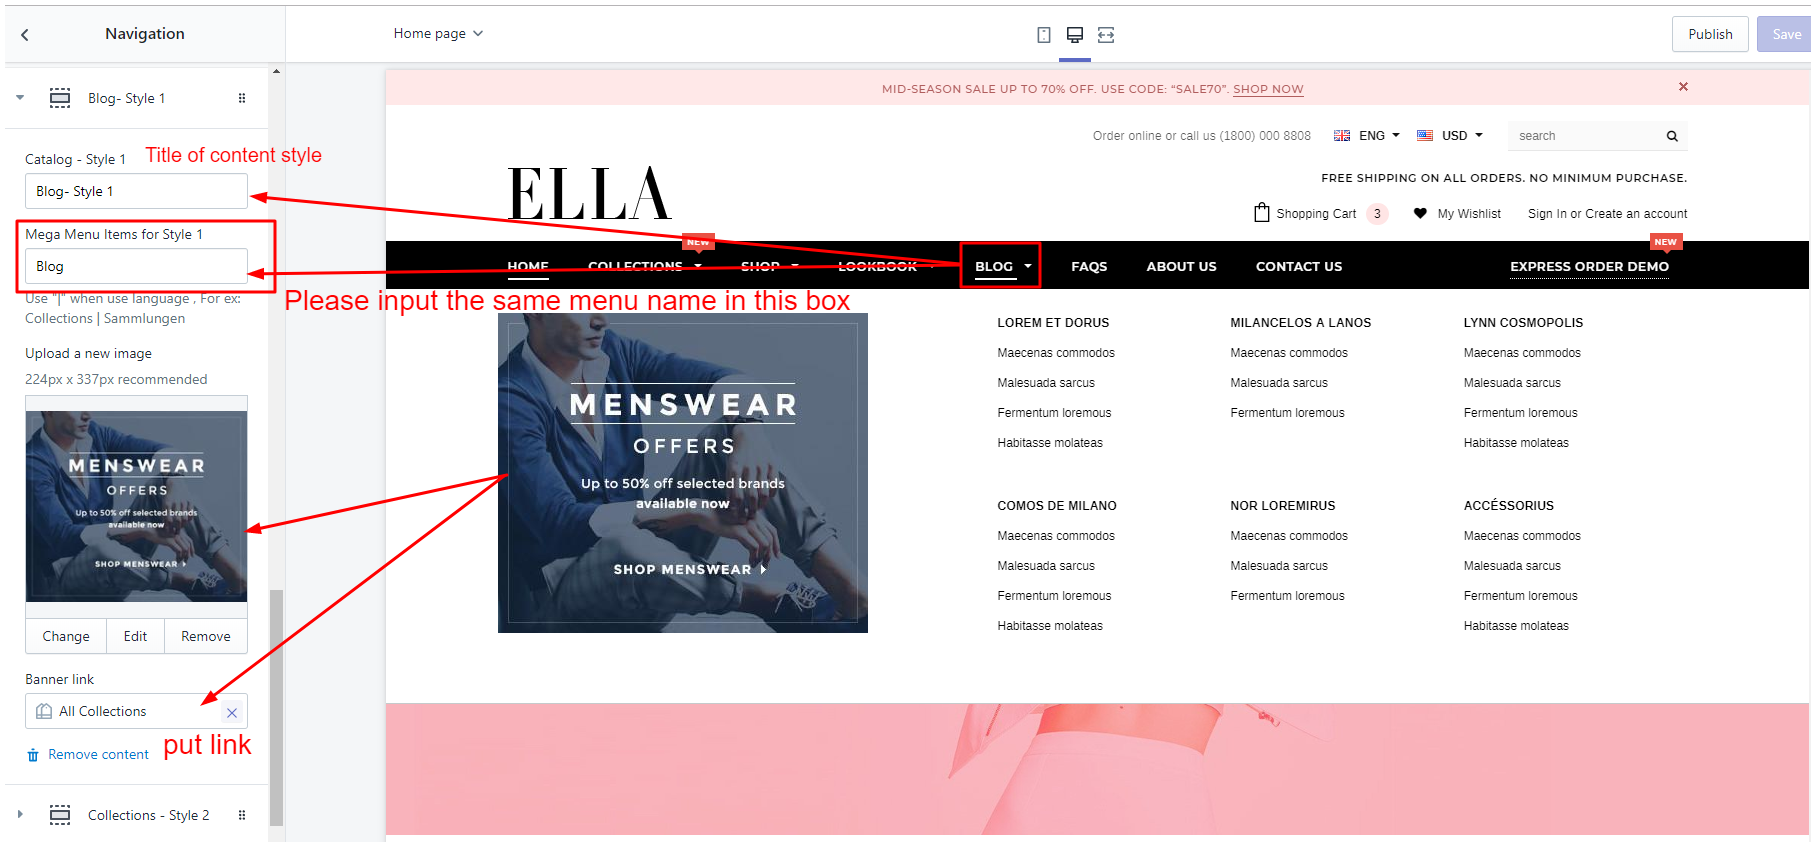
In settings of Themes --> Customize -> Sections -> Navigation, at "Content" click Style 1 and put Blog - Style 1 text into Mega Menu Item 1.
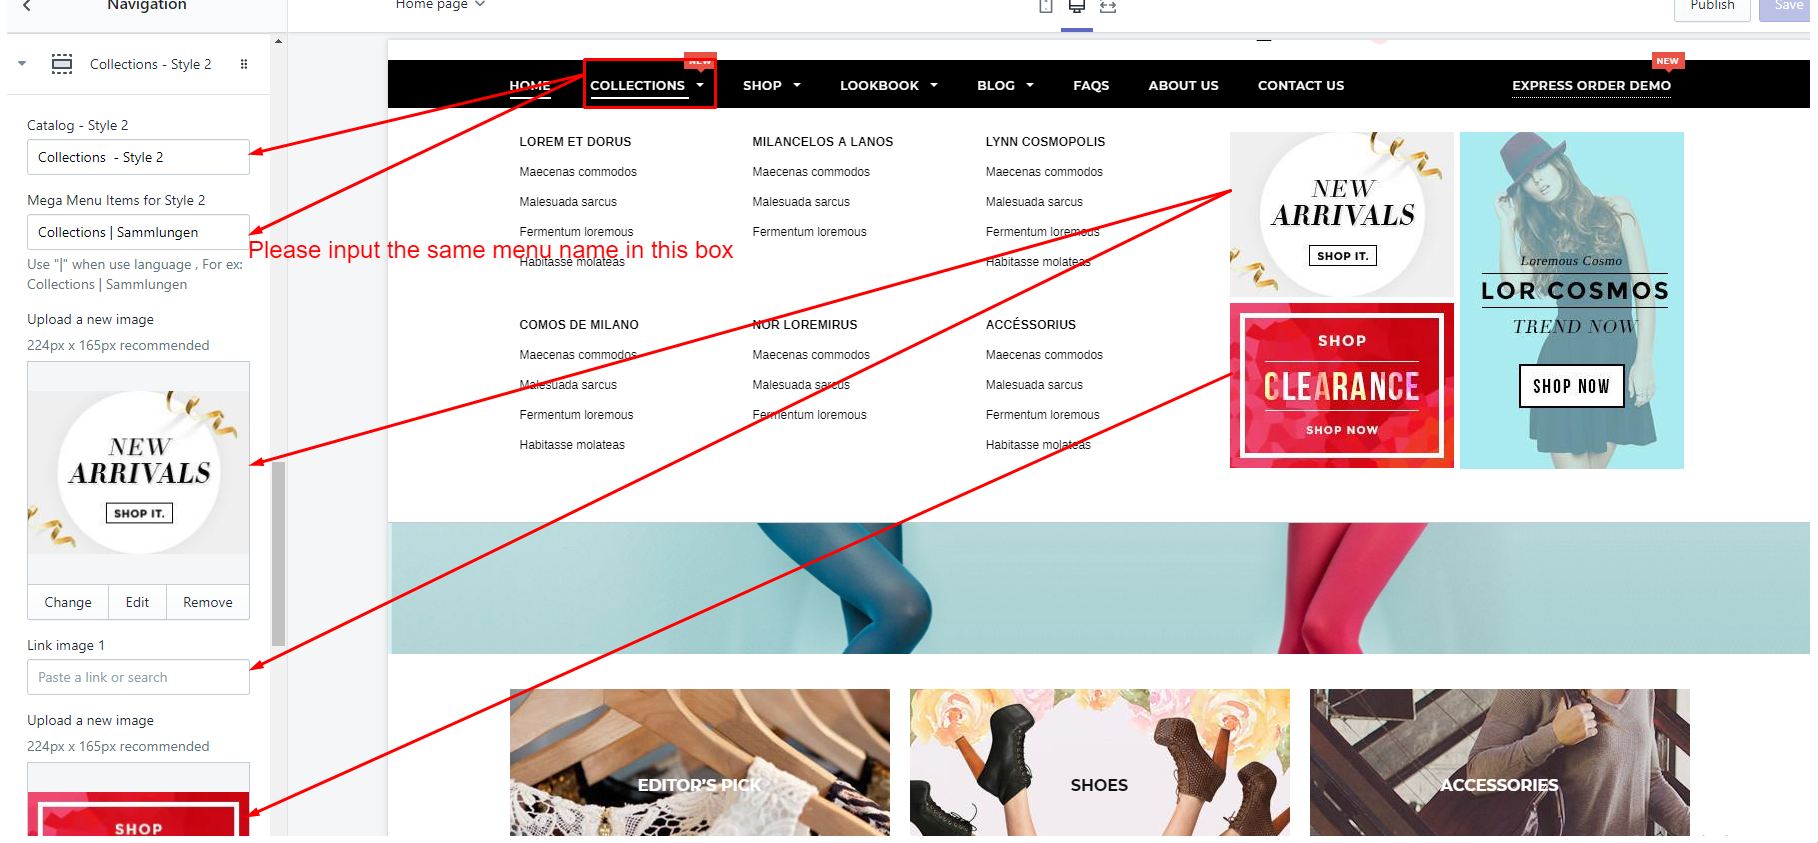
Mega Menu Style 2
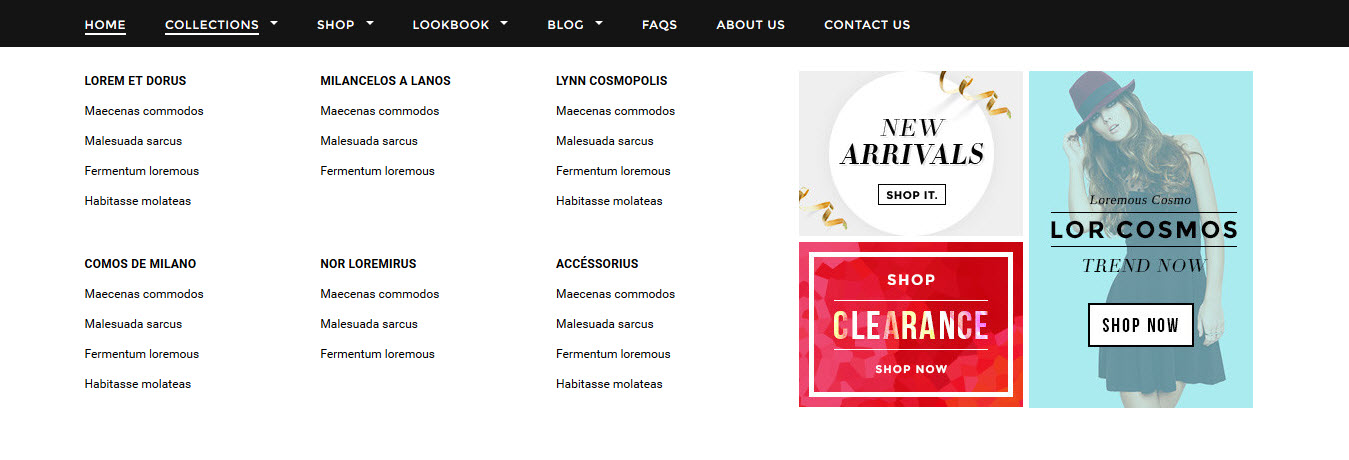
You'd like to display Collections as Mega Menu 2, you need to:
- Create the Collections menu in Navigation and the multi-level drop-down menu belongs to Collections (How can I do that?).
-
In settings of Themes --> Customize -> Section -> Navigation, at "Content" click Style 2 and put Collections - Style 2 text into Mega Menu Item 2.
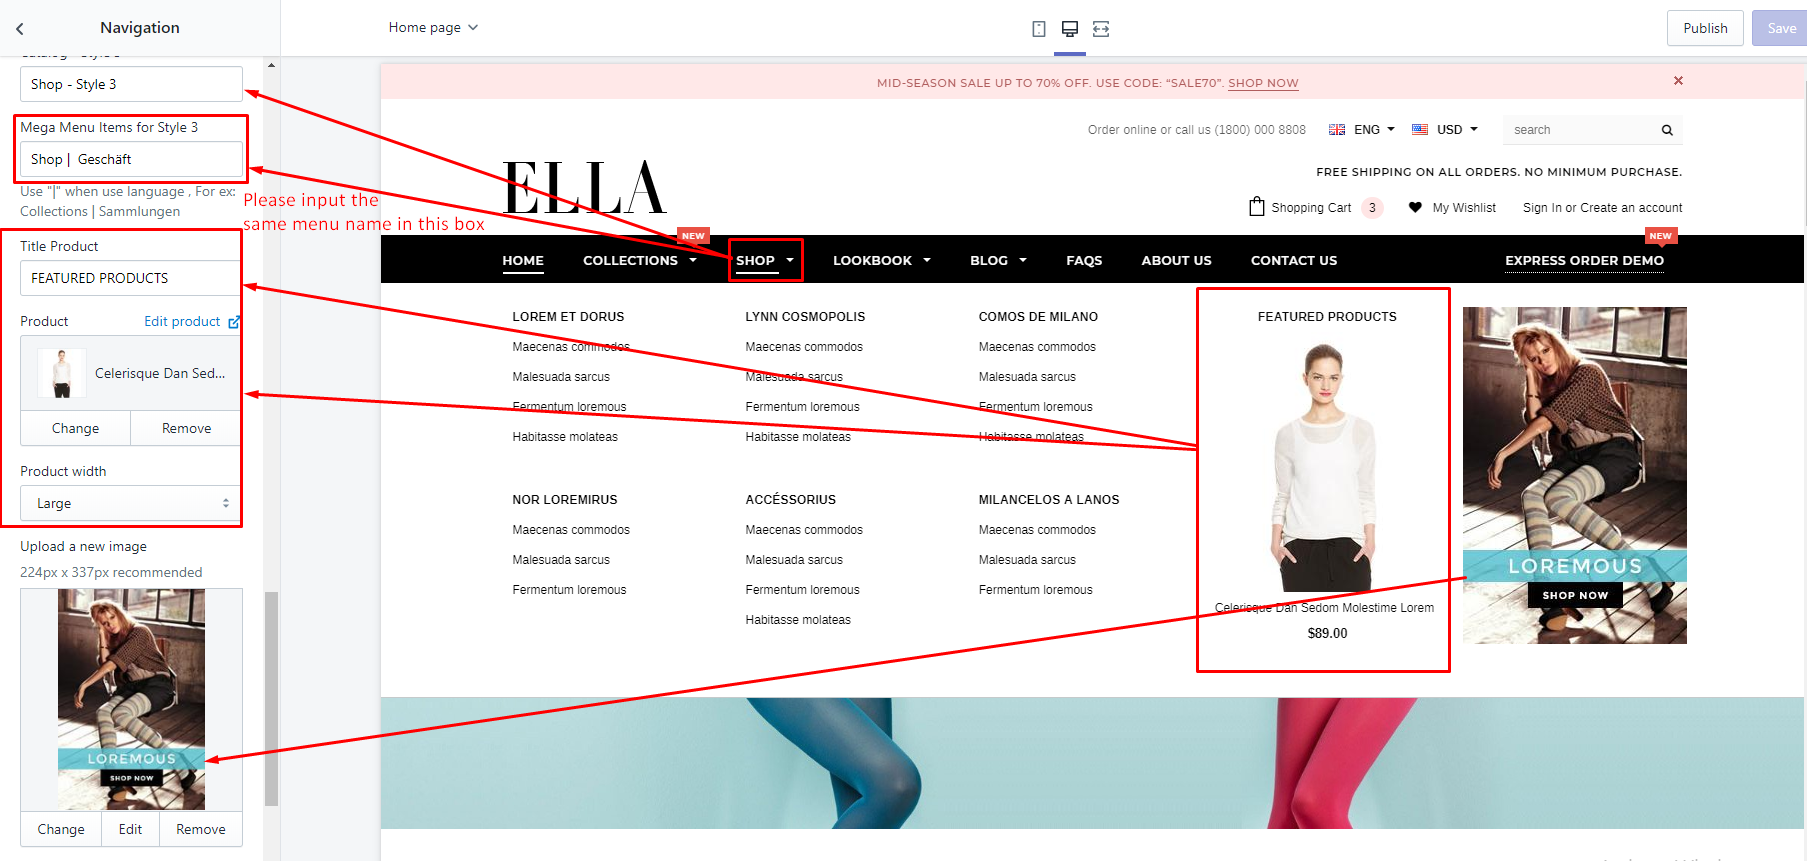
Mega Menu Style 3
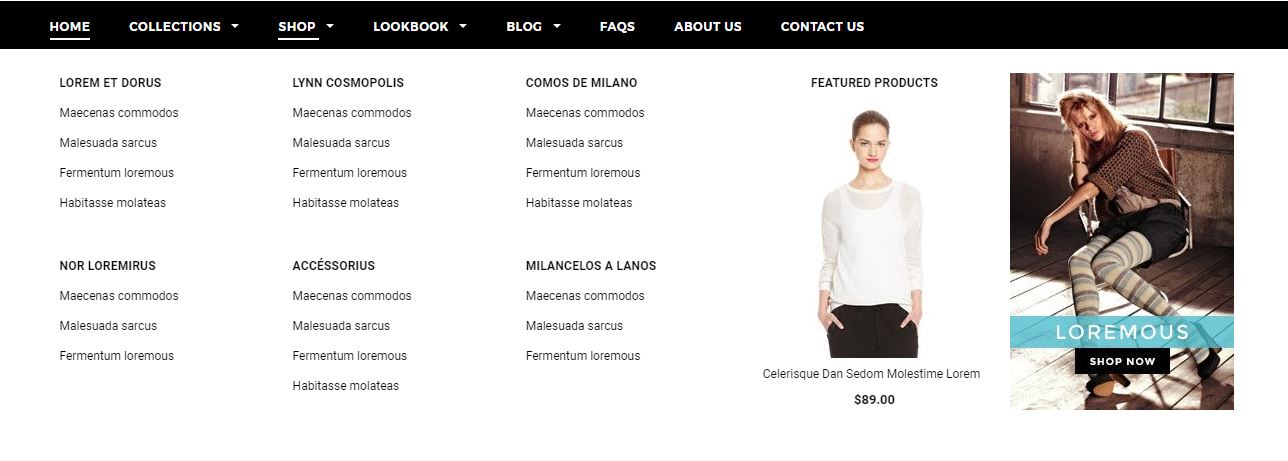
You'd like to display Shop as Mega Menu 3, you need to:
- Create the Shop menu in Navigation and the multi-level drop-down menu belongs to Shop (How can I do that?).
-
In settings of Themes --> Customize -> Section -> Navigation, at "Content" click Style 3 and put Shop - Style 3 text into Mega Menu Item 3.
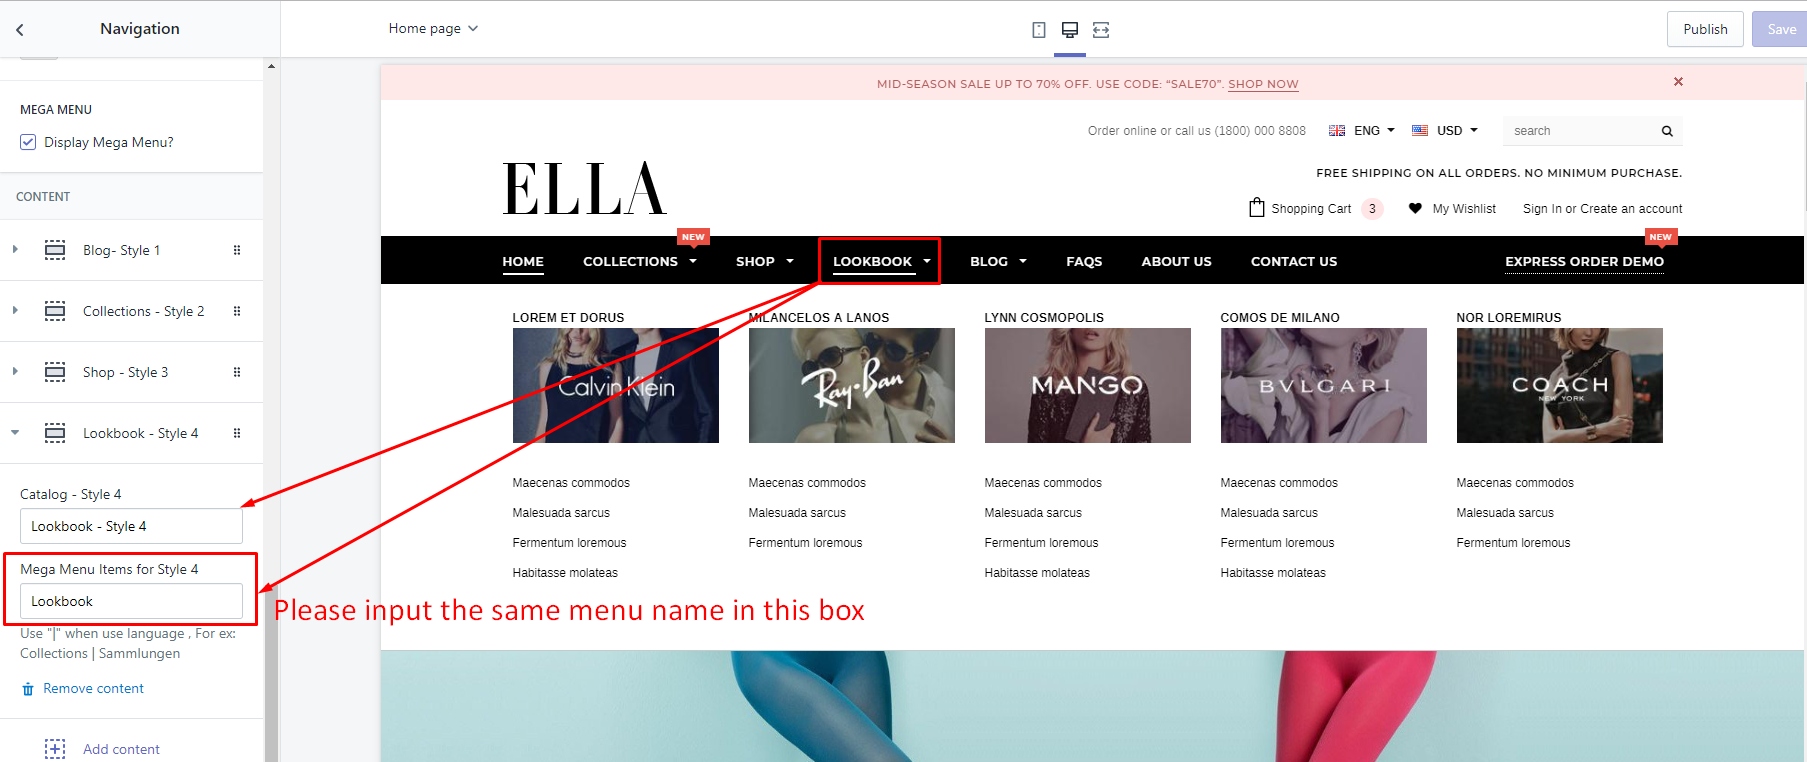
Mega Menu Style 4
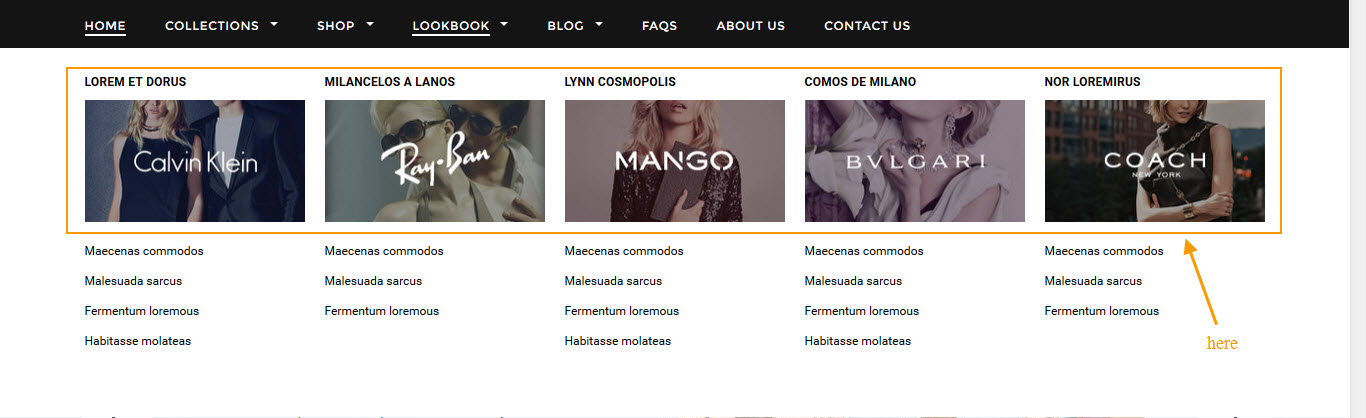
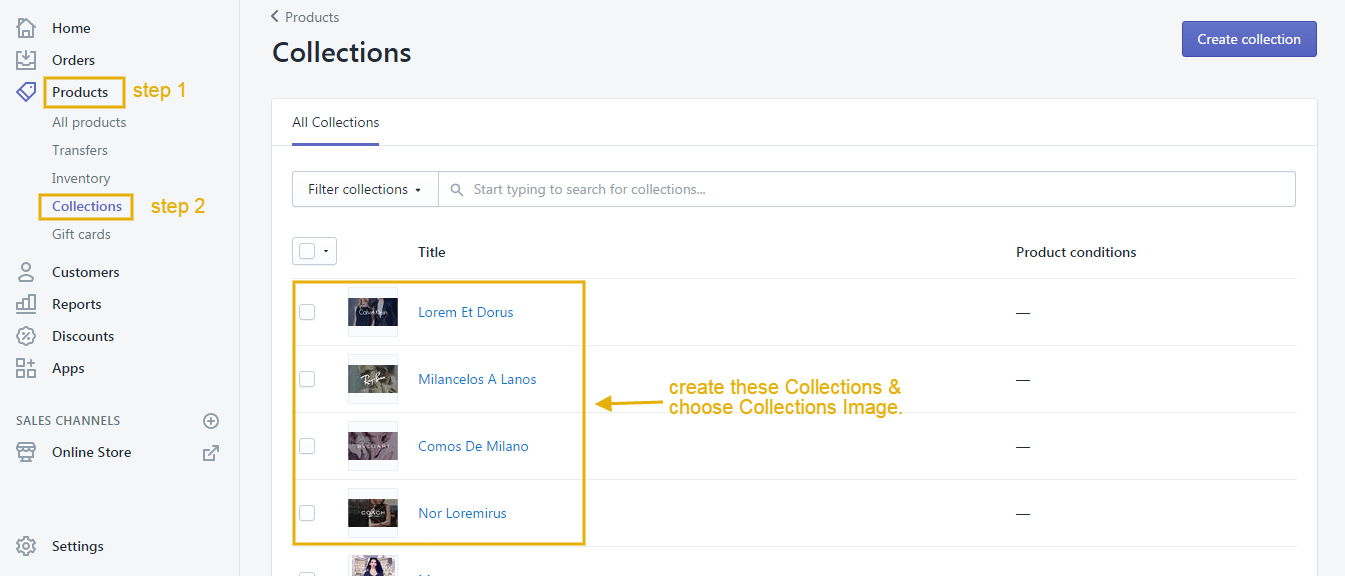
You'd like to display Lookbook as Mega Menu 4, you need to:
- Create the Lookbook menu in Navigation and the multi-level drop-down menu belongs to Lookbook (How can I do that?).
-
In settings of Themes --> Customize -> Sections -> Navigation, at "Content" click Style 4 and put Lookbook - Style 4 text into Mega Menu Item 4.
Slideshow
Here is a video for your reference.
Add Sections for Slideshow.
Recommended Size for Ella slideshow images (Width x Height): 1880px x 720px
From your Shopify admin, click Online Store. Click Customize theme for the theme you want to customize. Then go to Slideshow Sections tab, click Add content.
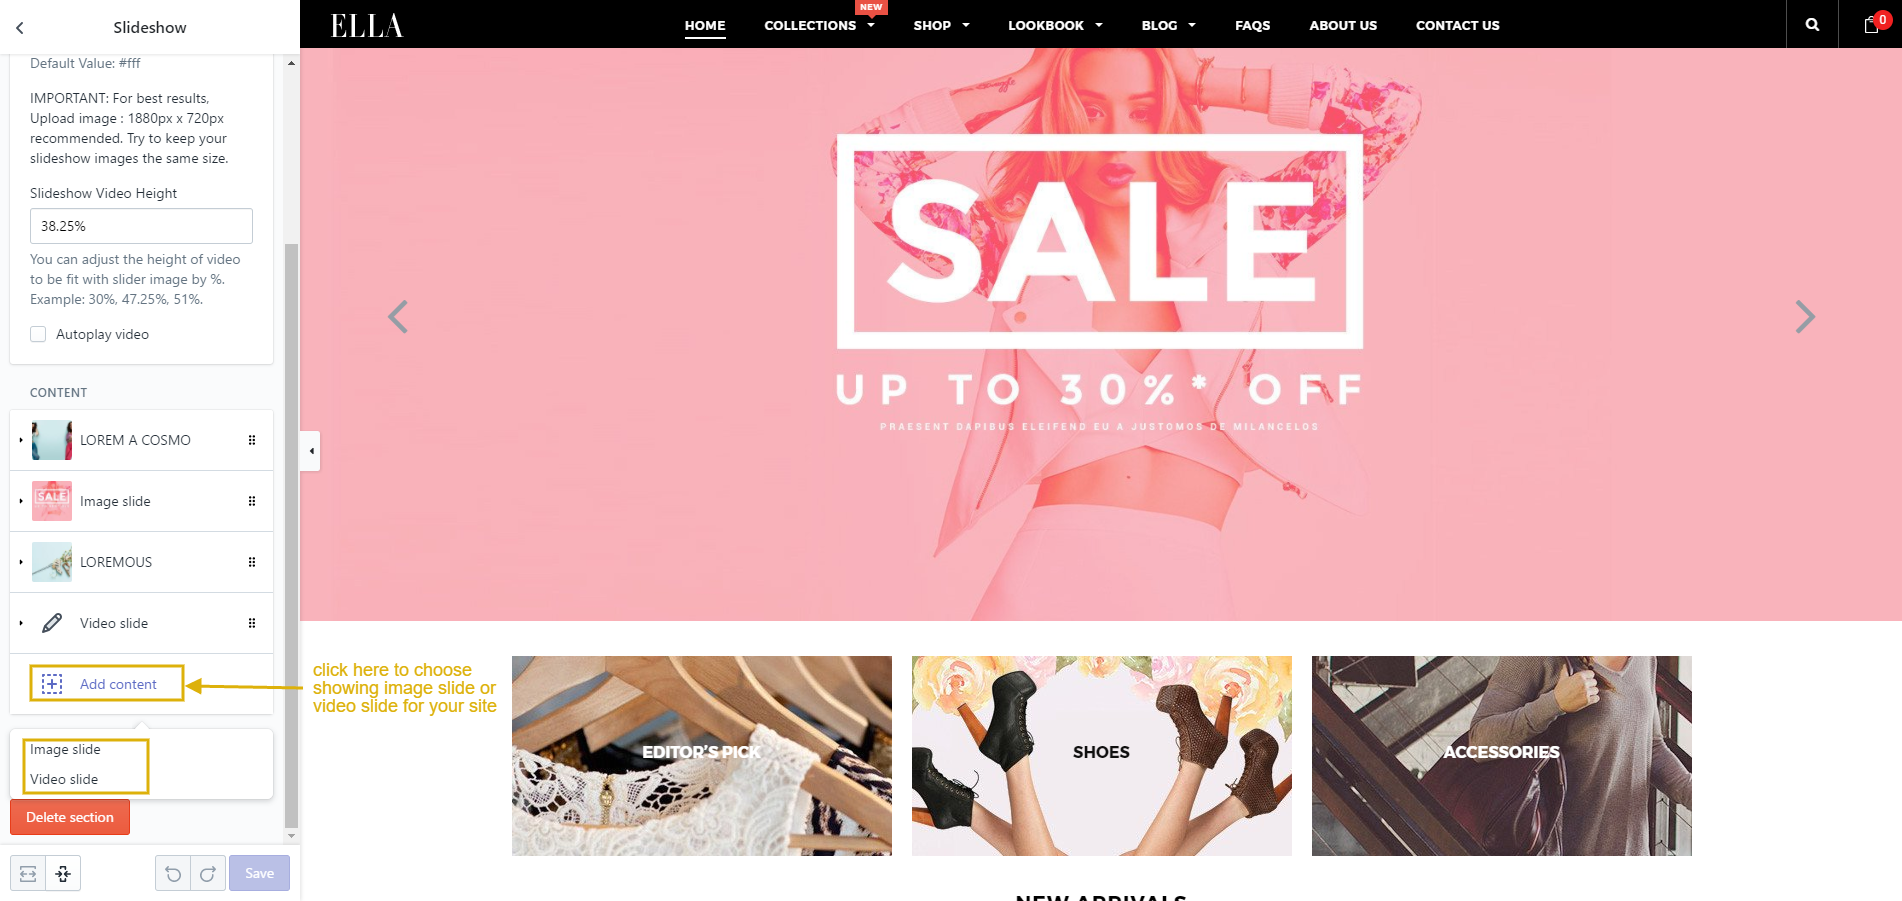
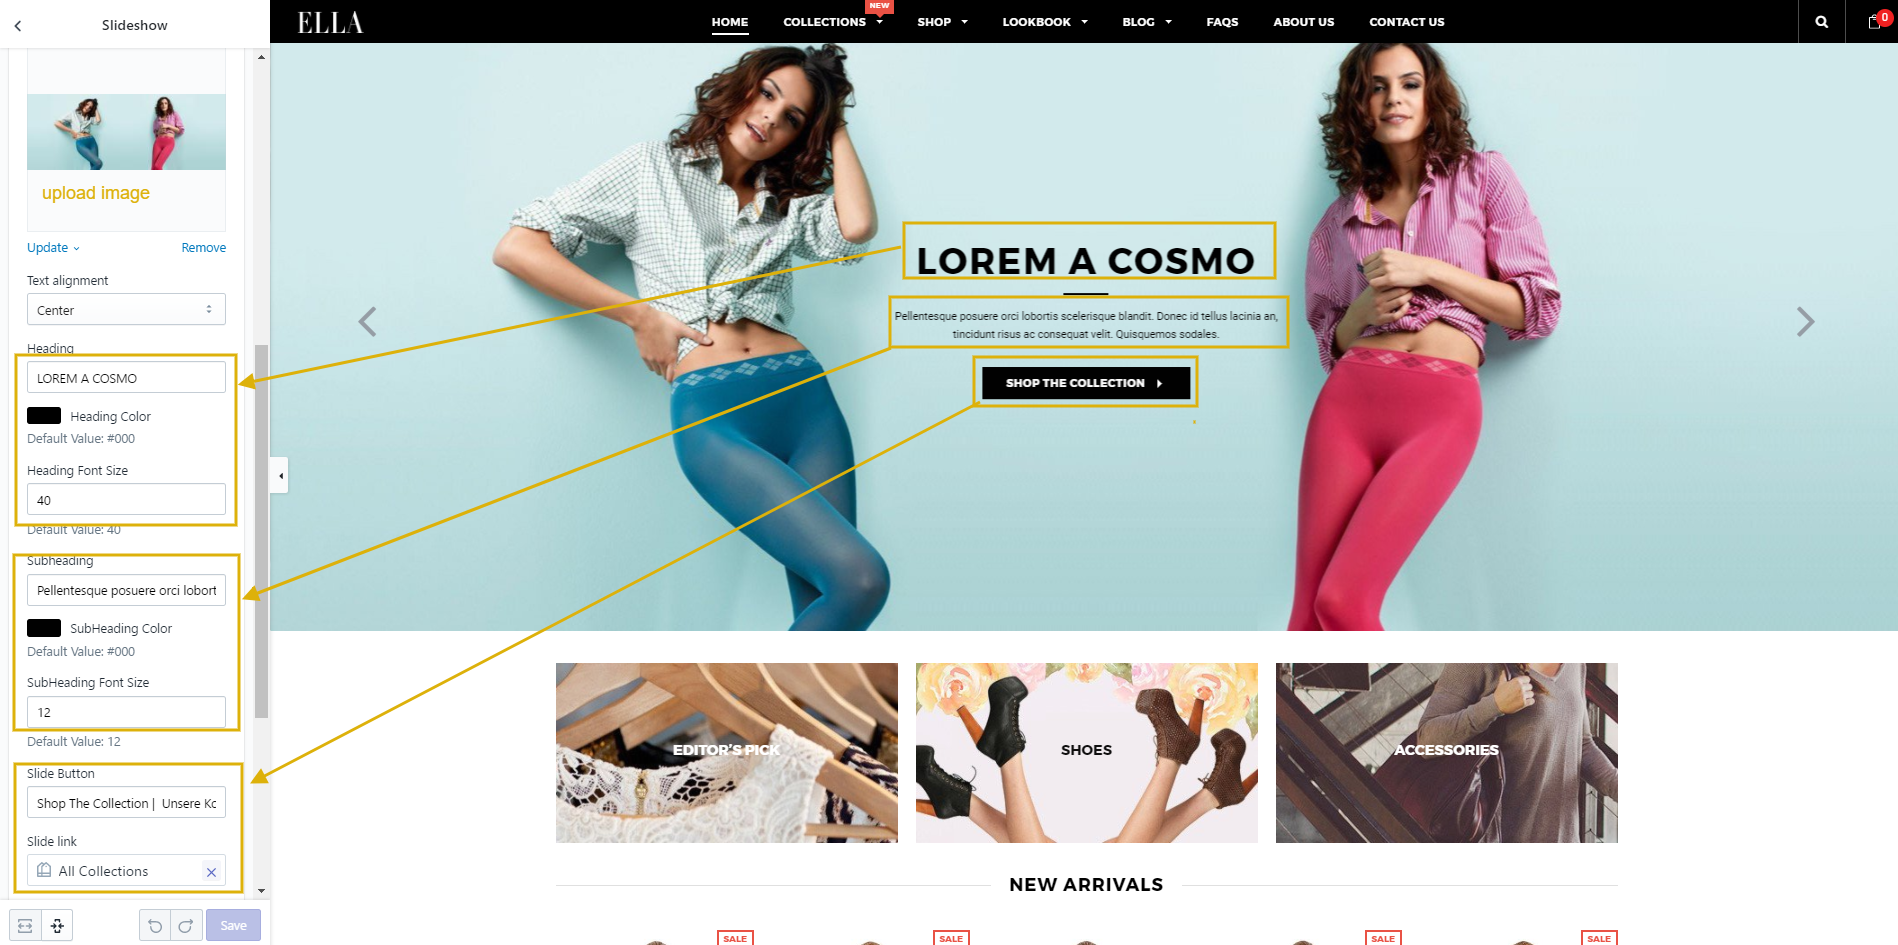
Configure Slideshow Image.
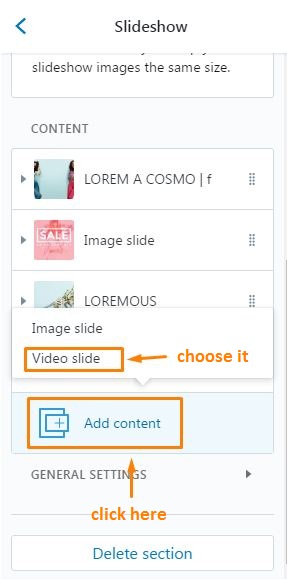
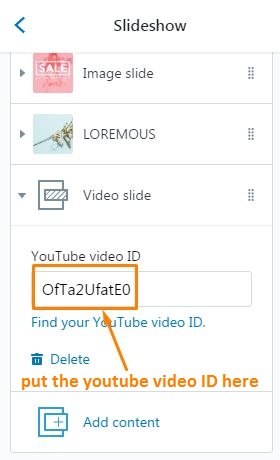
Configure Slideshow Video
You can go to this link to know how to get the ID from Youtube.
From your Shopify admin, click Online Store. Click Customize theme for the theme you want to customize. Then go to Slideshow Sections tab, click Add content.
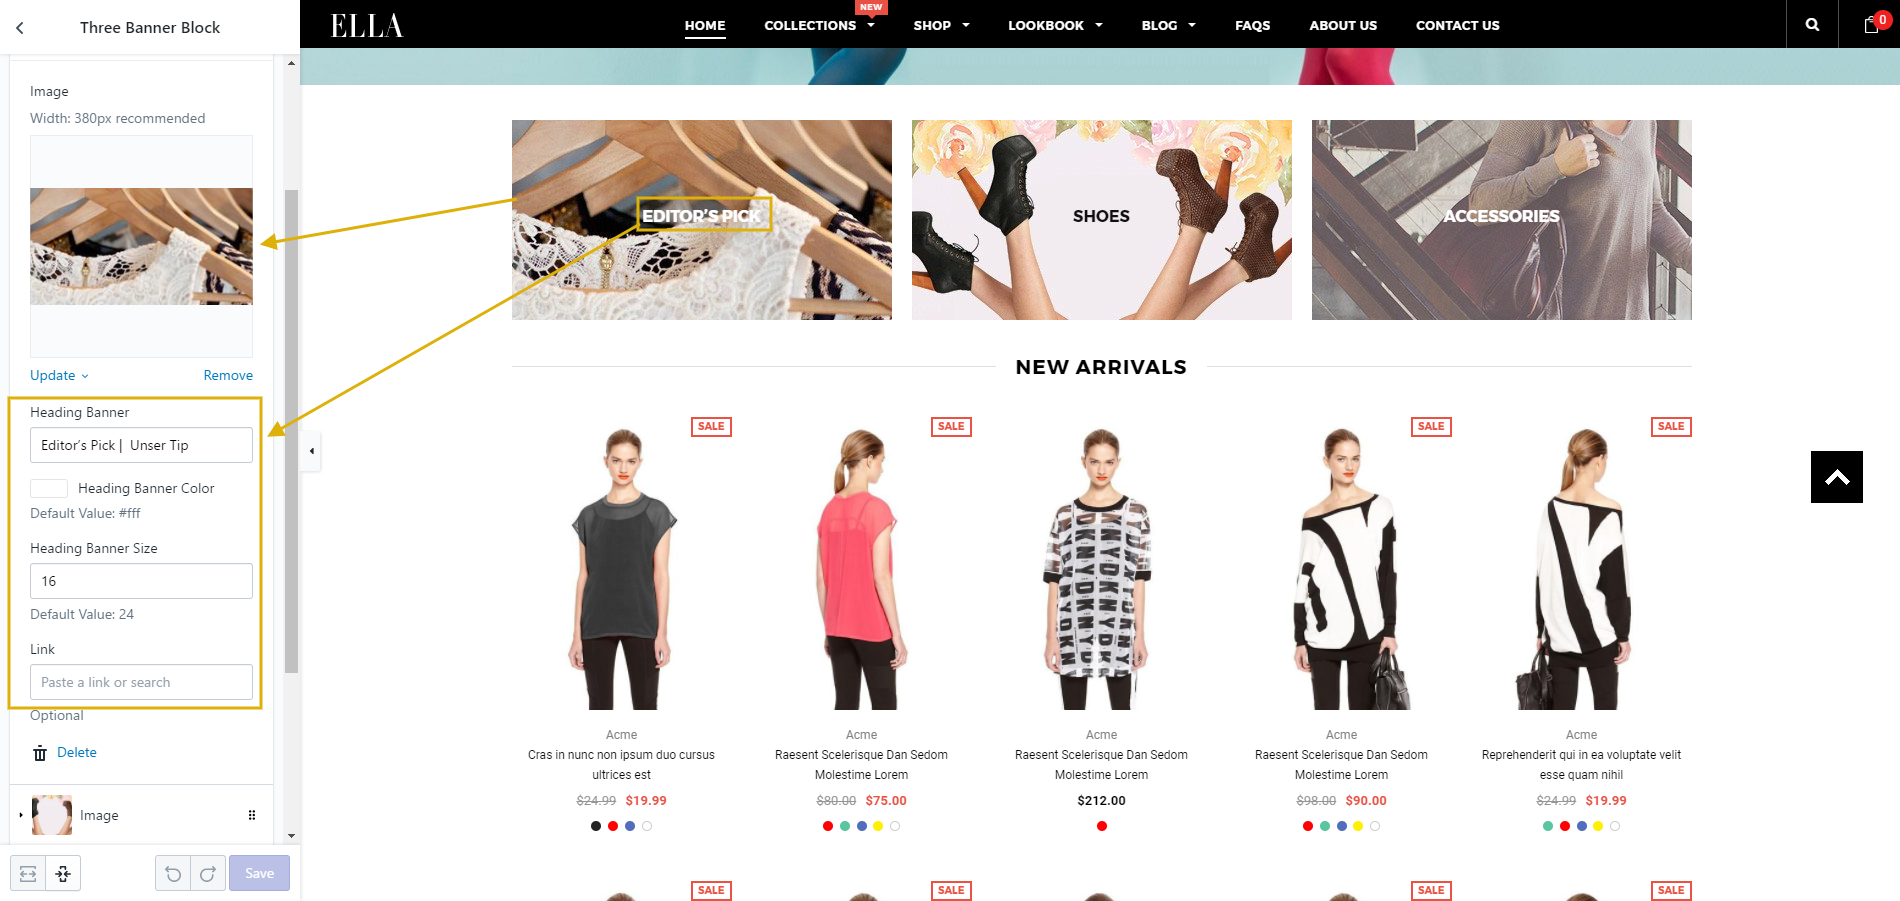
Three Block Banner
Recommended size for three block banner images (Width x Height): 380px x 200px

In settings of Themes --> Customize theme -> Sections -> Three banner blocks
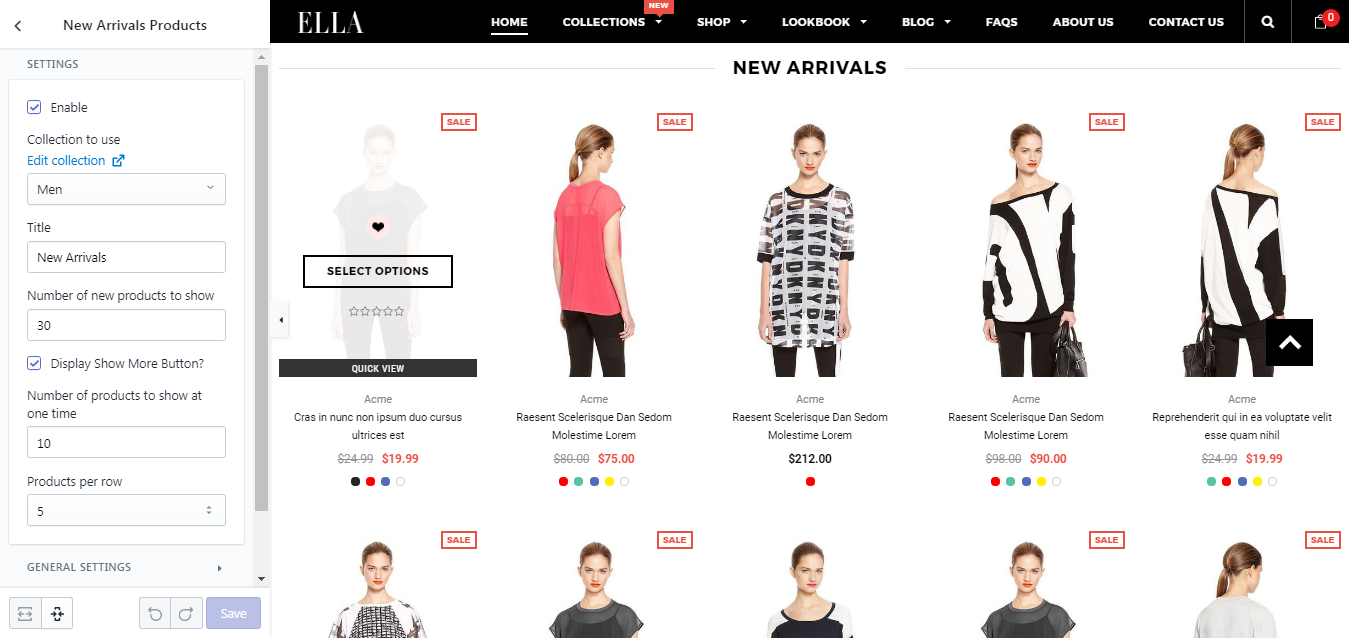
New Arrivals Products
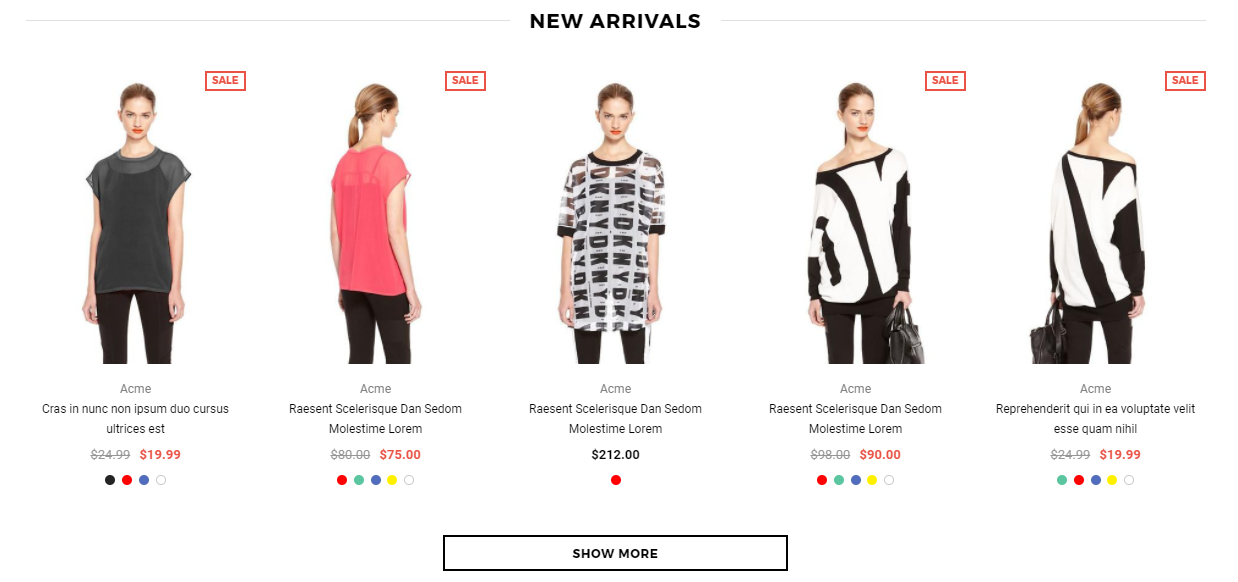
In settings of Themes --> Customize theme -> Sections -> New Arrivals Products
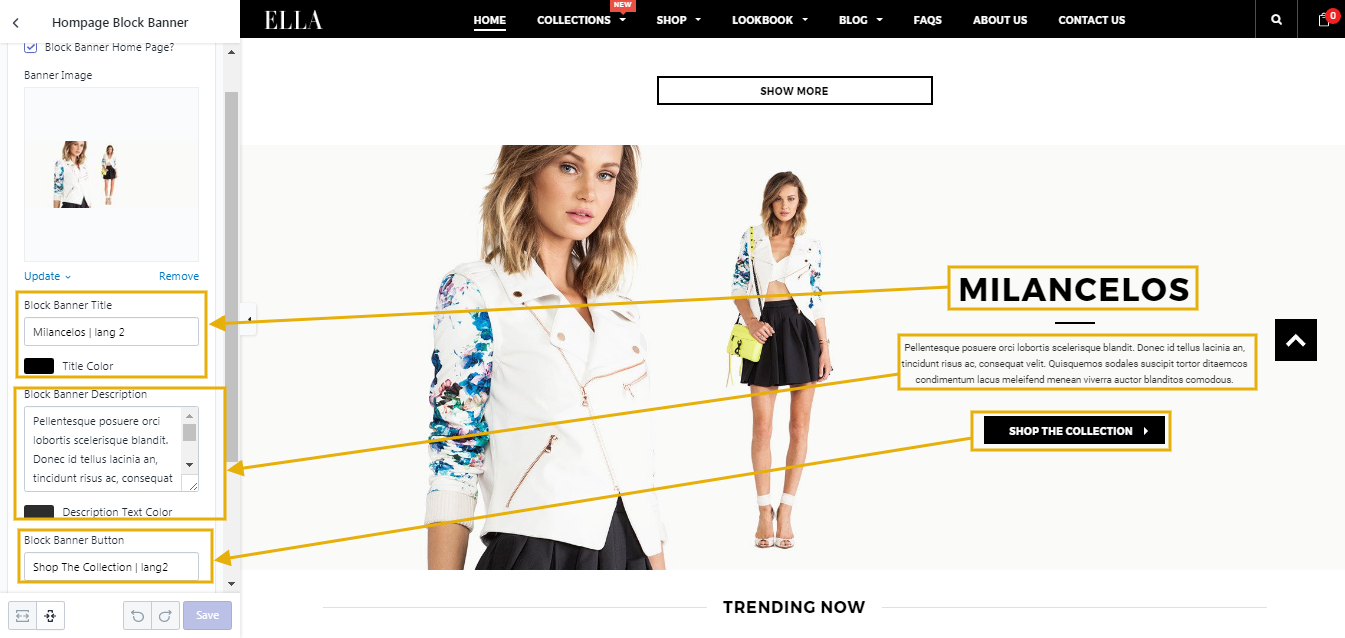
Hompage Block Banner
Recommended size for block banner image (Width x Height): 1880px x 720px
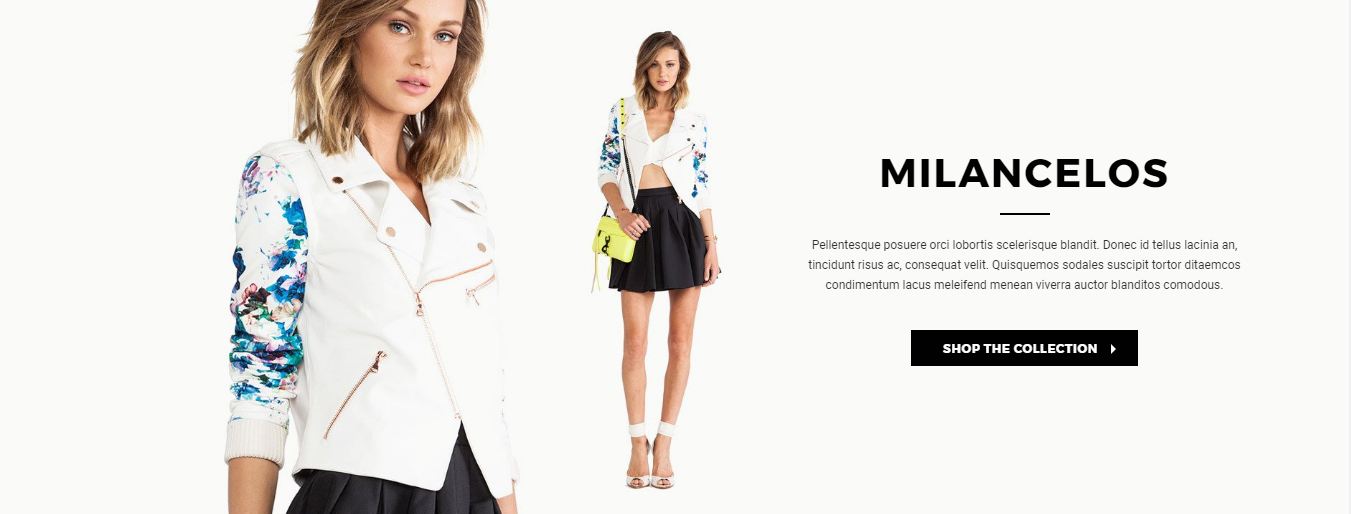
In settings of Themes --> Customize theme -> Sections -> Hompage Block Banner
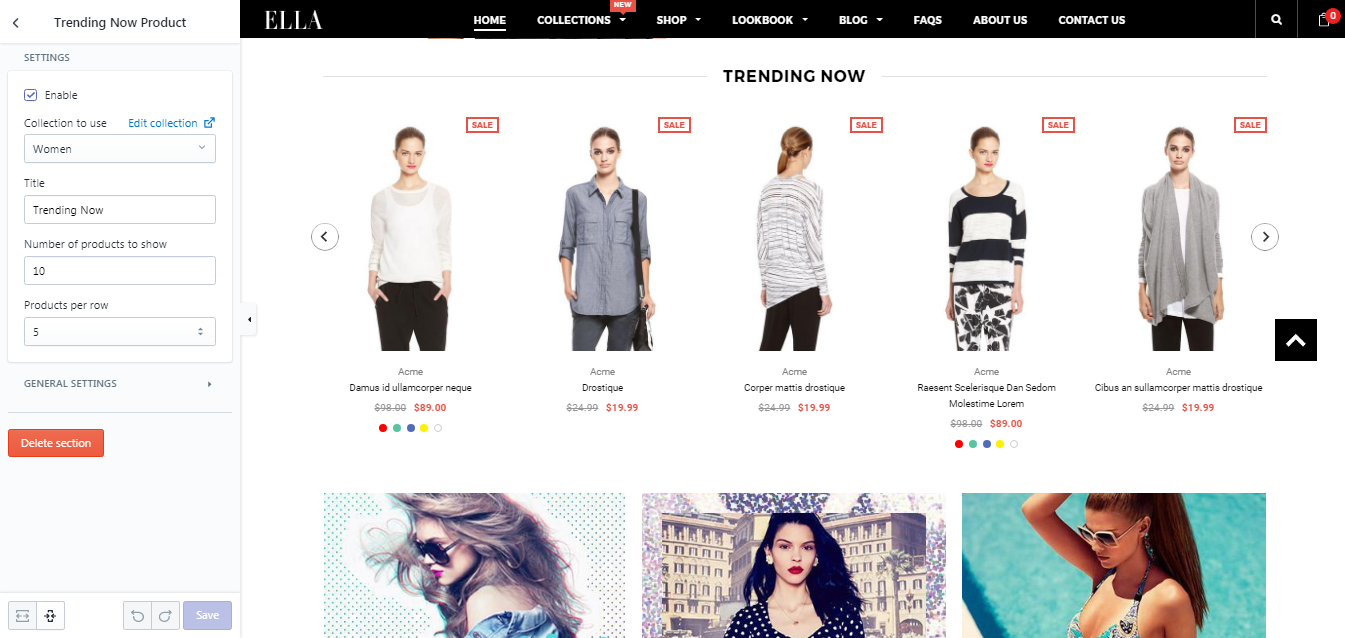
Trending Now Product
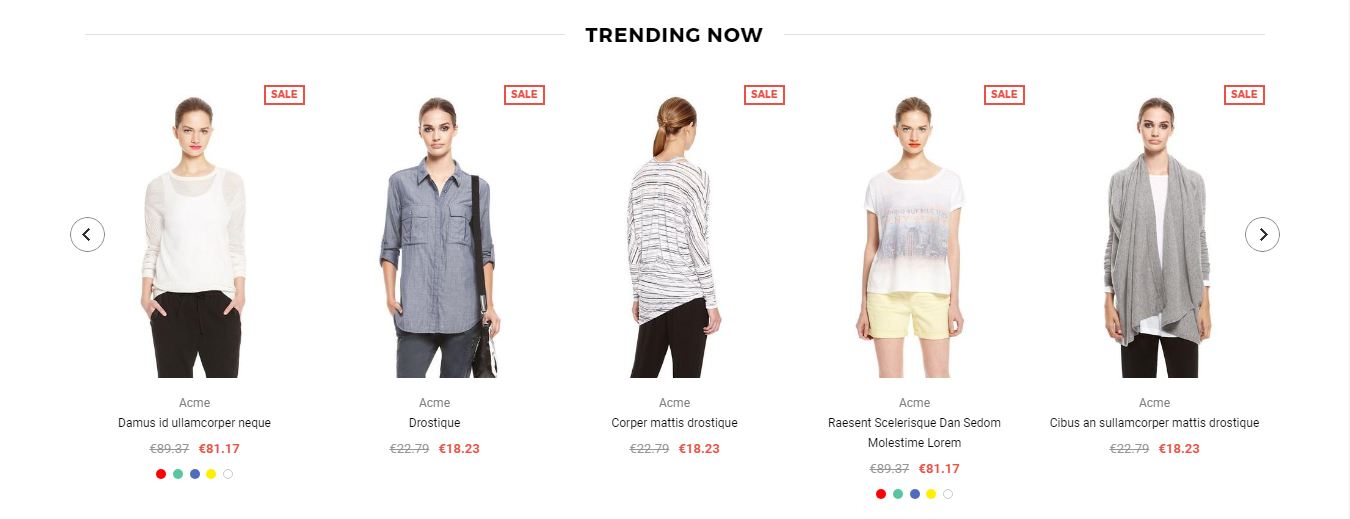
In settings of Themes --> Customize theme -> Sections -> Trending Now Product
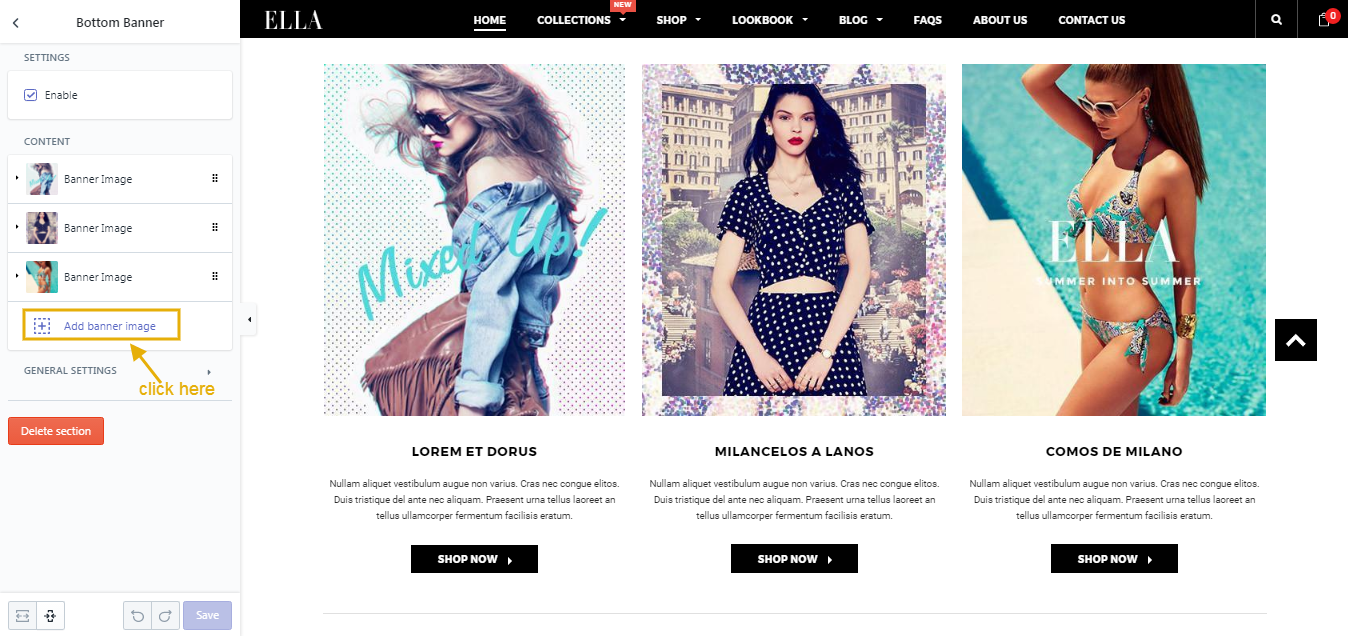
Bottom Banner
Recommended size for bottom banner images (Width x Height): 380px x 440px

In settings of Themes --> Customize theme -> Sections -> Bottom Banner
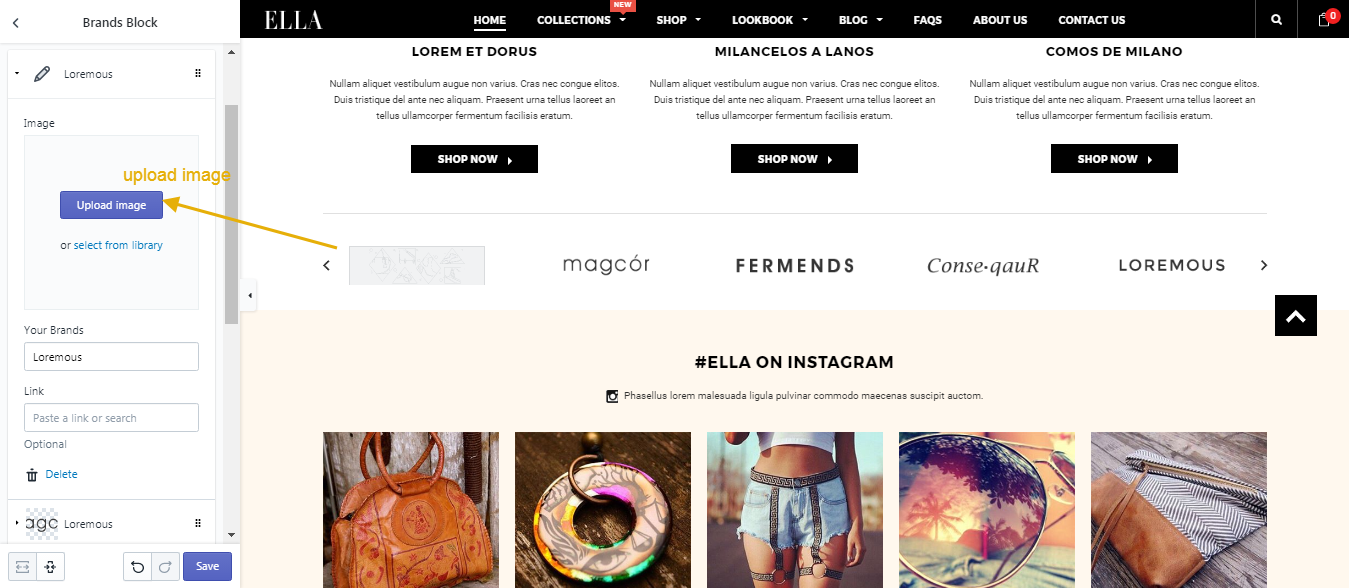
Brands Block

In settings of Themes --> Customize theme -> Sections -> Brands Block
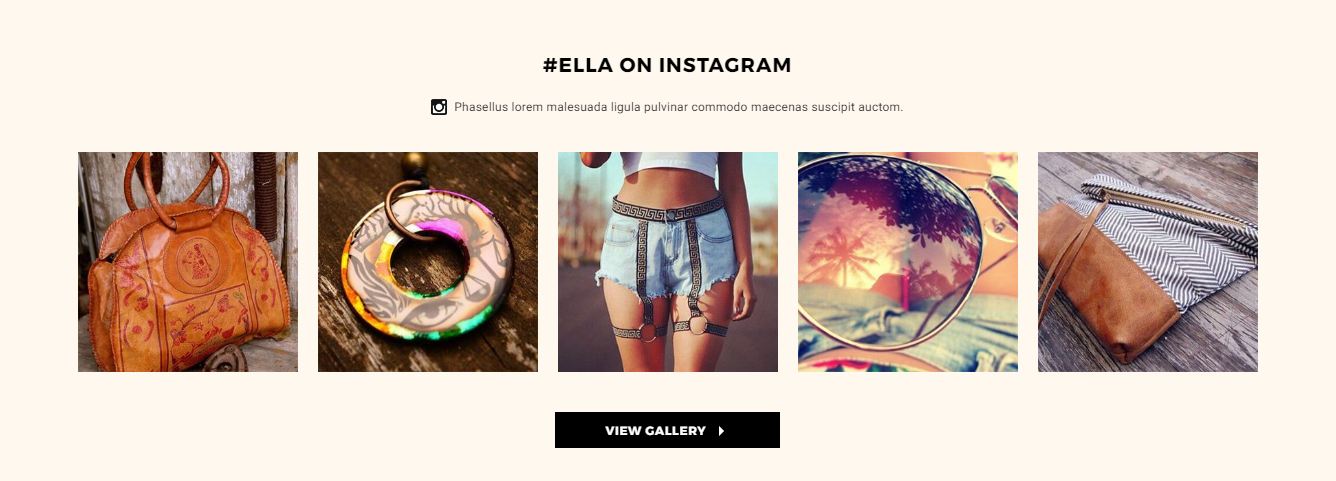
In settings of Themes --> Customize theme -> Sections -> Instagram
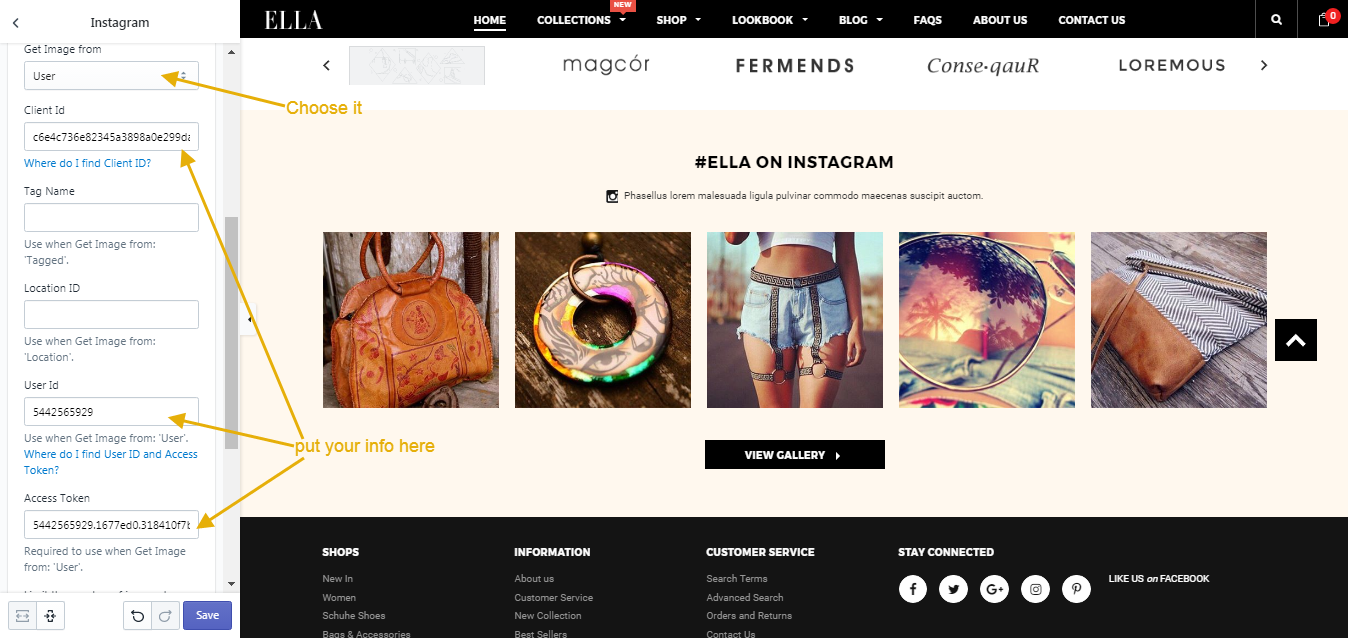
In Instagram sections, you need to chose Get Image from: User and put your Client Id, User Id and Access Token.
With clientId: your API client id from Instagram.
How to get Instagram Client_ID: http://darkwhispering.com/how-to/get-a-instagram-client_id-key
How to get Instagram Access Token & UserID: please follow below guide
- Go to http://instagram.pixelunion.net/, click on the big button and login with the credentials for the Instagram account you want to access. Pixel Union will generate a new authorisation token for you. Copy the token to your Theme Settings.
- Now copy the first 10 characters of the token - they are the characters before the "." (full stop). This is the User ID: paste it into 'User Id'.
- Save your Settings.
Footer
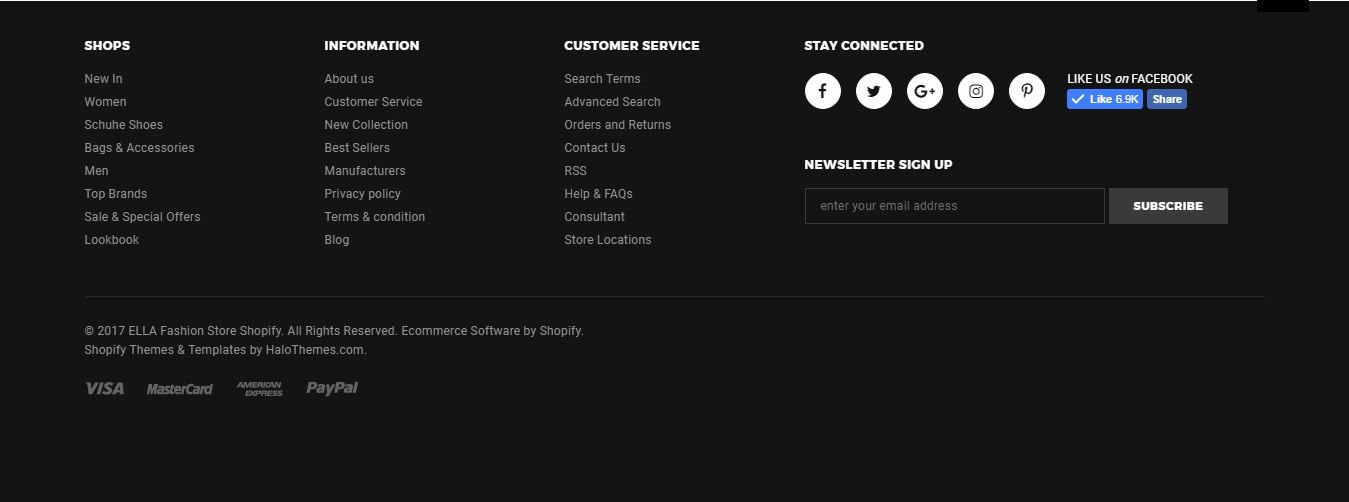
From your Shopify admin, click Online Store --> Themes --> Customize theme for the theme you want to customize. Then go to Footer Sections tab, click here.
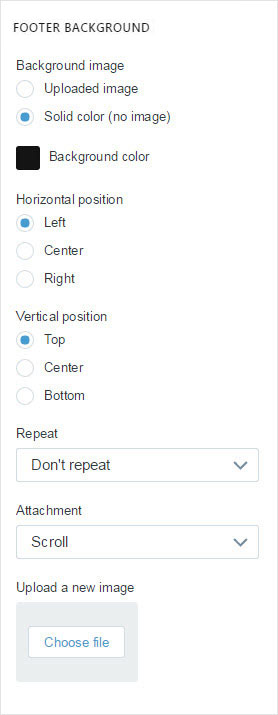
Footer Background
Follow to edit background color or background image of footer.
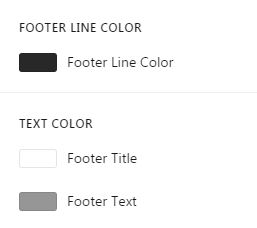
Footer Line Color, Footer Text Color
Follow to edit color of footer text:
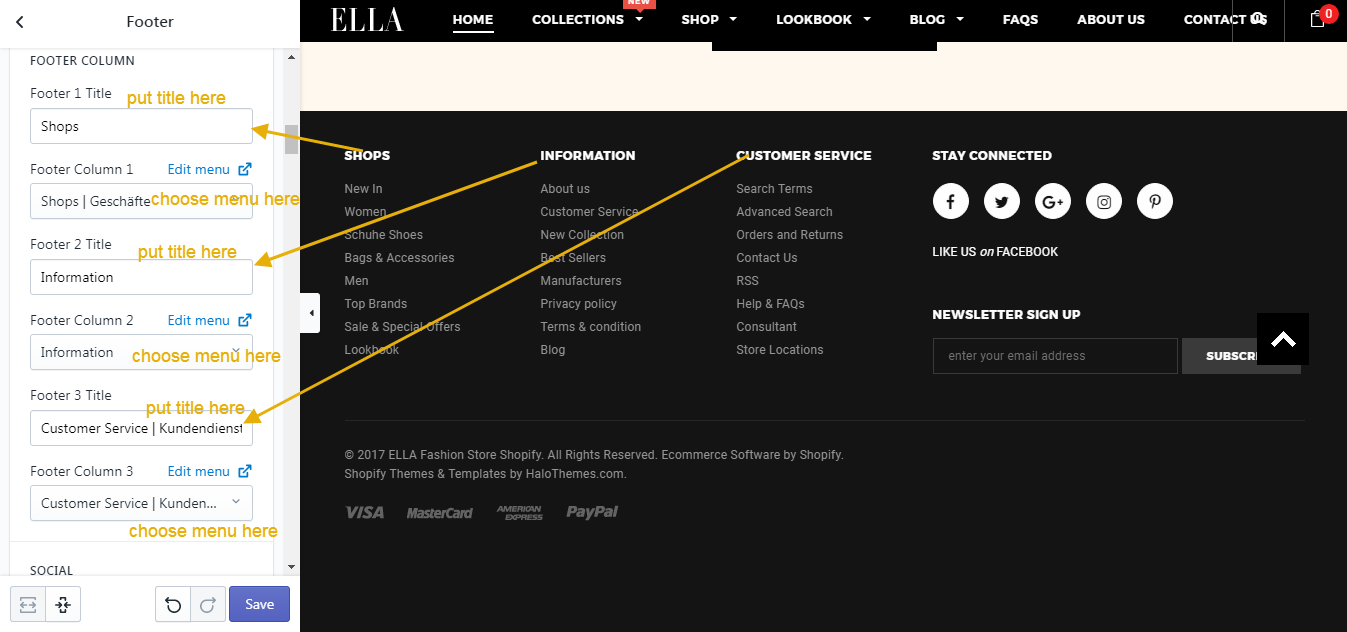
Footer Column
Follow to edit text and link at footer.

Social
Follow to edit footer social.
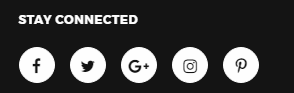
In settings of Themes --> Customize theme -> General settings -> Social media.
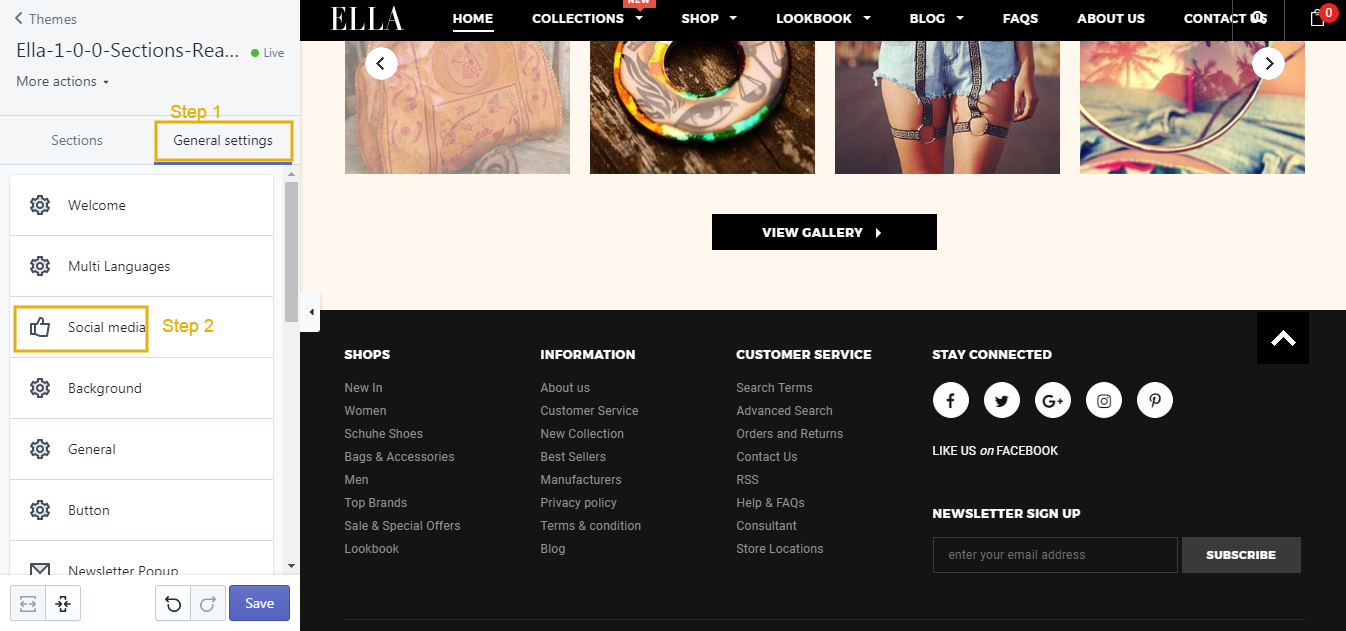
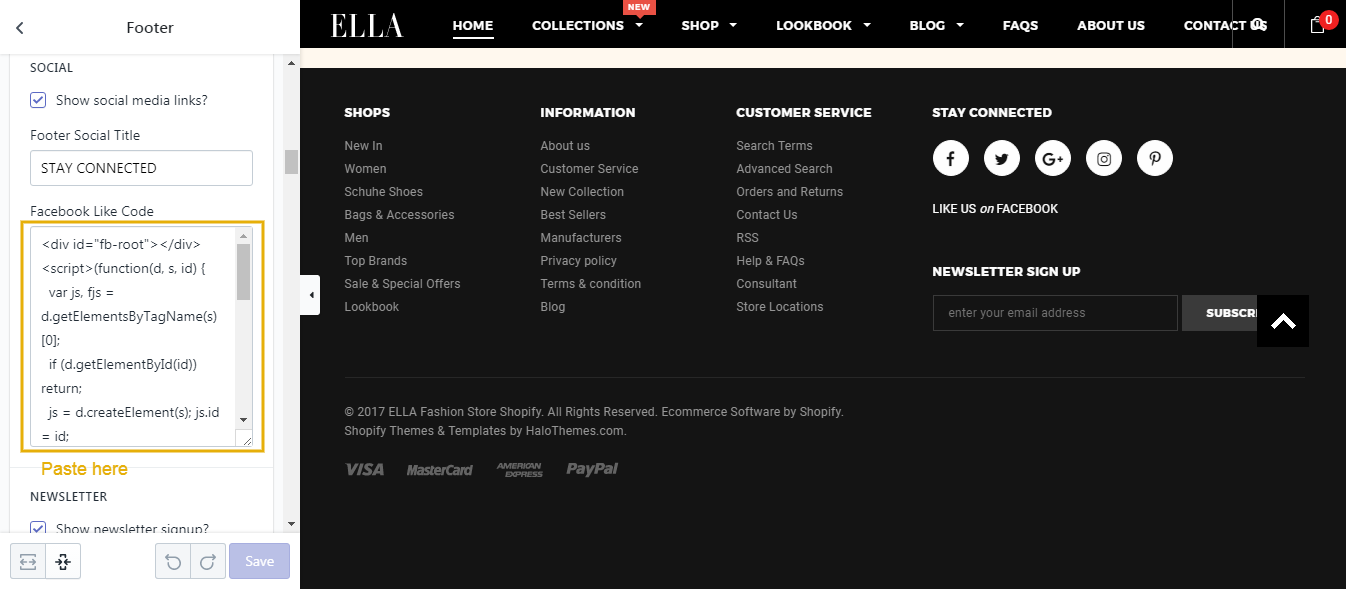
Facebook Code in Footer
This is the Facebook Code at the footer of the site.

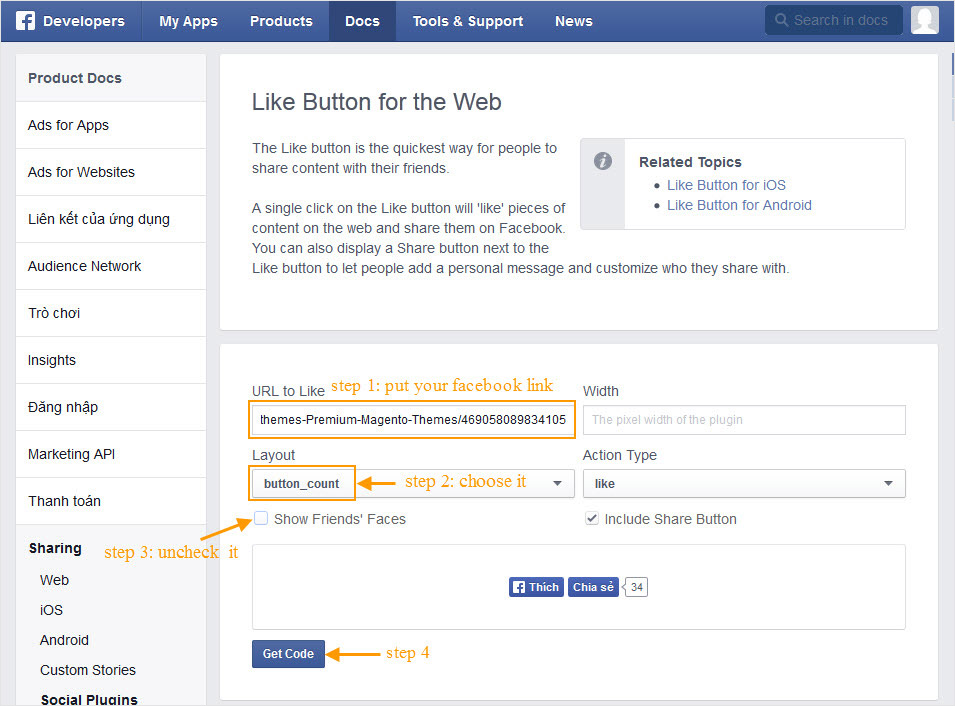
How to configure it in your site.
1. Go to https://developers.facebook.com/docs/plugins/like-button
2. Copy your facebook link and paste into URL to Like.
3. At Layout, choose button_count.
4. Uncheck Show Friend's Faces.
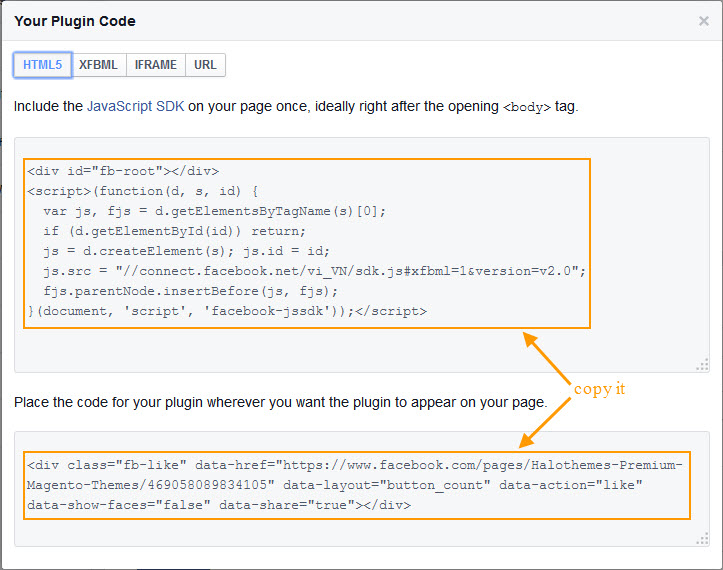
5. After that, click Get code button and copy script into the settings.
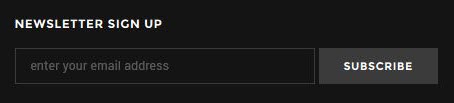
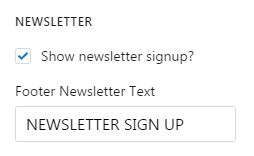
Newsletter
Follow to edit newsletter.
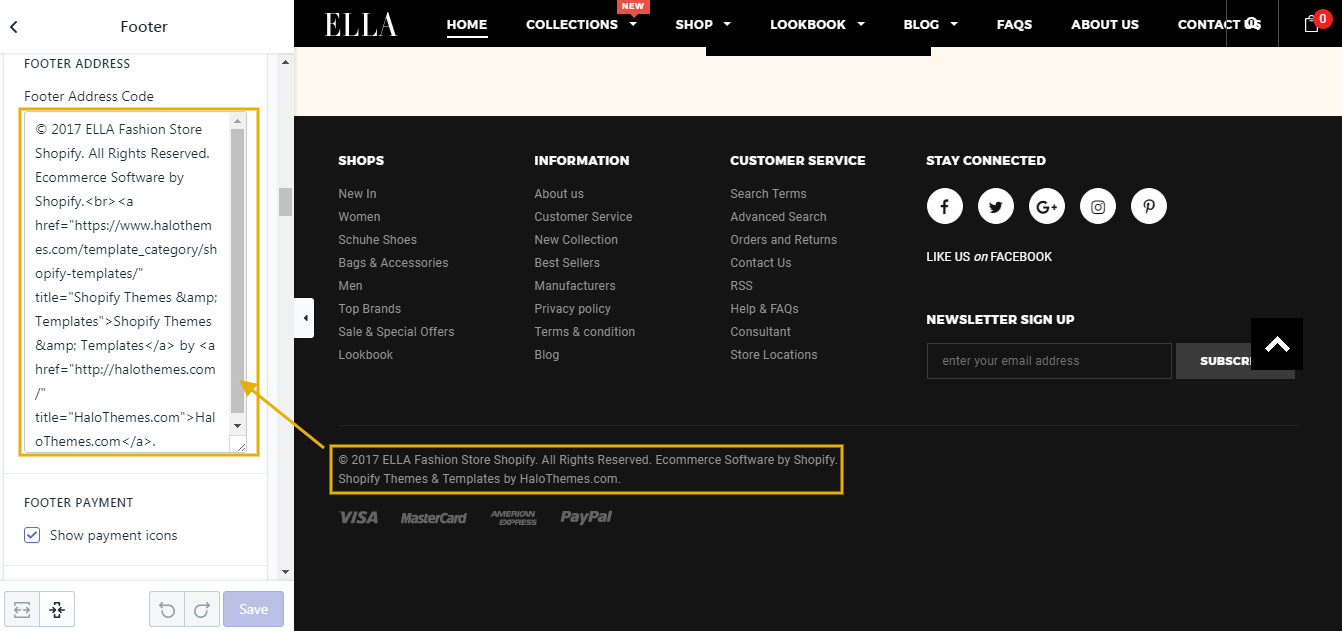
Footer Address
Follow to edit text and link address at footer.

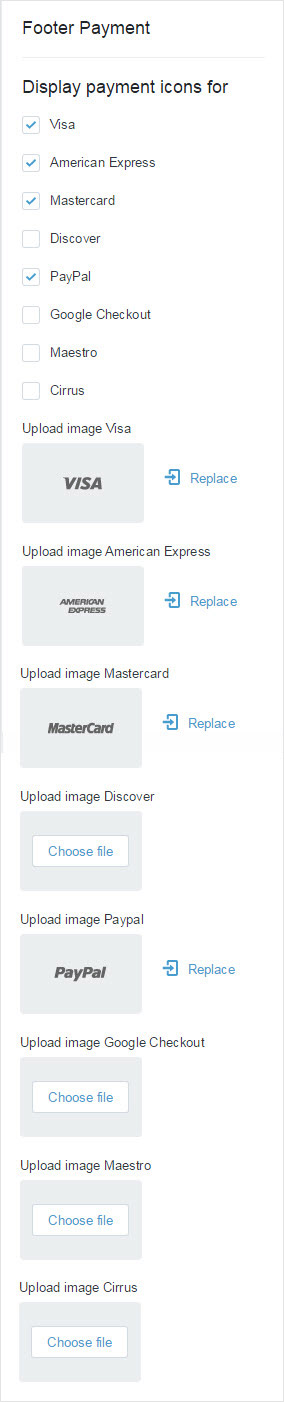
Footer Payment
Follow to select payments shown at footer and show title payment if you add text in Payment methods accepted text field:

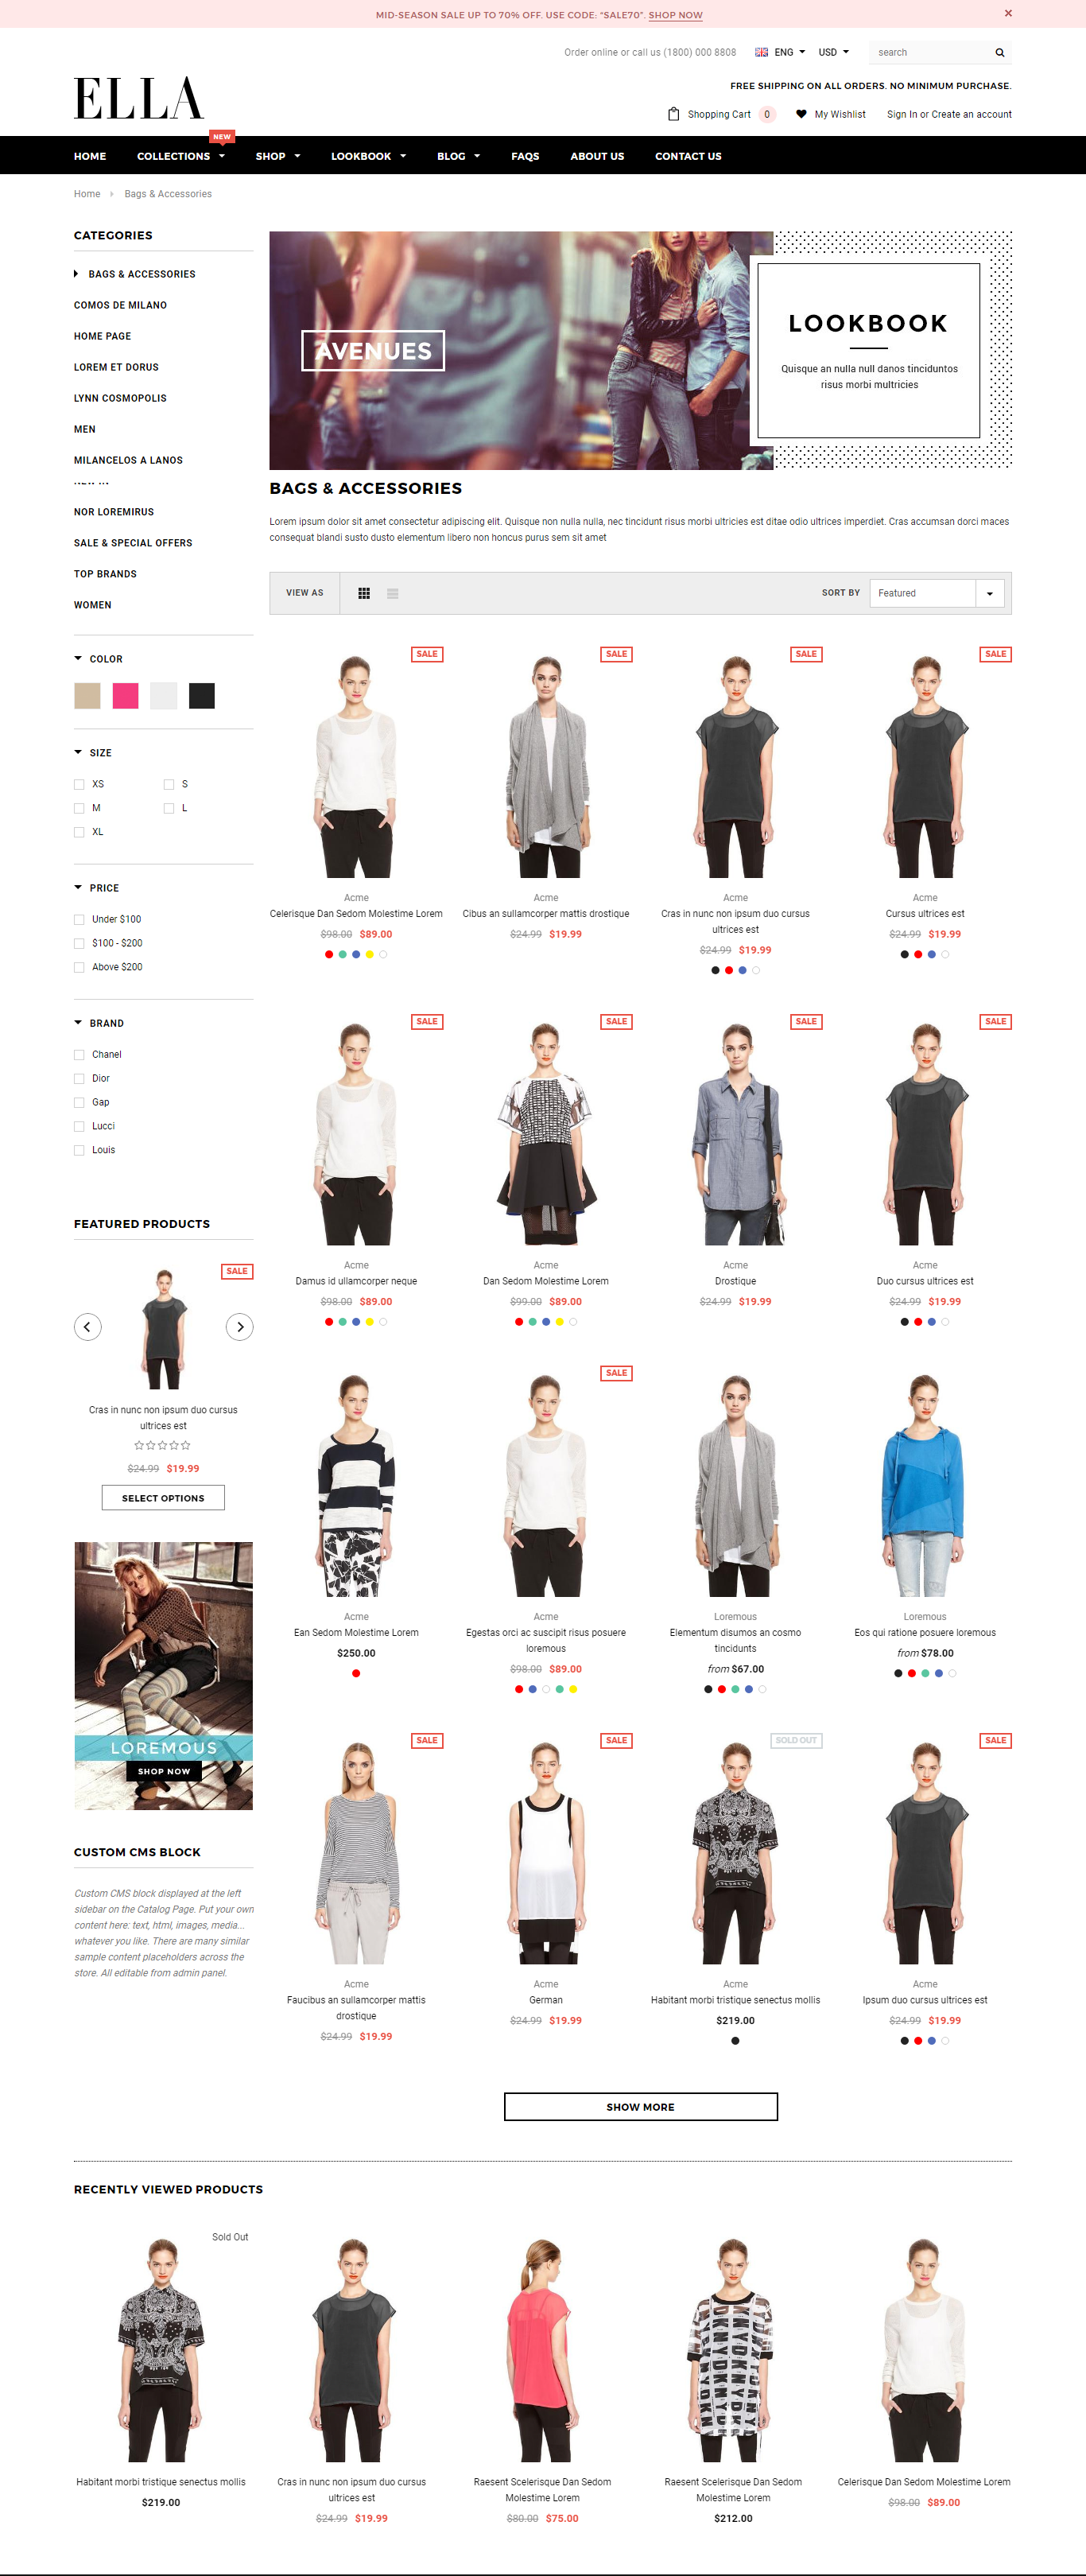
Collection Page
Here is a video for your reference.
In this sections, you will find the instruction for how to set up Category page with 4 main sections: Sidebar, Collection Header, Collection Page and Recently Viewed Products.
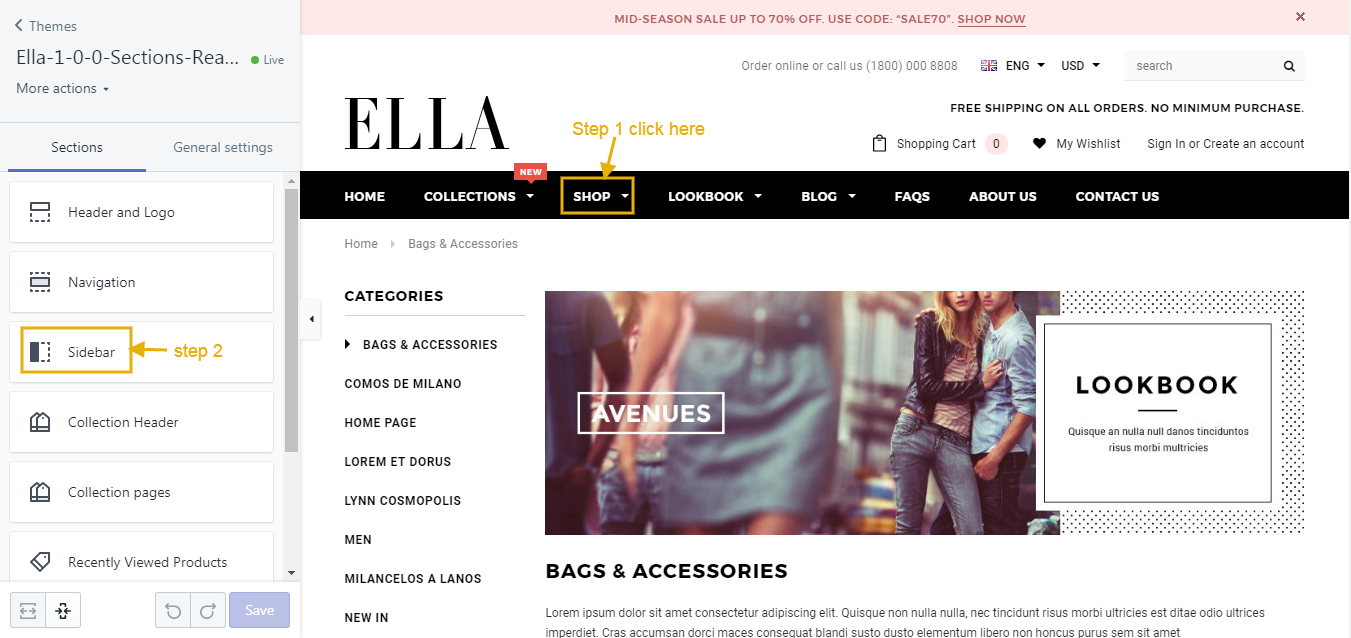
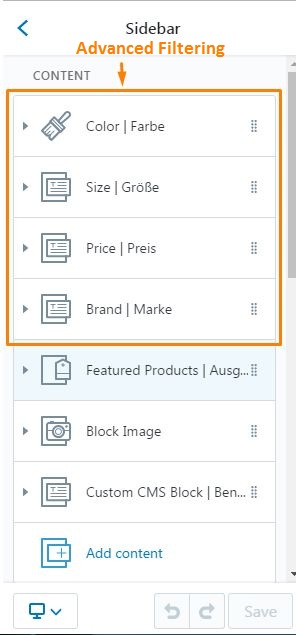
Sidebar
From your Shopify admin, click Online Store --> Customize theme --> Collection Page. Click Sidebar.
Category
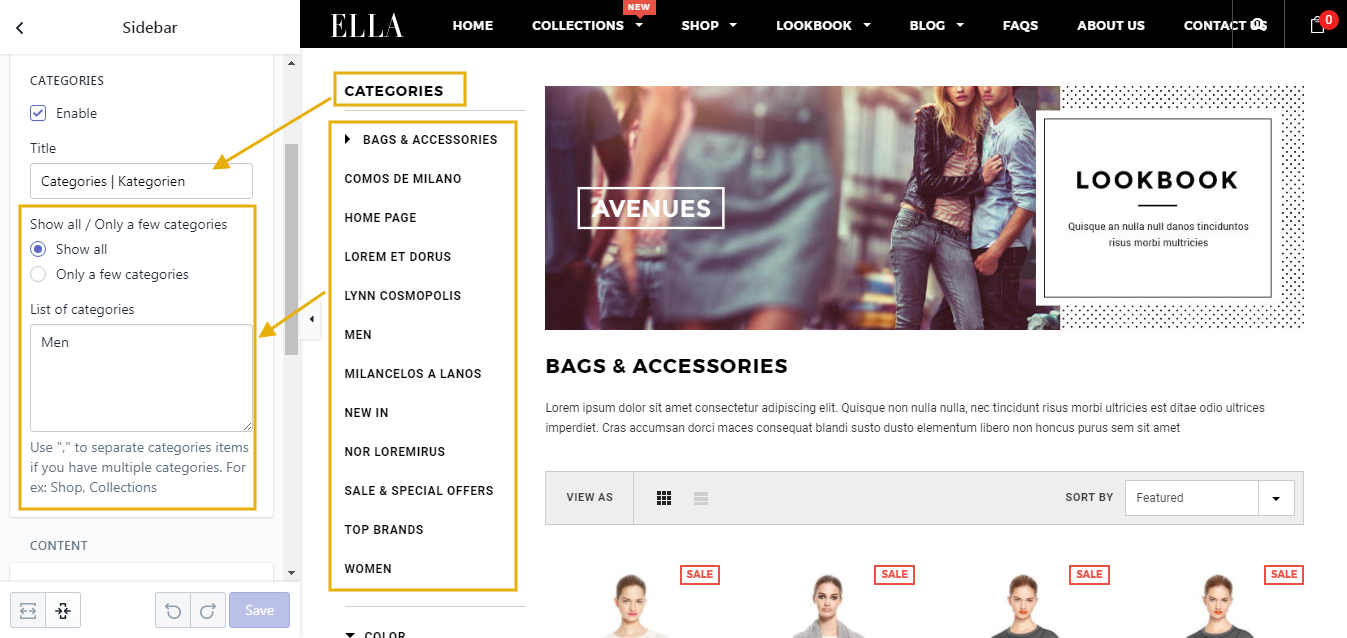
Using of Advanced Filtering
Advanced Filtering sidebar is built on top of Tags of Shopify. To make the feature work, you need to configure options in theme setting and add tags to your products (like variant option)
To use advanced filtering as in our demo page (http://ella-demo-8.myshopify.com/collections/all), you need to follow these steps:
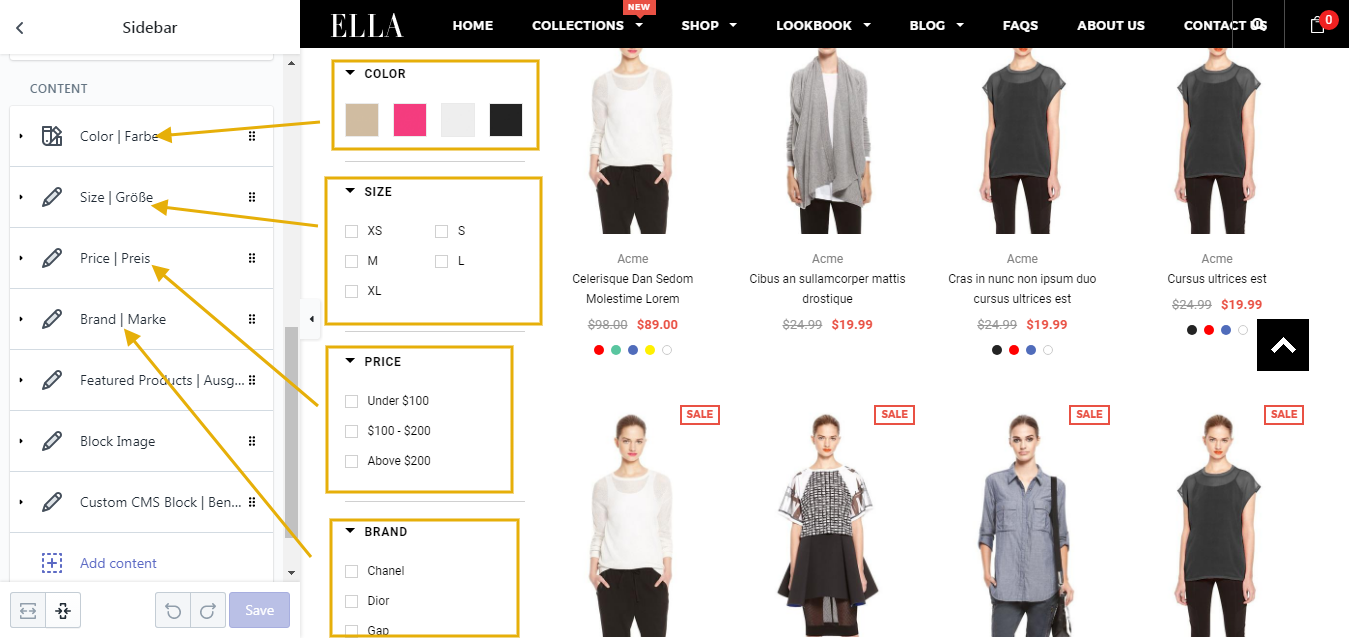
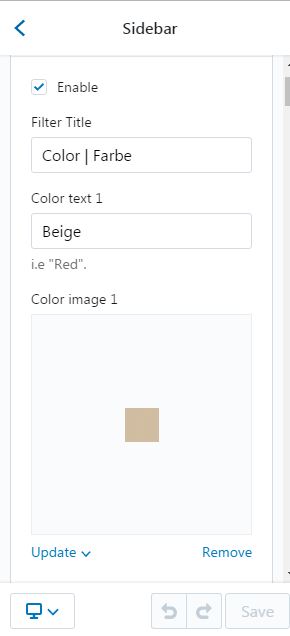
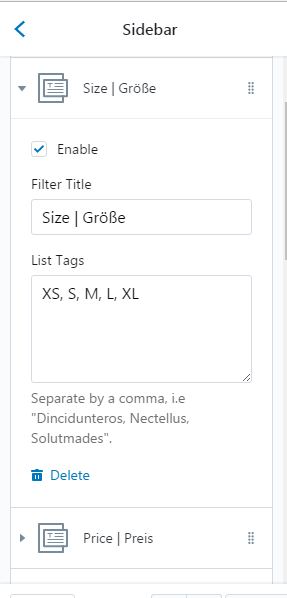
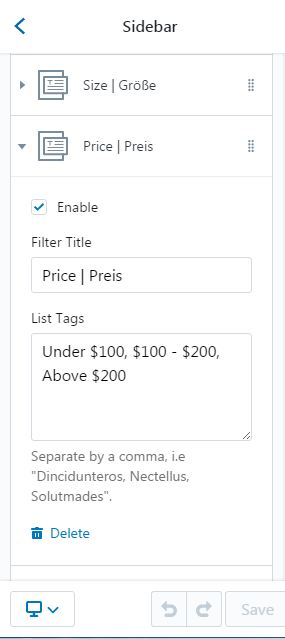
1. We offer 4 options for you to show in your site: Color, Size, Price, and Brand
2.Then go to Products, click on the product that you'd like to show these options.
3. In the Organization sections, you need to put tags which you just filled in the above sidebar option for products you would like to show (using a comma to separate different tags).
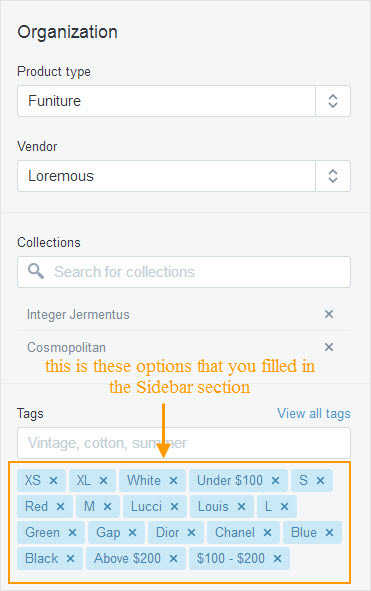
For example:
If you would like to filter by color and price, your products have below options: Red color, White color, Blue color, Black color, Under $100, $100 - $200, Above $200. Then you need to fill in theme settings all these options.
For a product A which has below options: Red color, Gray color, Less than $299, $300 - $899, you need to add below tags: Red, White, Blue, Black, $100 - $200, Above $200 for this product.
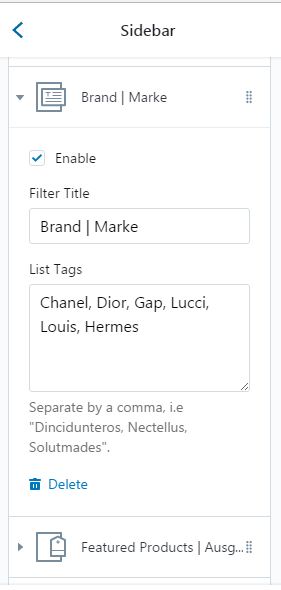
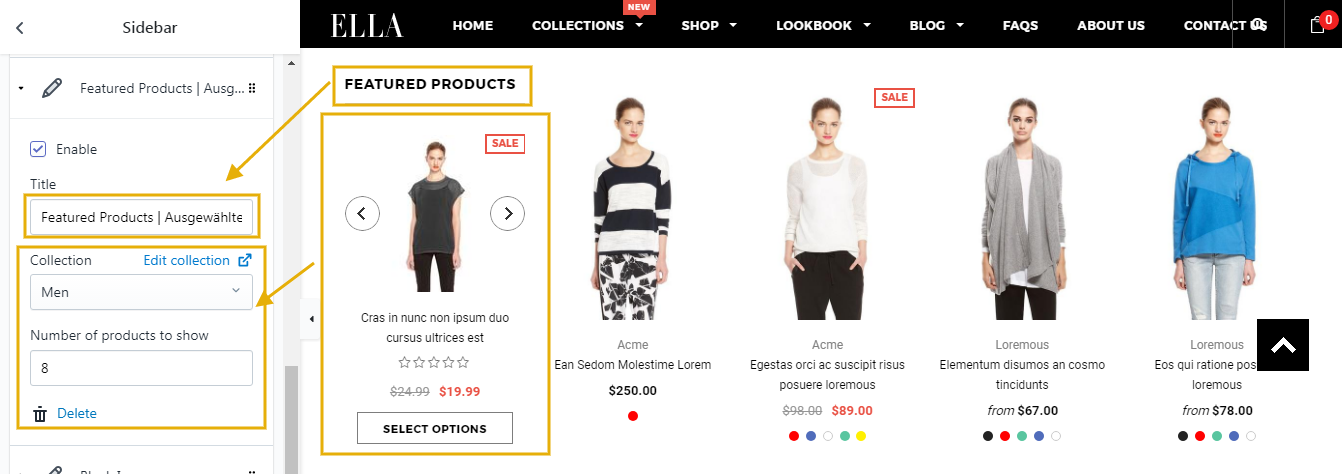
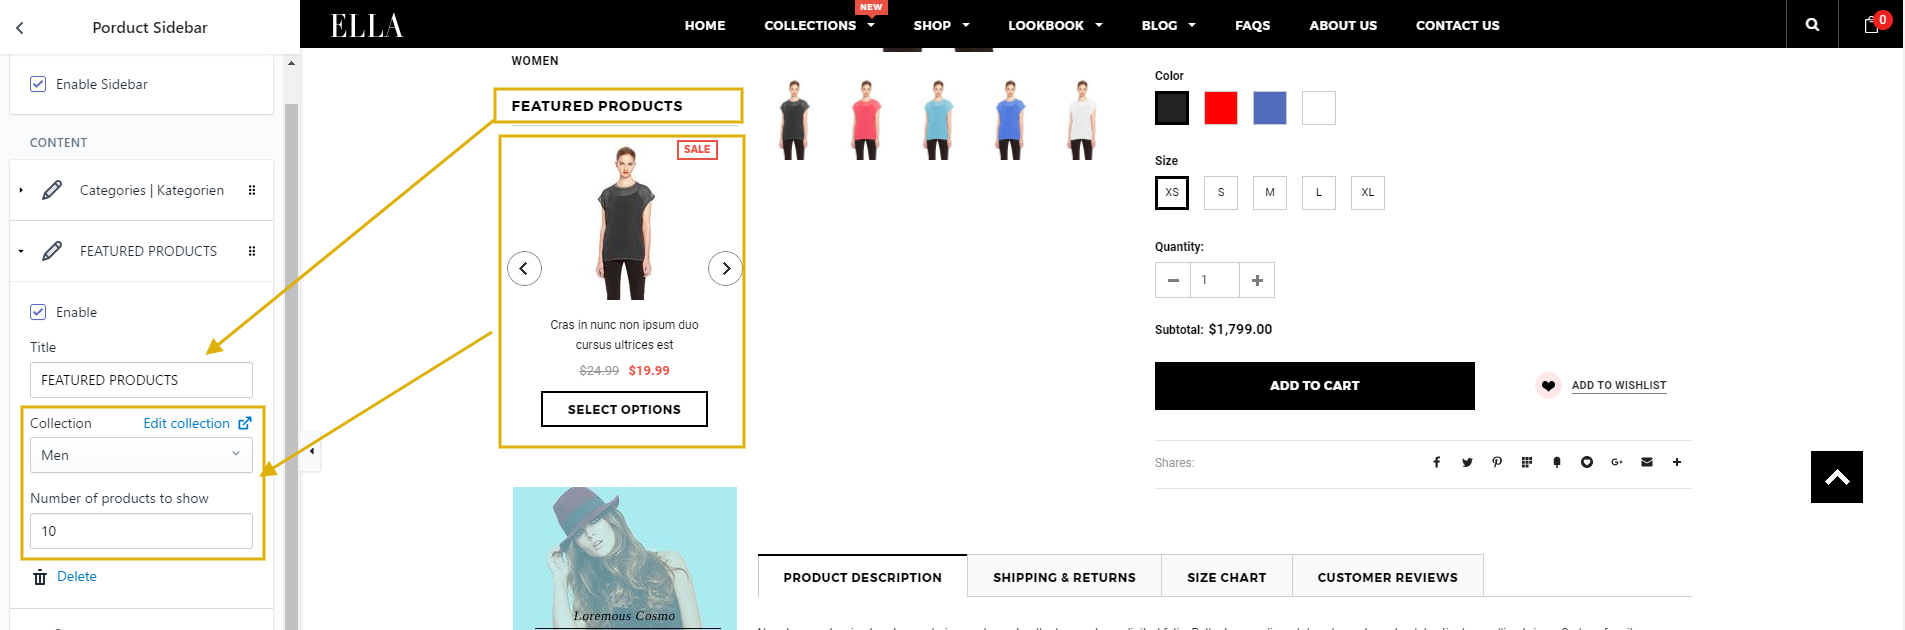
Featured Products
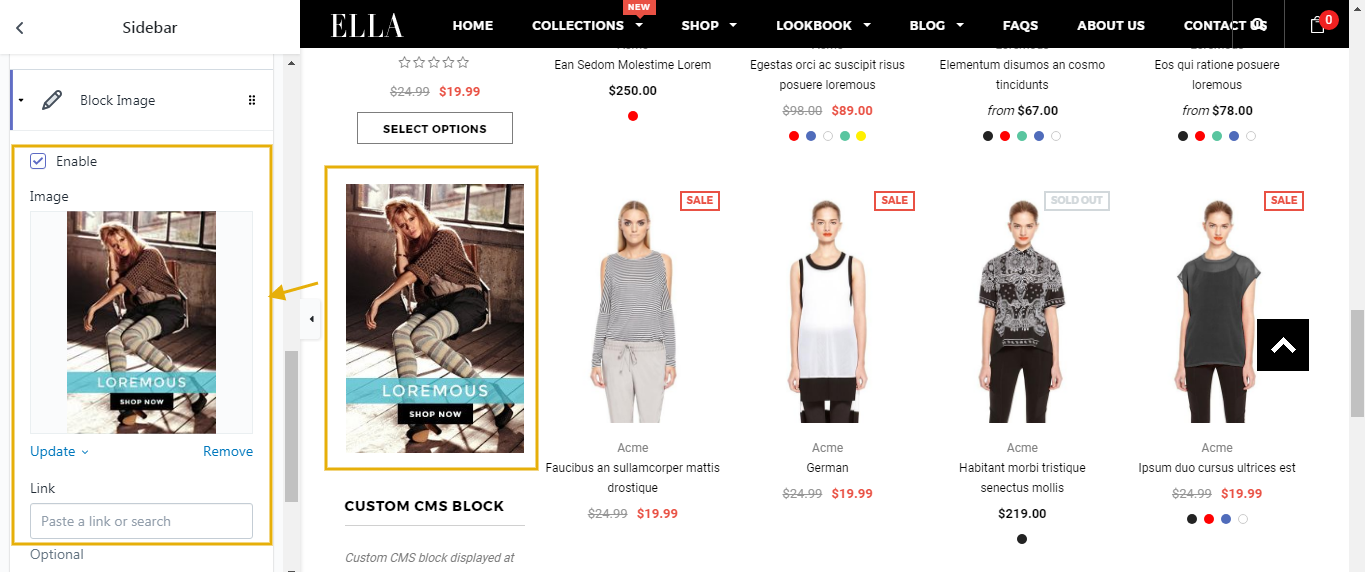
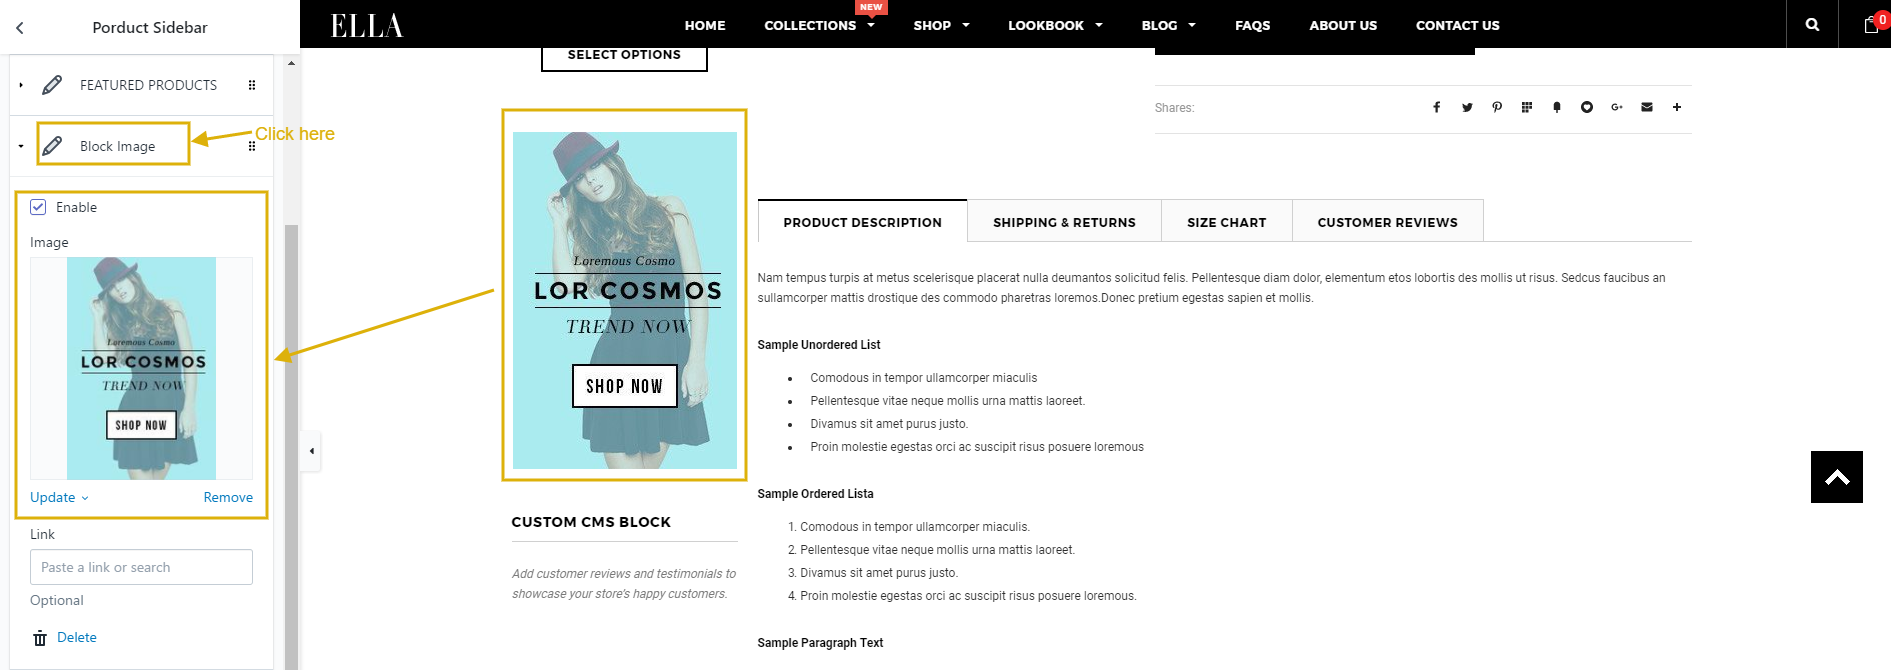
Block Image
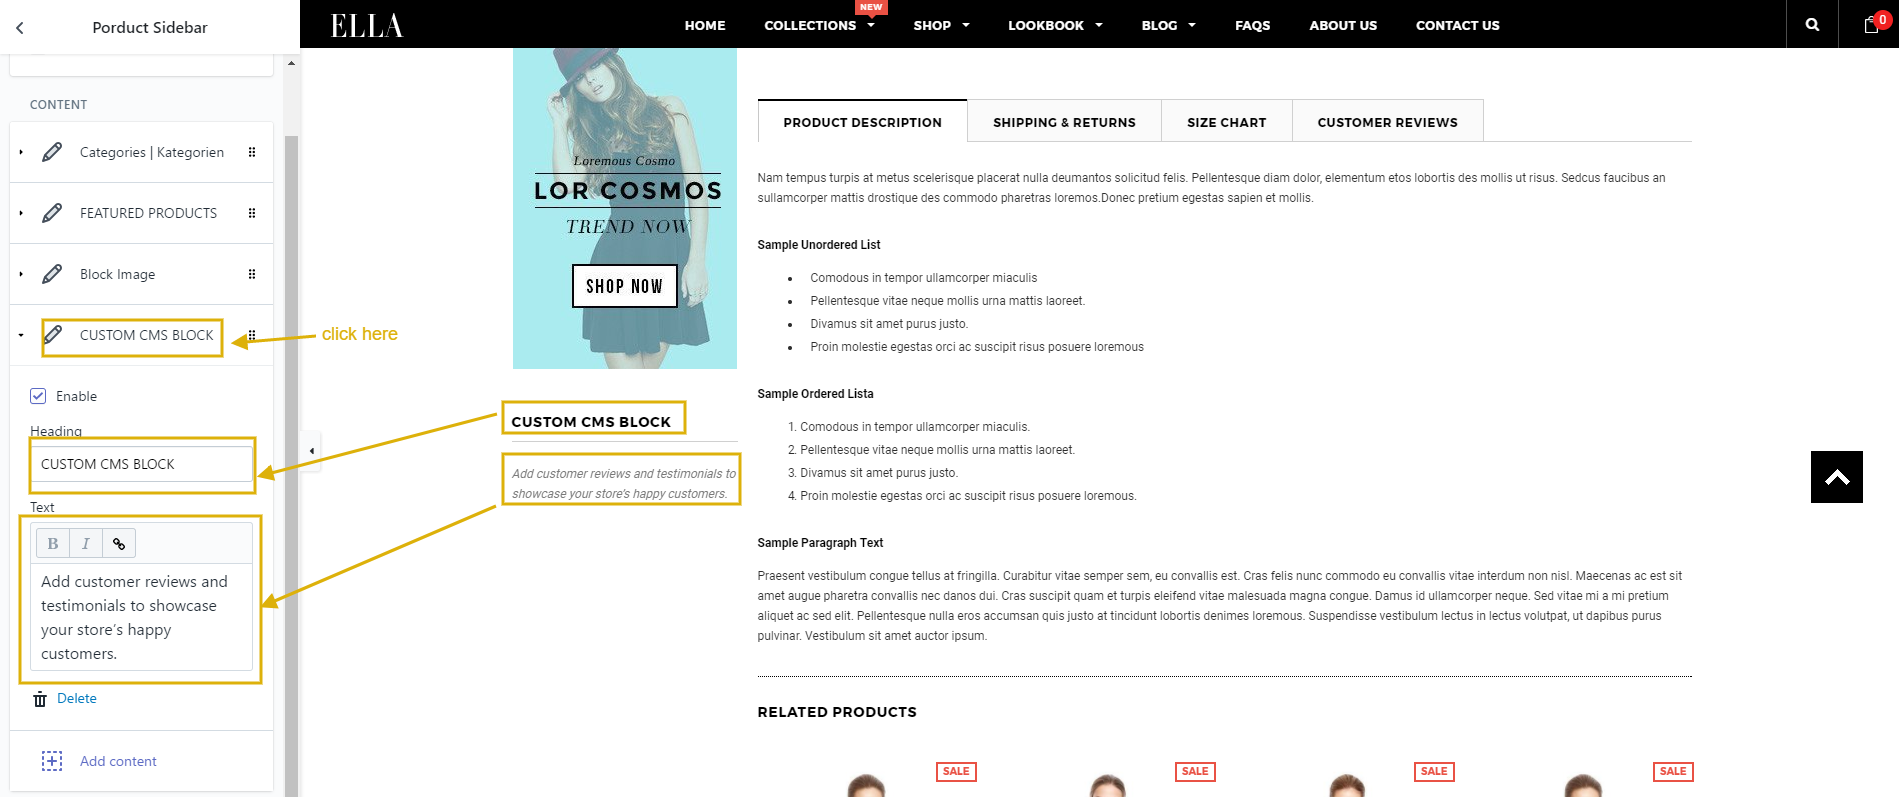
CUSTOM CMS BLOCK

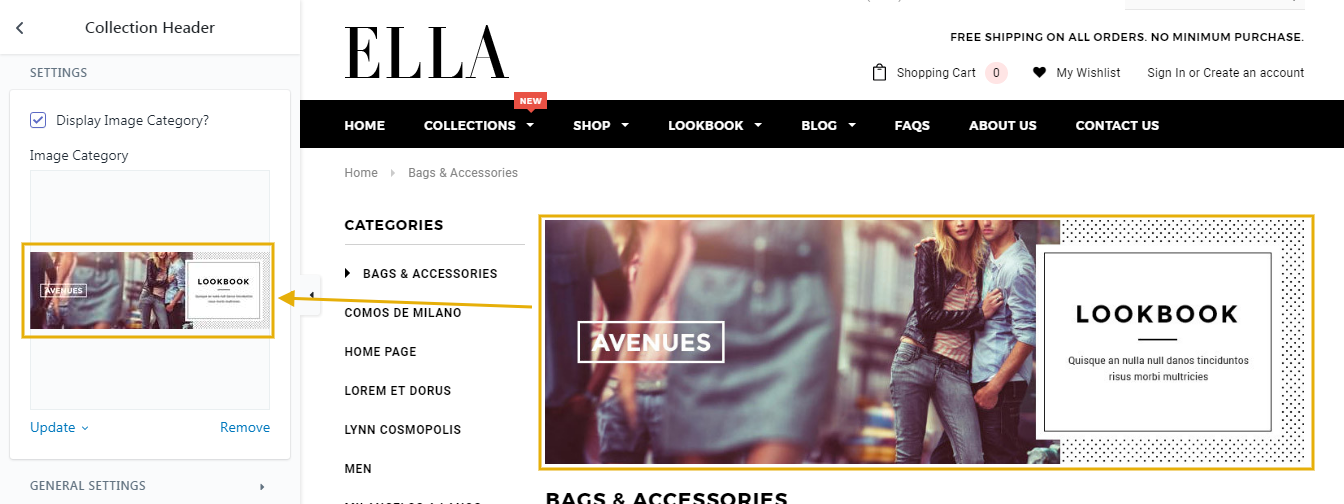
Collection Header
From your Shopify admin, click Online Store --> Customize theme --> Collection Page. Click Collection Header.

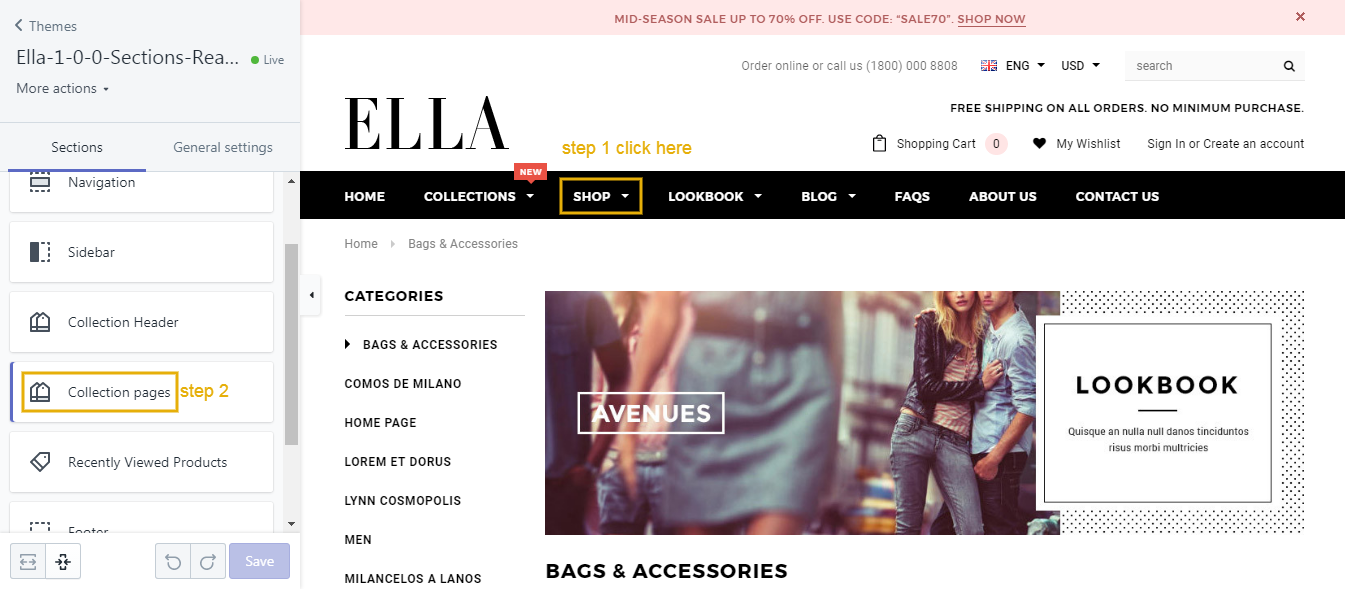
Collection Pages
From your Shopify admin, click Online Store --> Customize theme --> Collection Page. Click Collection Pages.

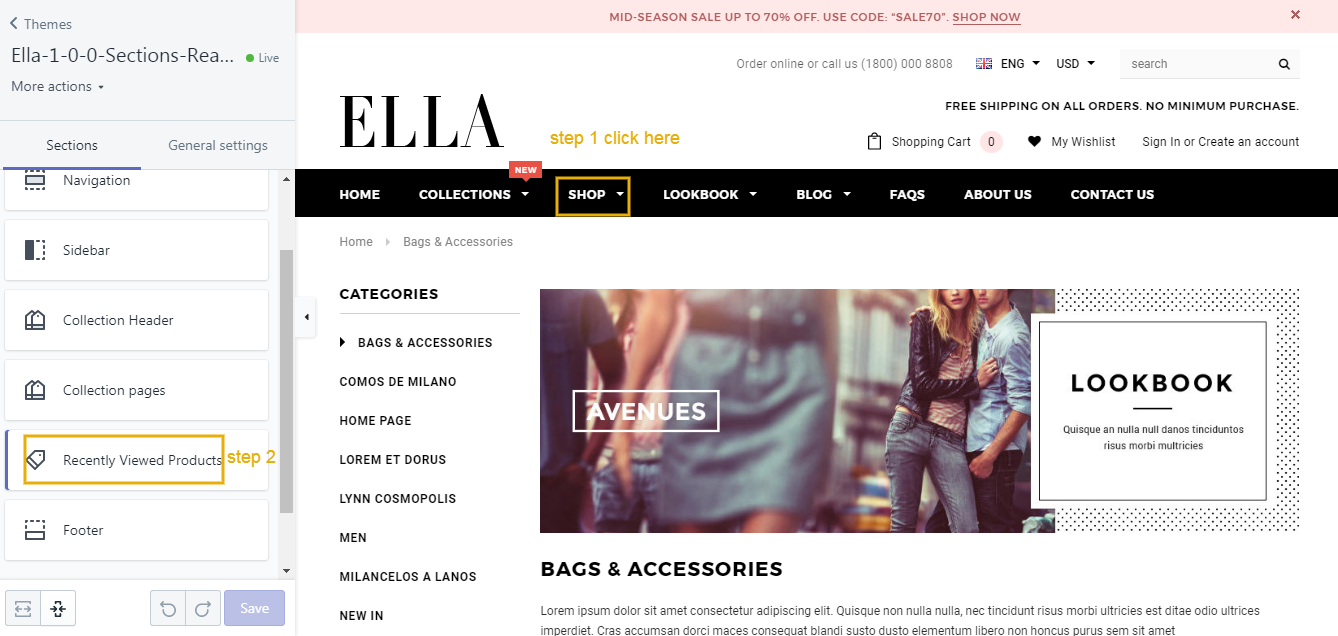
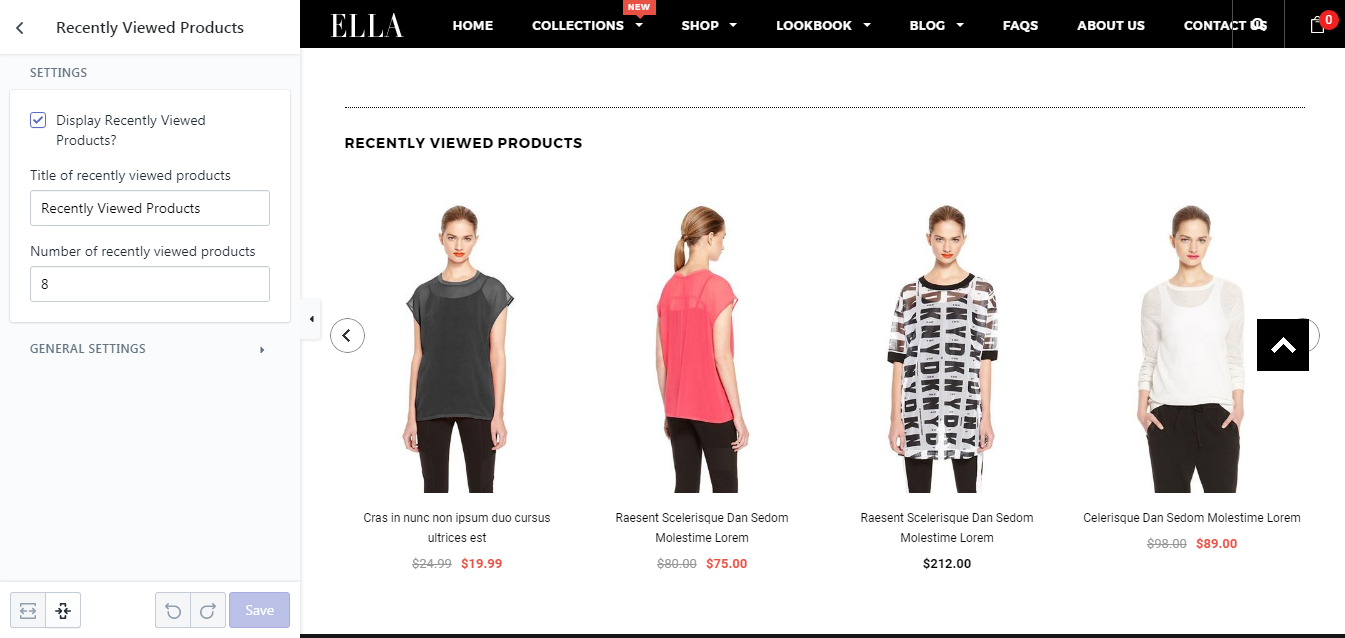
Recently Viewed Products
From your Shopify admin, click Online Store --> Customize theme --> Collection Page. Click Recently Viewed Products.
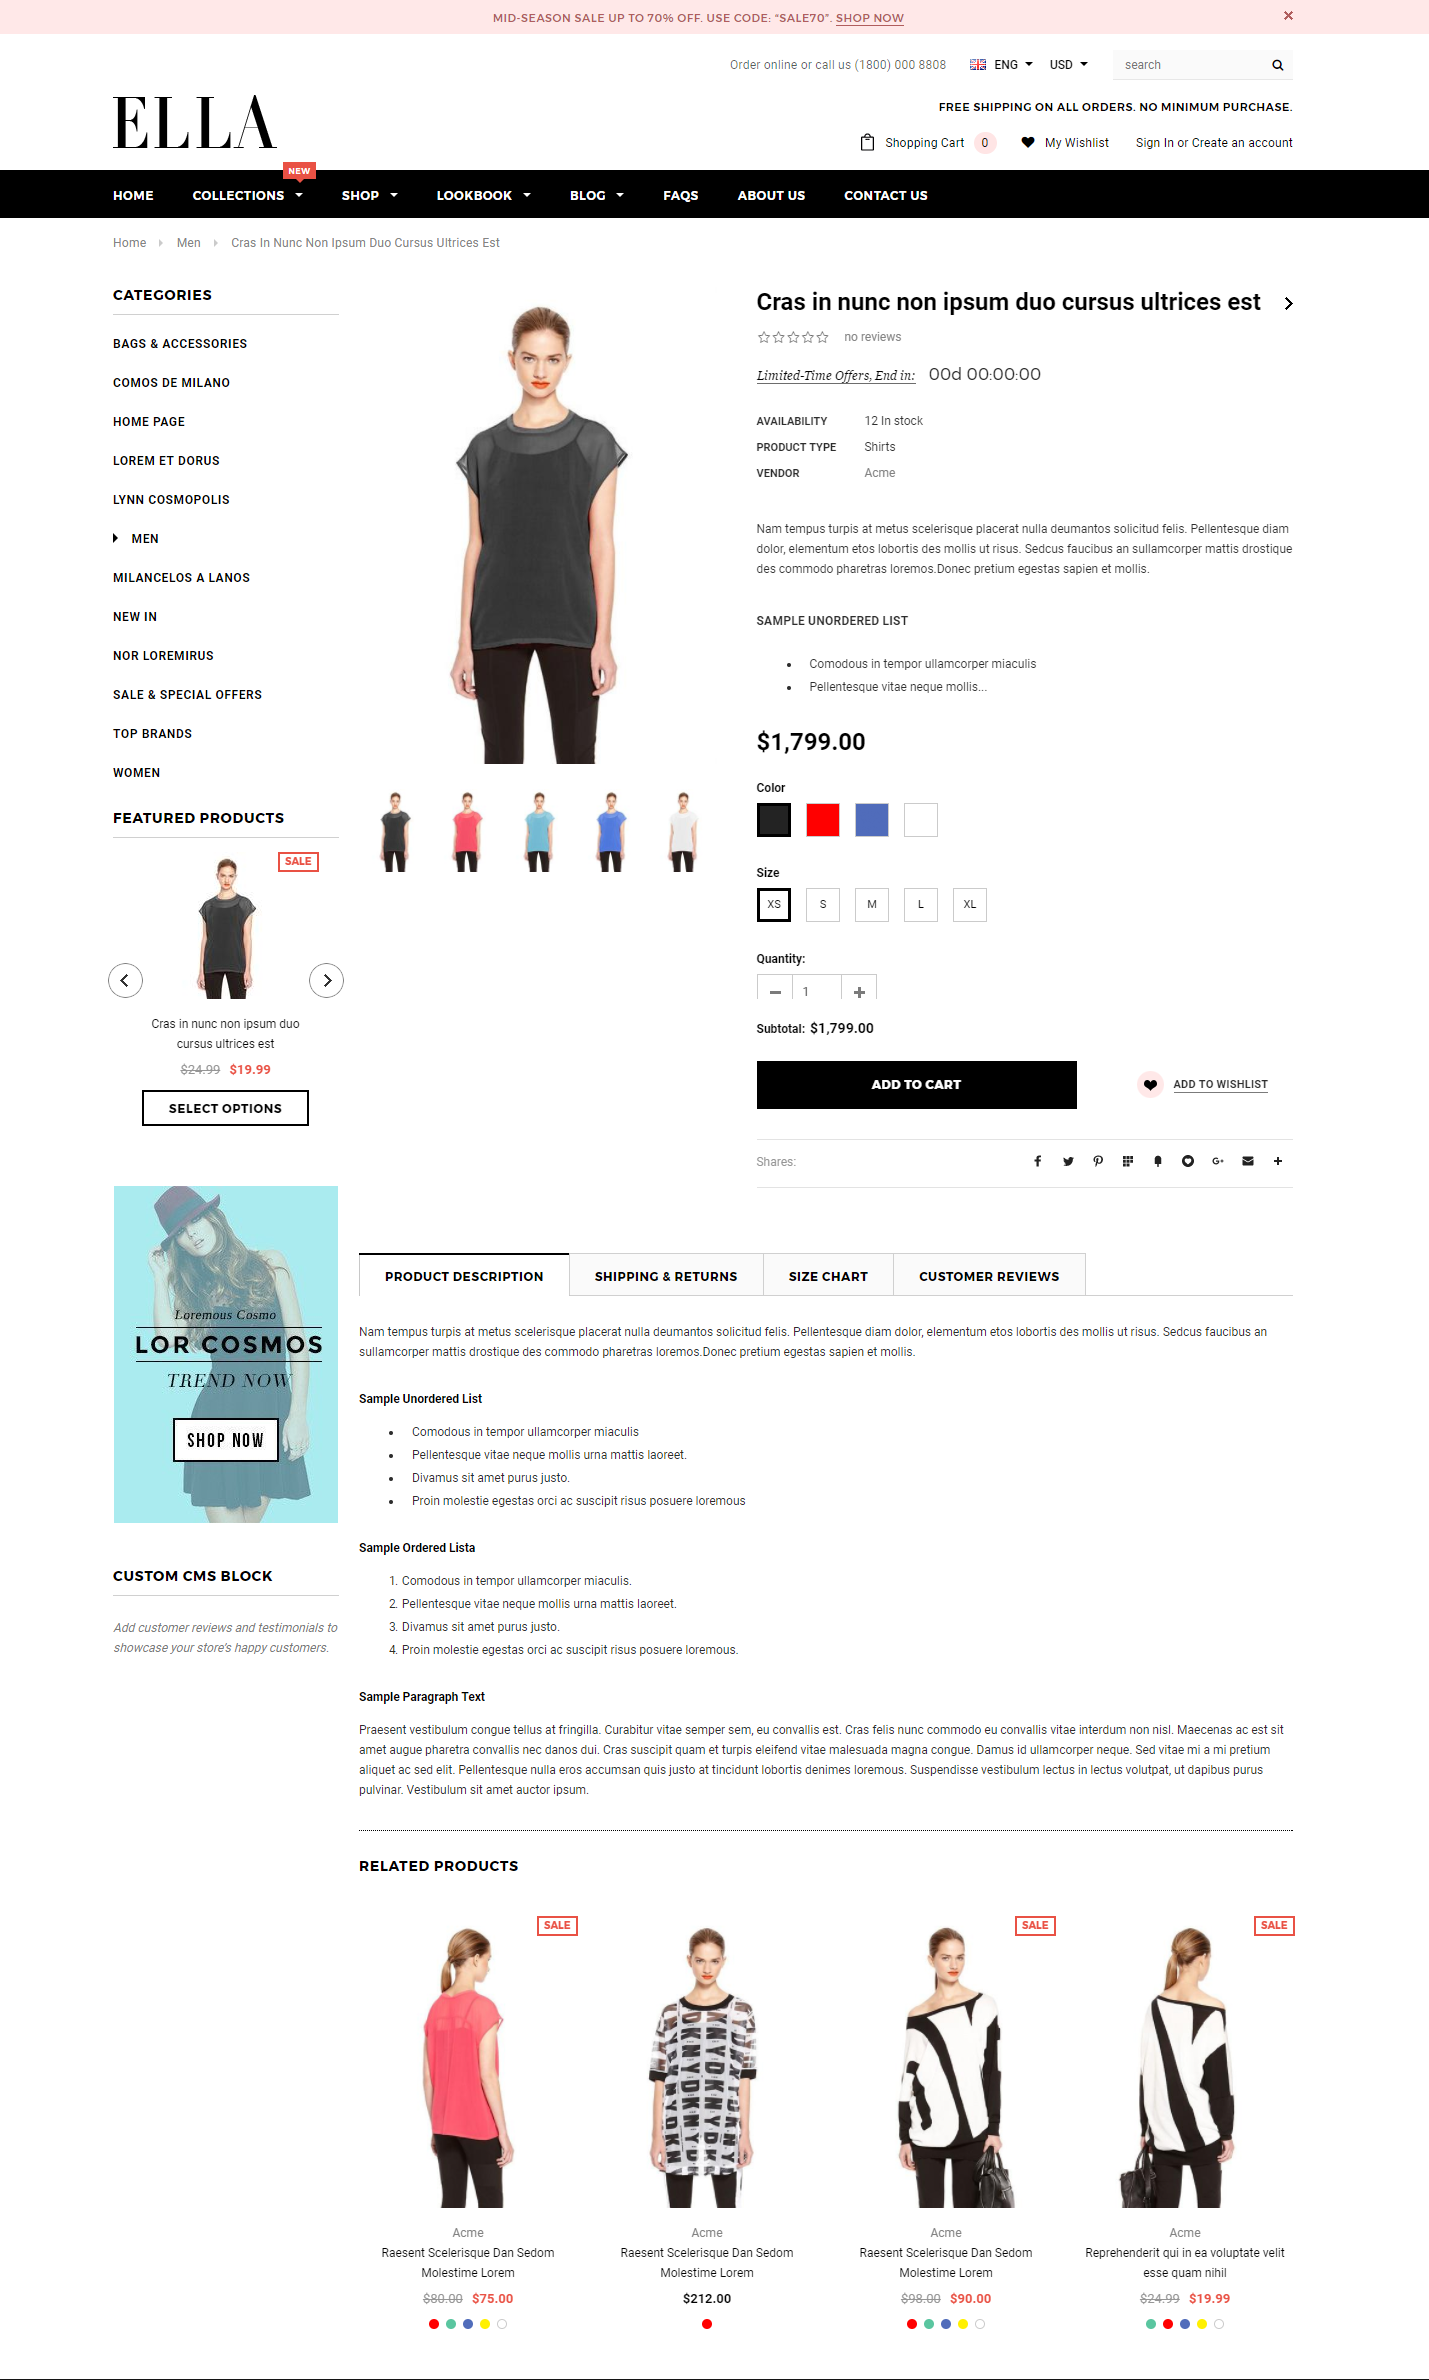
Product Page
Here is a video for your reference.
In this sections, you will find the instruction for how to set up Product page with 2 main sections: Product Sidebar and Product Detail.
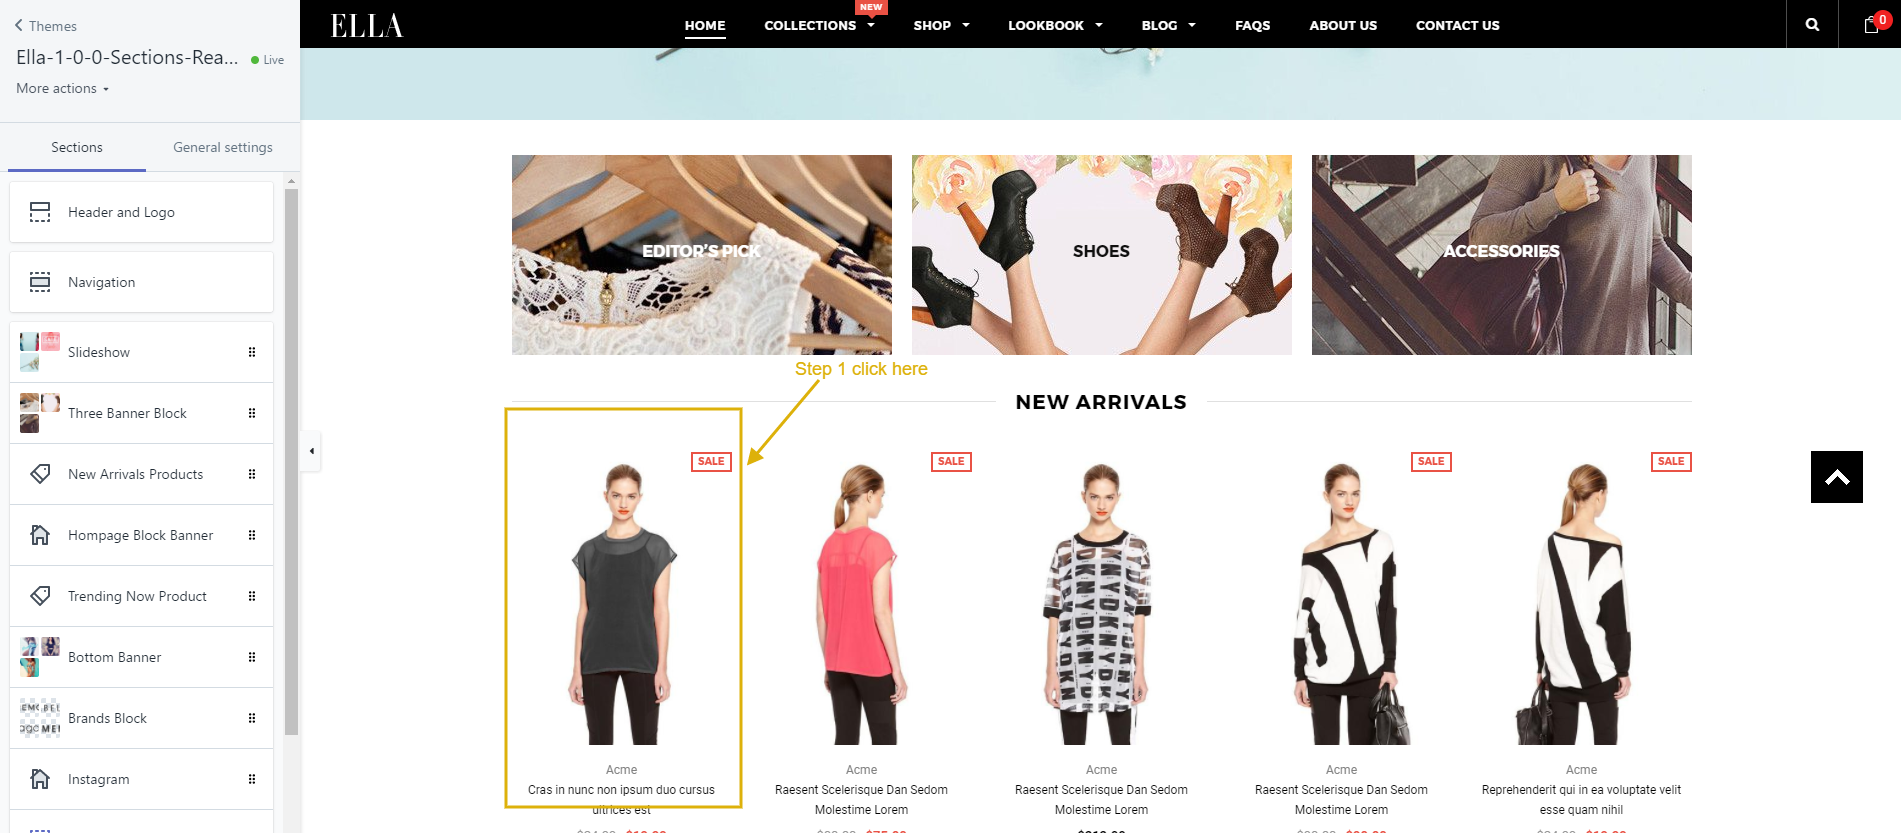
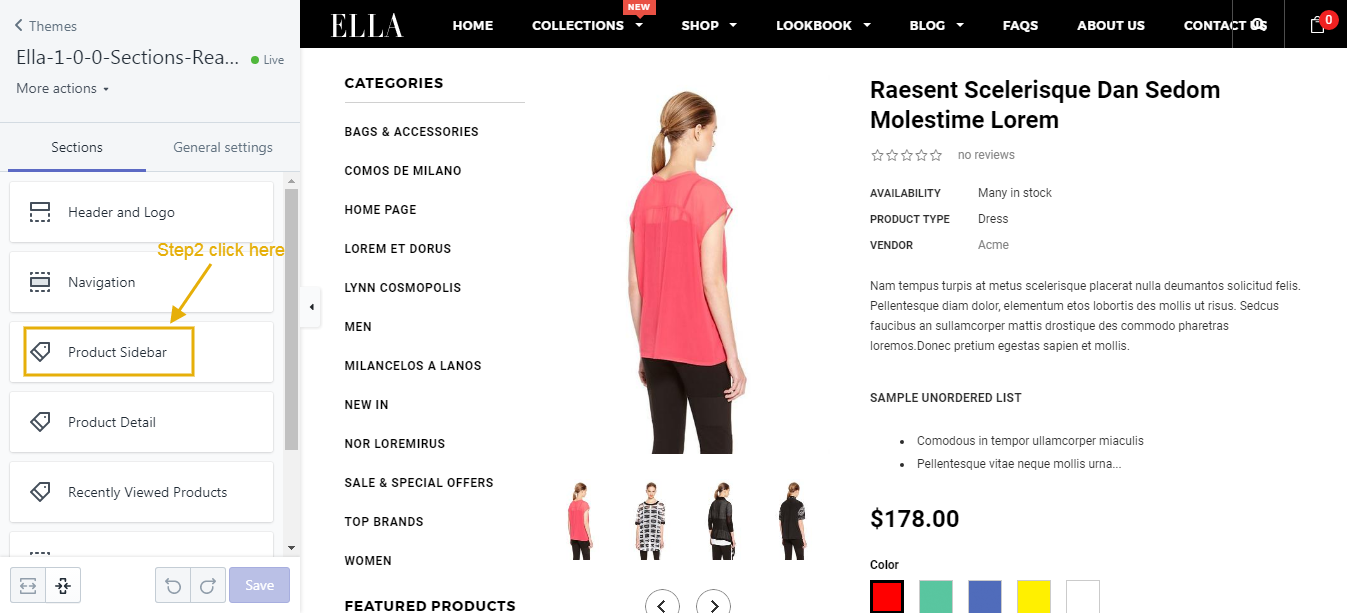
Product Sidebar
From your Shopify admin, click Online Store --> Customize theme --> Click product image on your site to display the Product Page Sections. Click Product Sidebar.
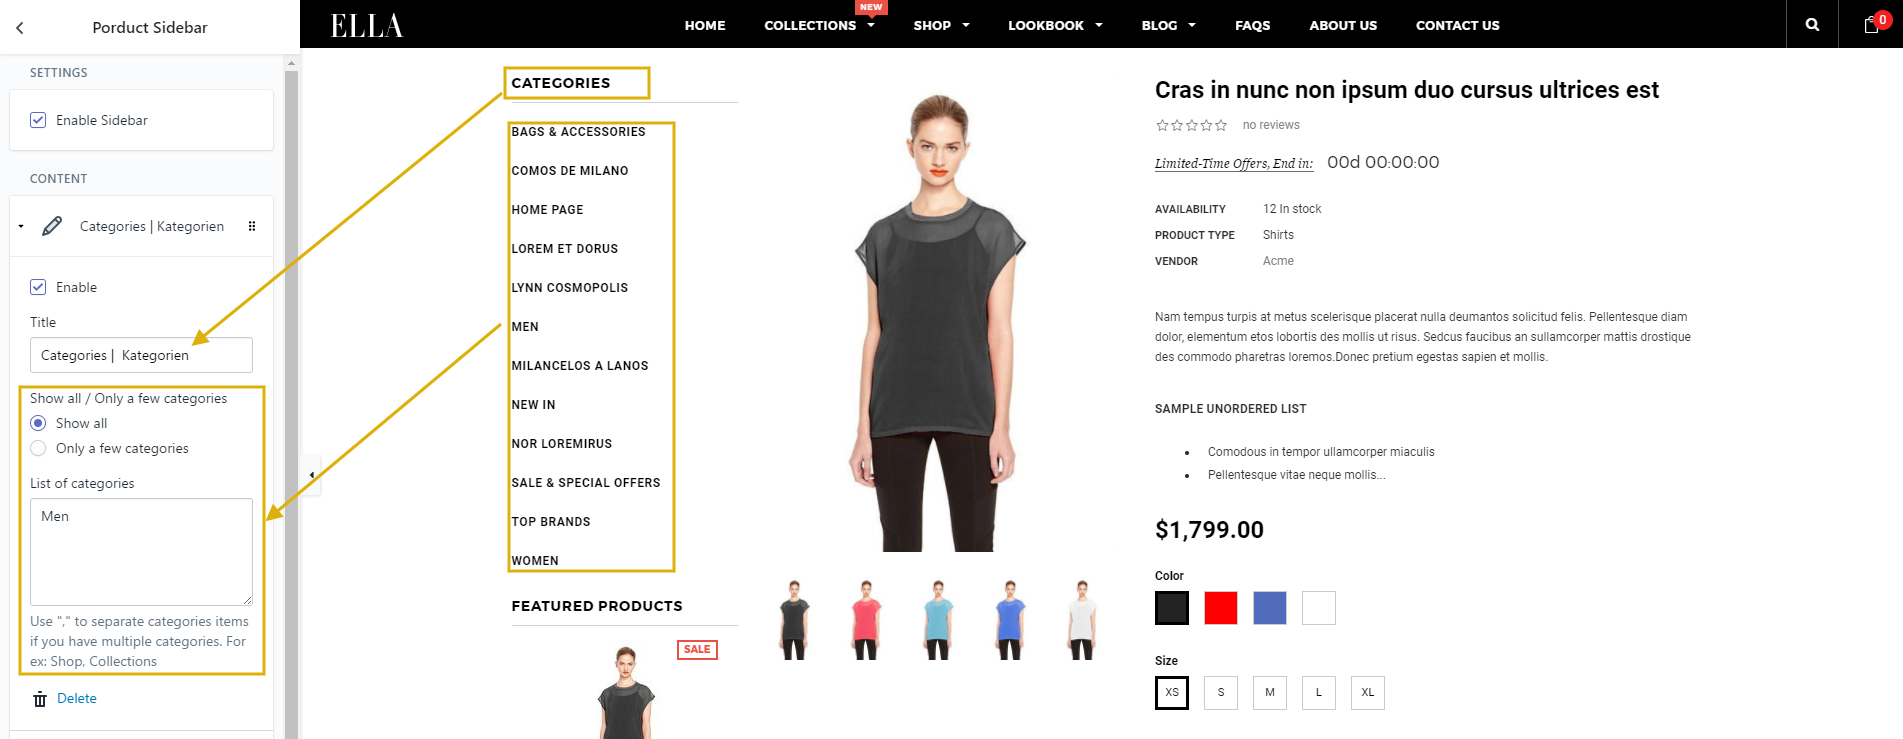
Category
Featured Products
Block Image
CUSTOM CMS BLOCK
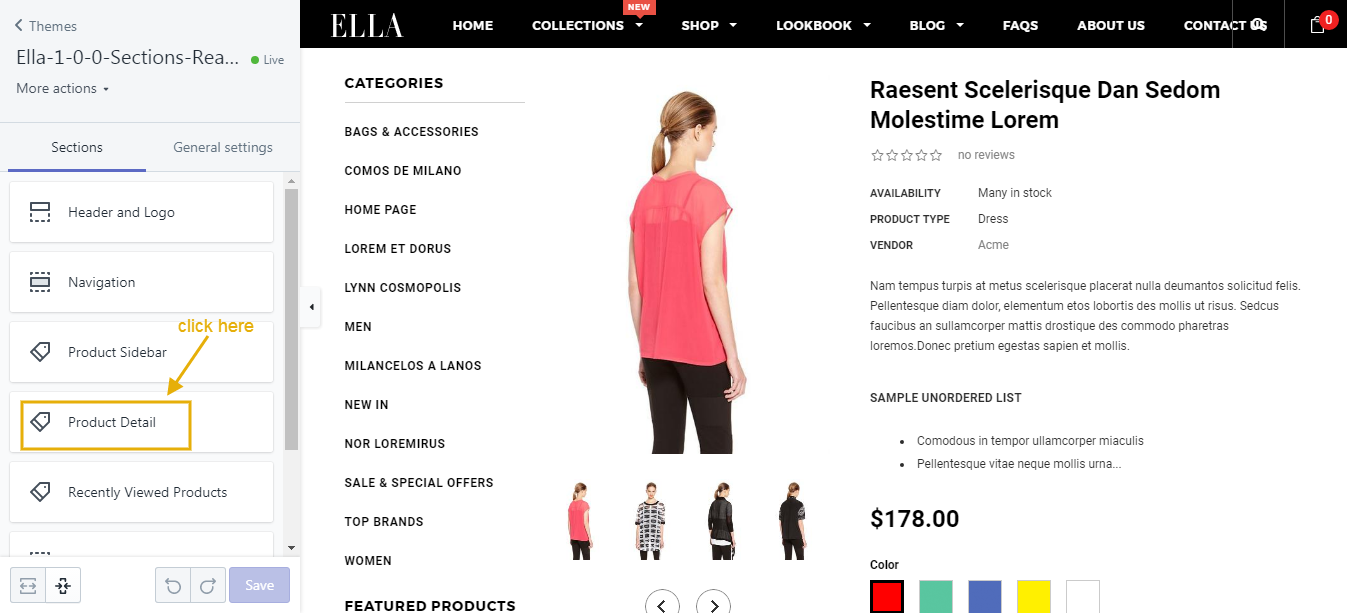
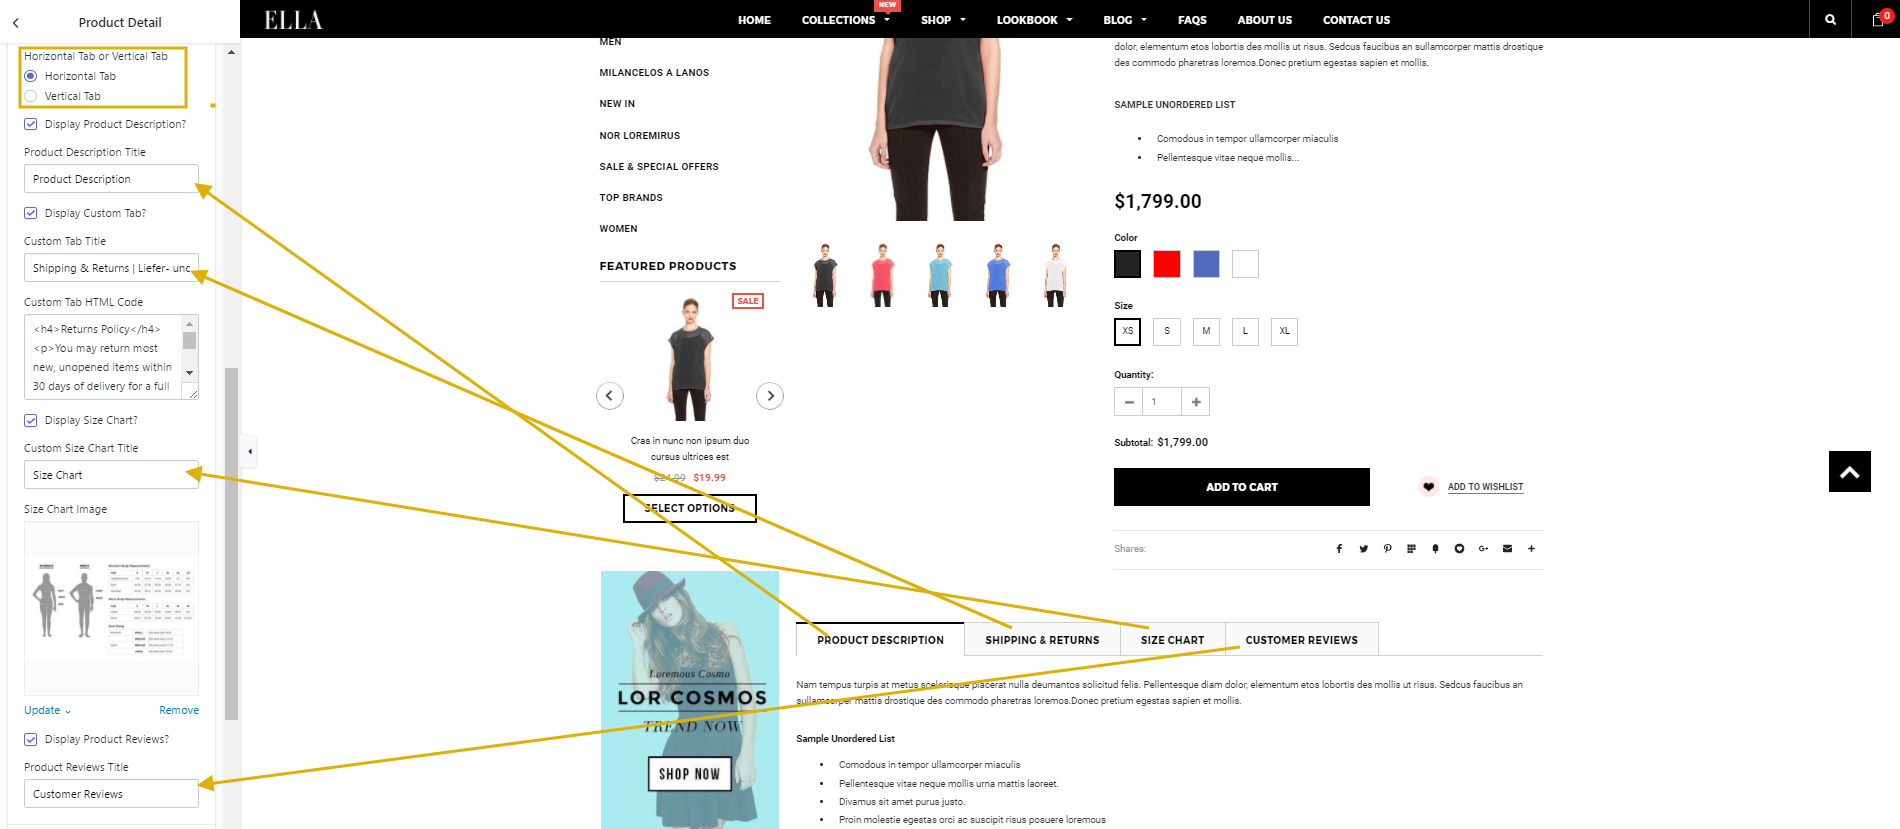
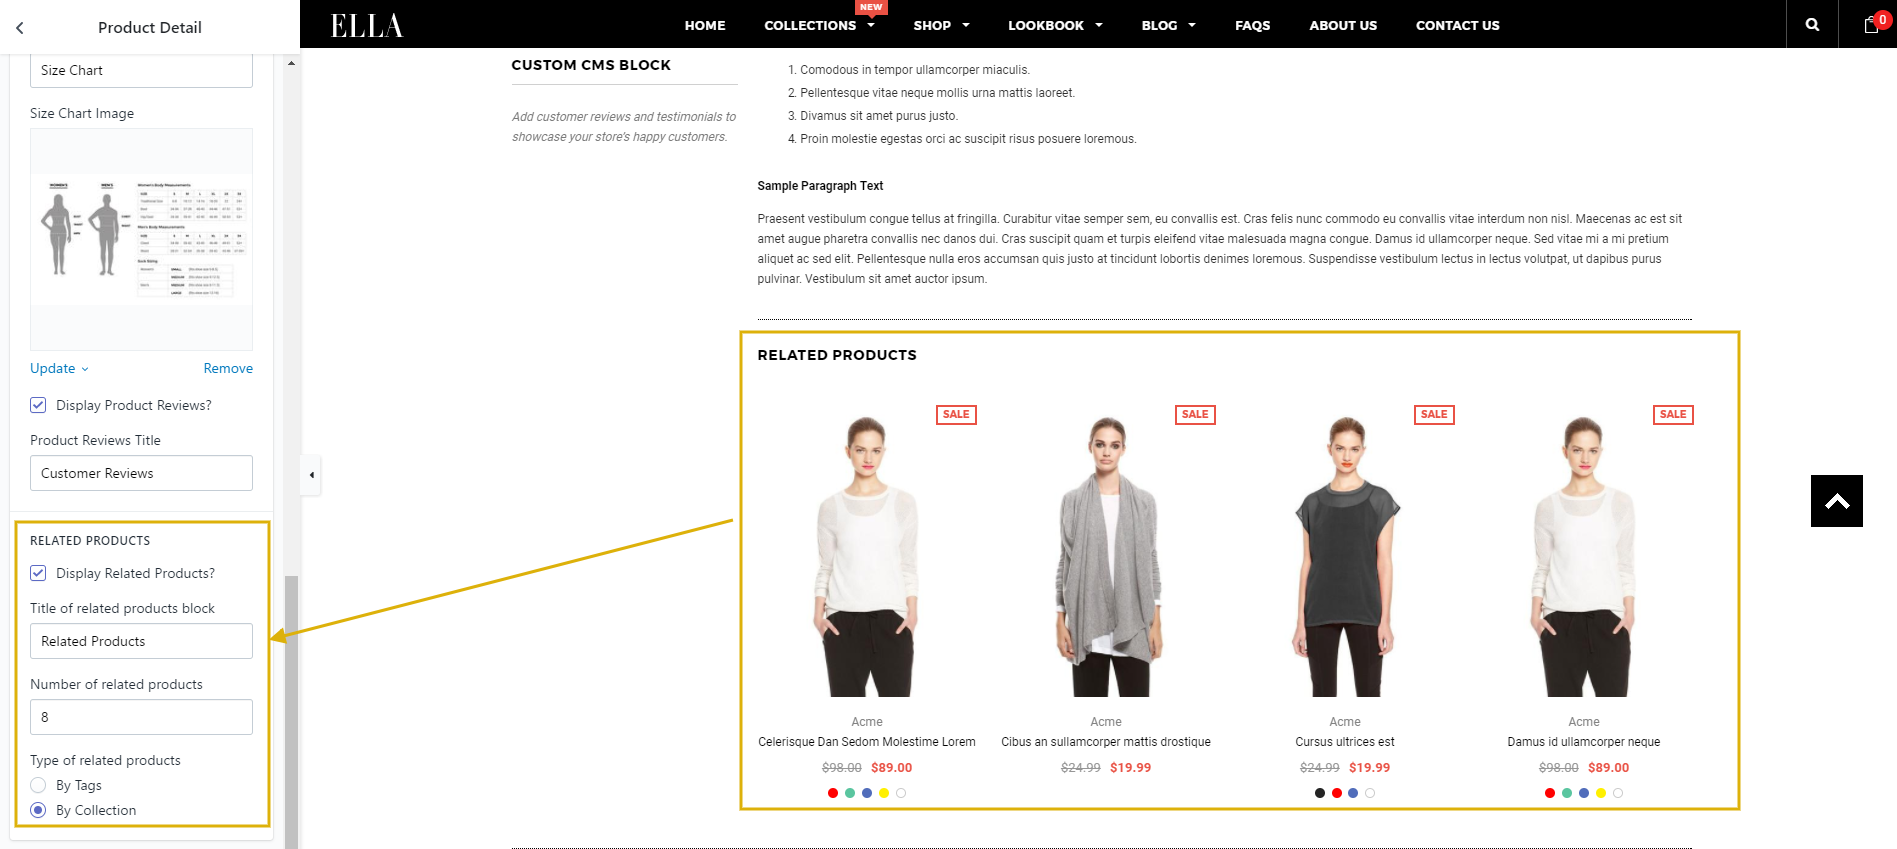
Product Detail
In Product page. Click Product Detail
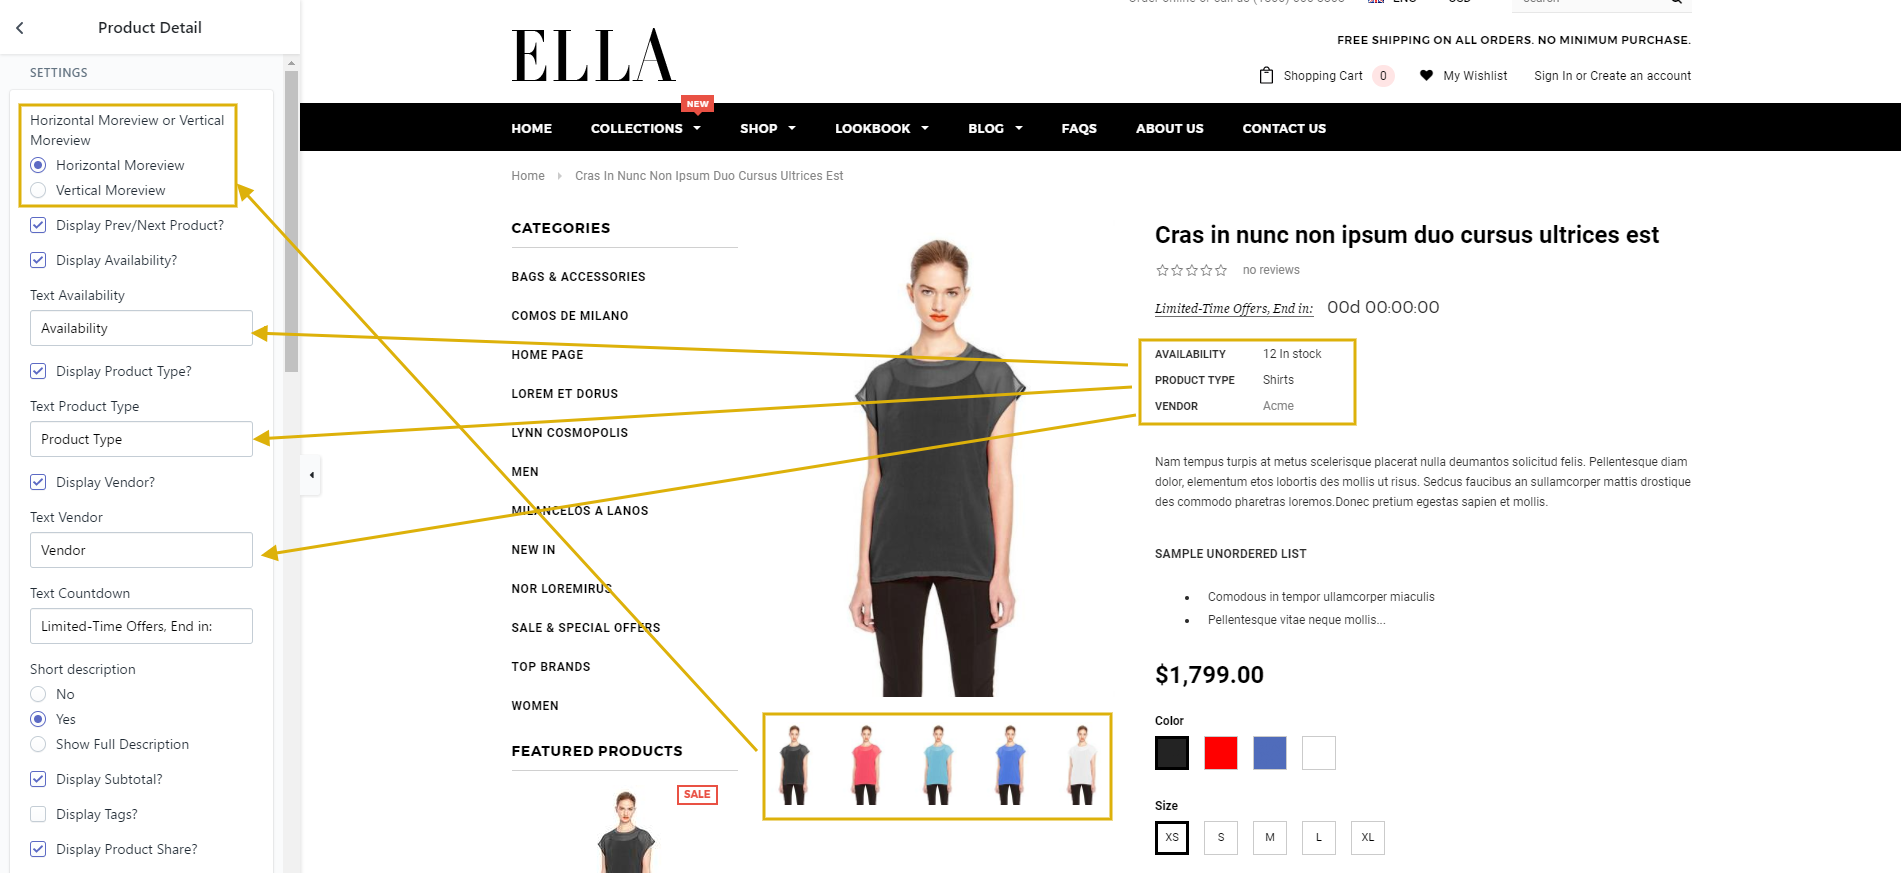
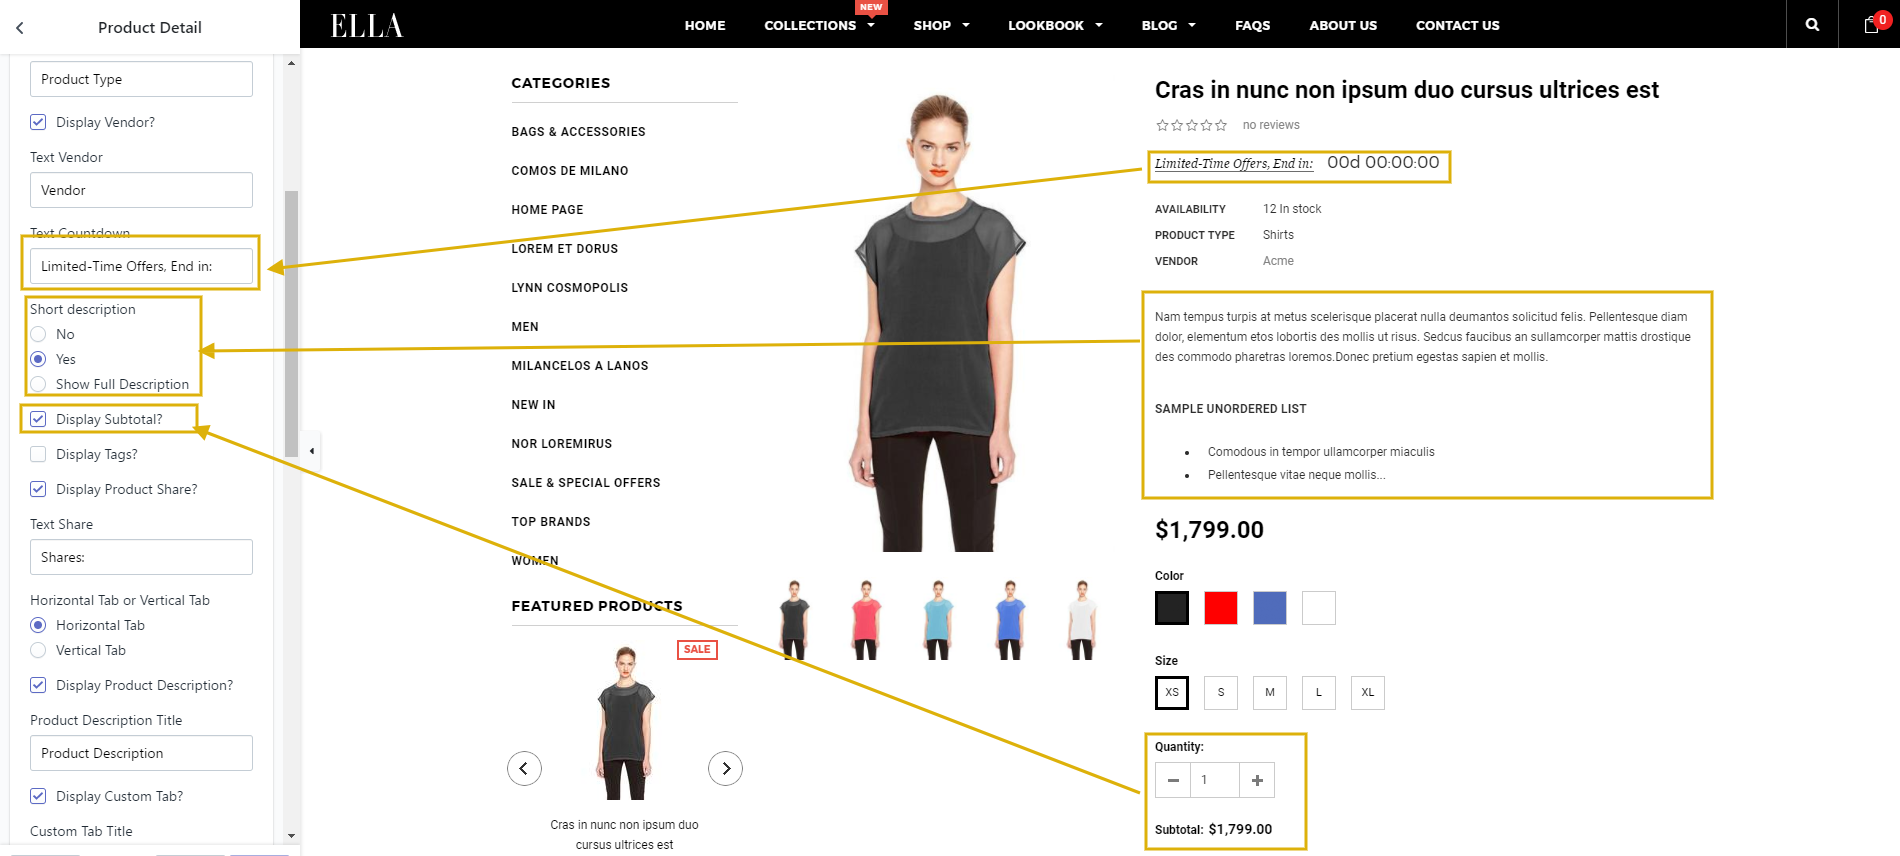
Showing Short Description differently with Long Description.
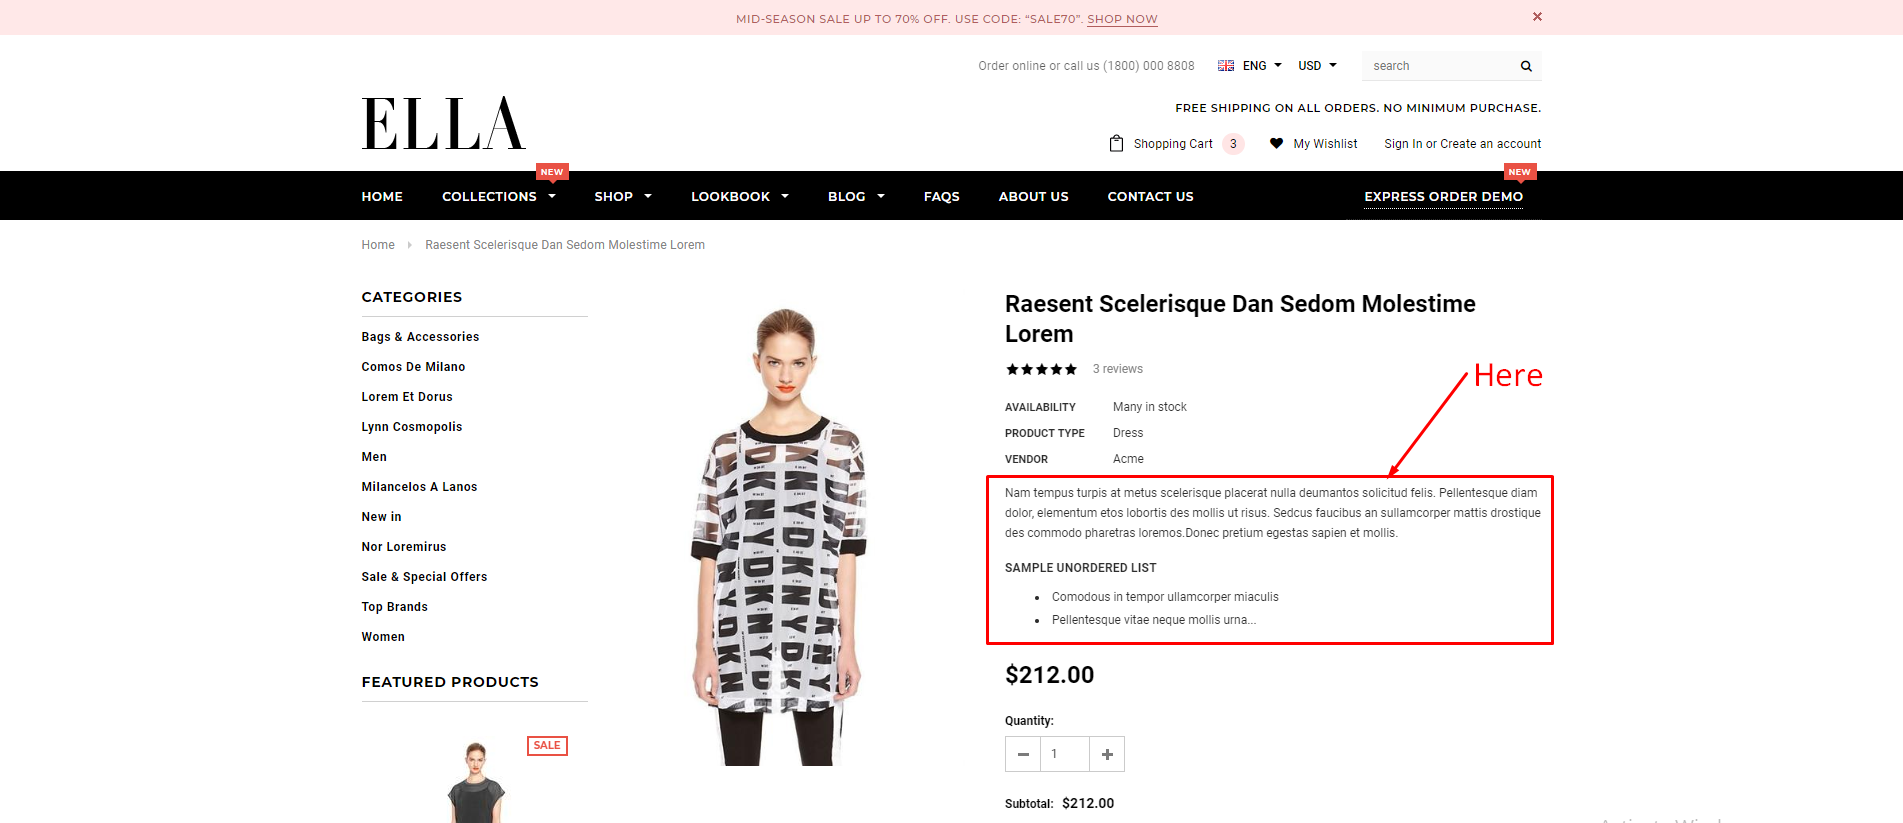
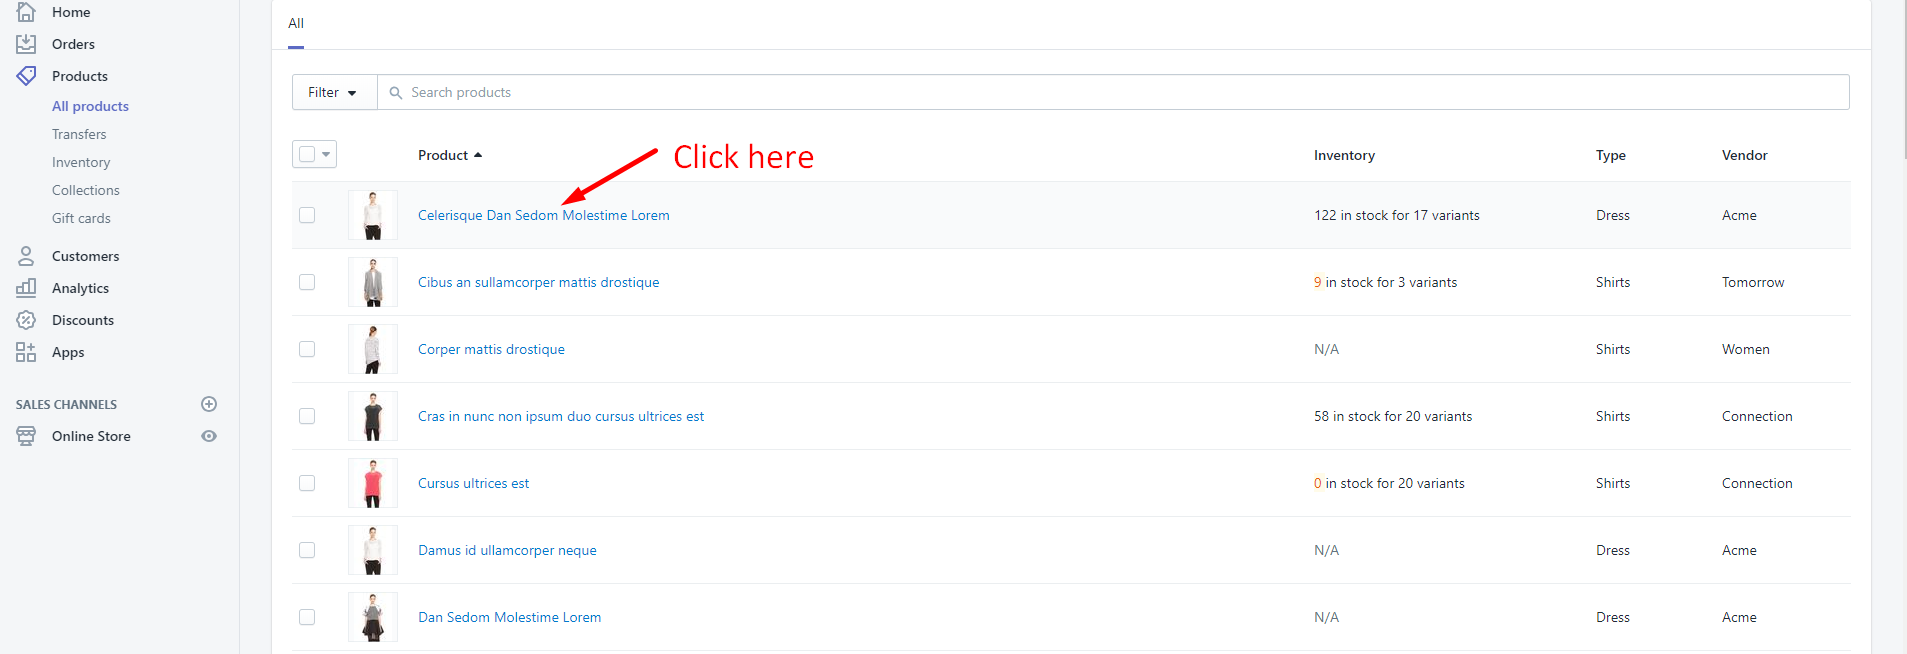
1.From your Shopify admin, click Online Store --> Products -> Click products you would like to show Short Description differently with Description.
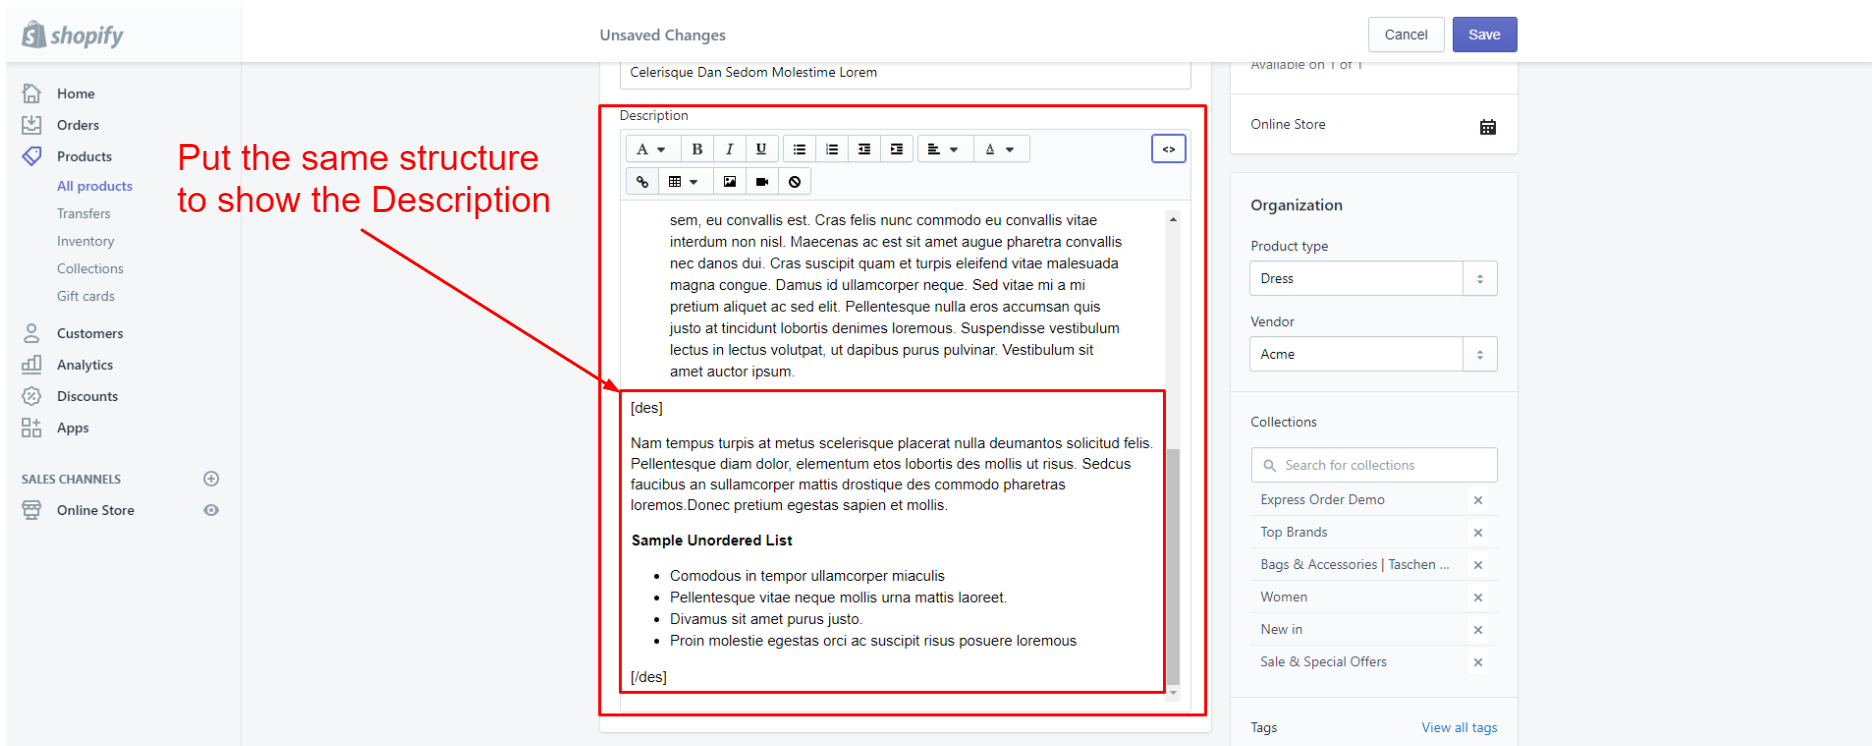
2. At the Description of product, you need to put the Short Description in the last line of Description and follow the below structure.
[des]
Content of Short Description here
[/des]
Using of Variant images and Color Variant
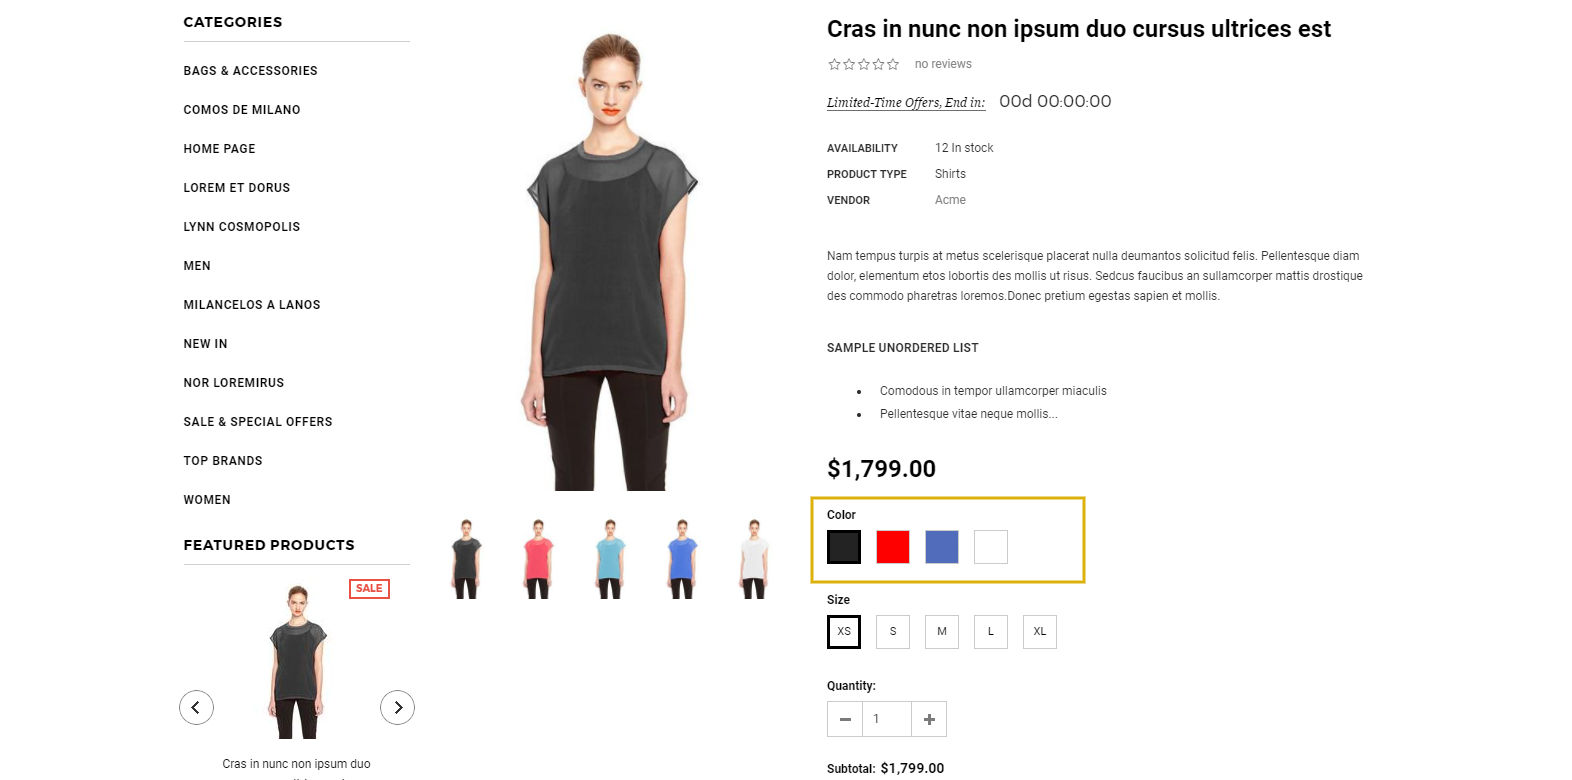
To create product with color variant as in our demo page (https://ella-demo-8.myshopify.com/products/cras-in-nunc-non-ipsum-duo-cursus-ultrices?variant=31534360328), you need to follow these steps:
A. Add images to your product variants
1. From your Shopify admin, click Products, then click on the product you would like to add color variants.
2. In Variants sections, click the image icon to assign an image to that variant.
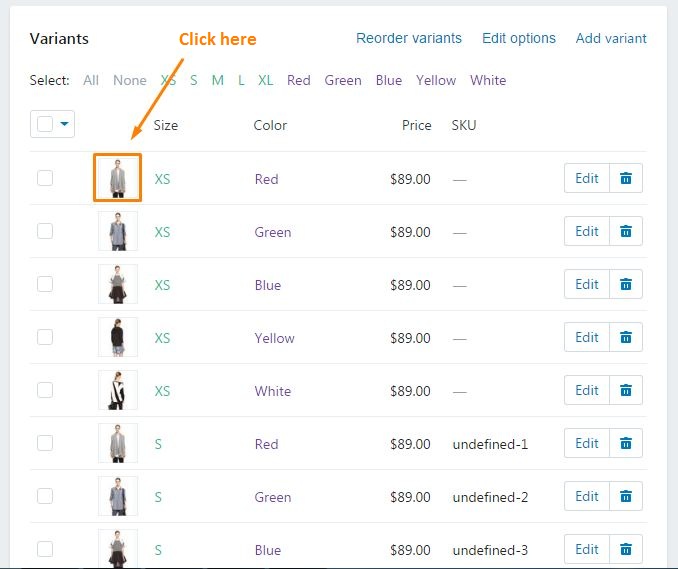
3. Select a product image or click Add image to upload a new image.
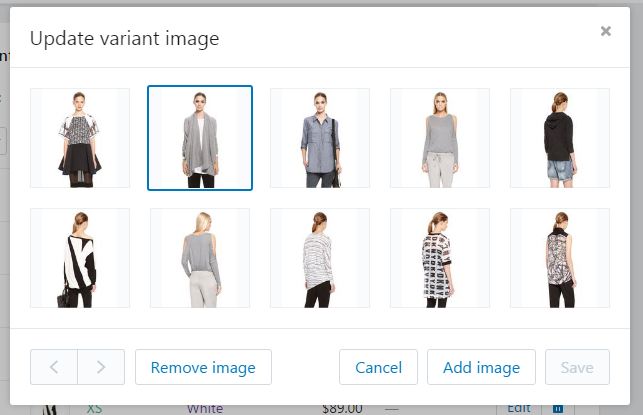
4. Click Save .
B. Add color variant icons
After that, to show color swatch icons, you can use one of two below methods:
1. Upload icon with the same name as the variant color name (please use PNG icon). You need to go to Settings --> Files upload images here.
Naming convention: Lower cap and use "-" to replace white space.
For example: with the option name "Modern Style" the icon name will be modern-style.png.
Here is Youtube video link to help you understand more about how to show Variant images with our theme in your site.
2. Use color name for the option.
Naming convention: No space and the name need to be existed in this table: http://www.w3schools.com/tags/ref_colornames.asp
For example: MediumPurple or MistyRose, Black.
Setup of Page
You will also need to create two pages, one for the textual content that can be placed on the ' Frontpage ' as a welcome message and another for the ' Contact Page ' which you can link to the 'page.contact' template. Linking these pages to the correct template will be covered in their respective sections within this documentation. Here is the link which help you to create custom pages.
Create Contact Us Page
Here is a video for your reference.
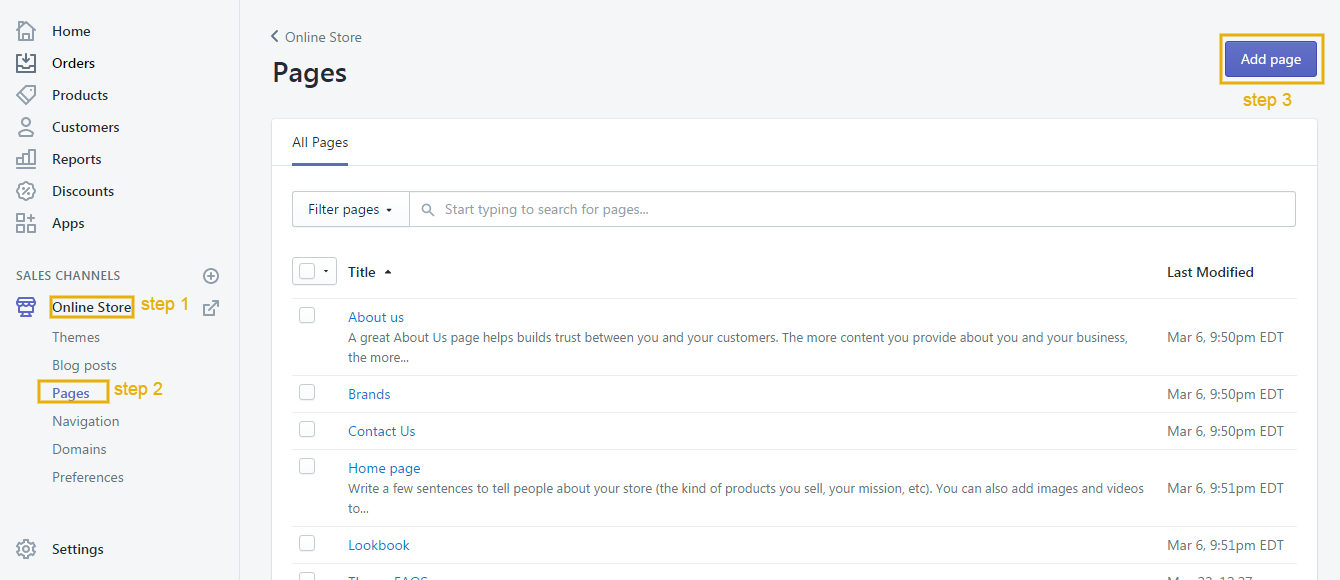
Login to your Shopify admin panel, click Online Store --> Pages --> Add page.

Google maps
There is also a guide of how to embed a goole maps directly into the contact page. Please go to Google maps and find your desired location. Then copy the maps iframe code and paste it into the text editor.
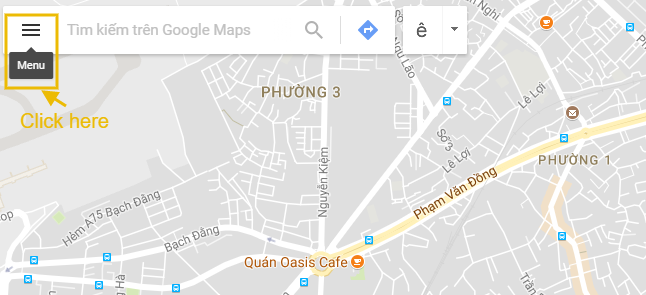

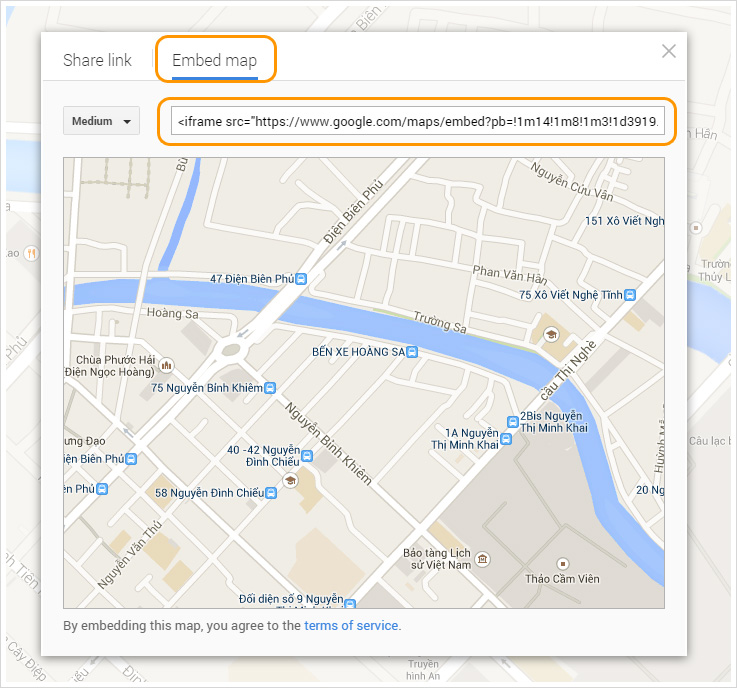
You need to extract the src attributes content. You could have a look at the example of the embedded code. The highlighted part is what you need to copy.
Then go to Themes > Customize theme > Contact Page. Click Contact Page
After you create Contact Us page successfully, please go to Themes > Customize theme > Click Contact us which you just created at navigation to show Sections for this.
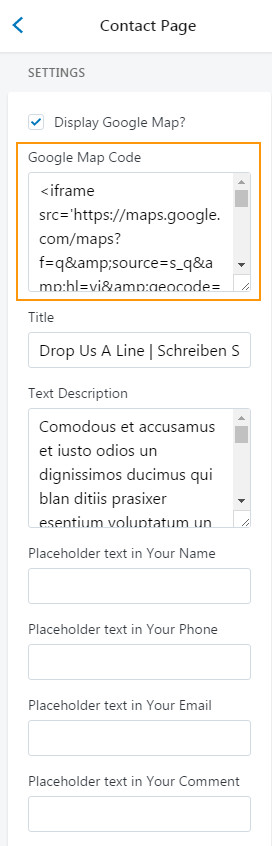
At this Sections, you can start adjusting like in this image below:

Then, paste the embedded code of Google Map into the field Google Map Code and put the content that you'd like to show as the below image.
Edit/add fields to the Contact Form
This is the contact form we are going to add/ edit:
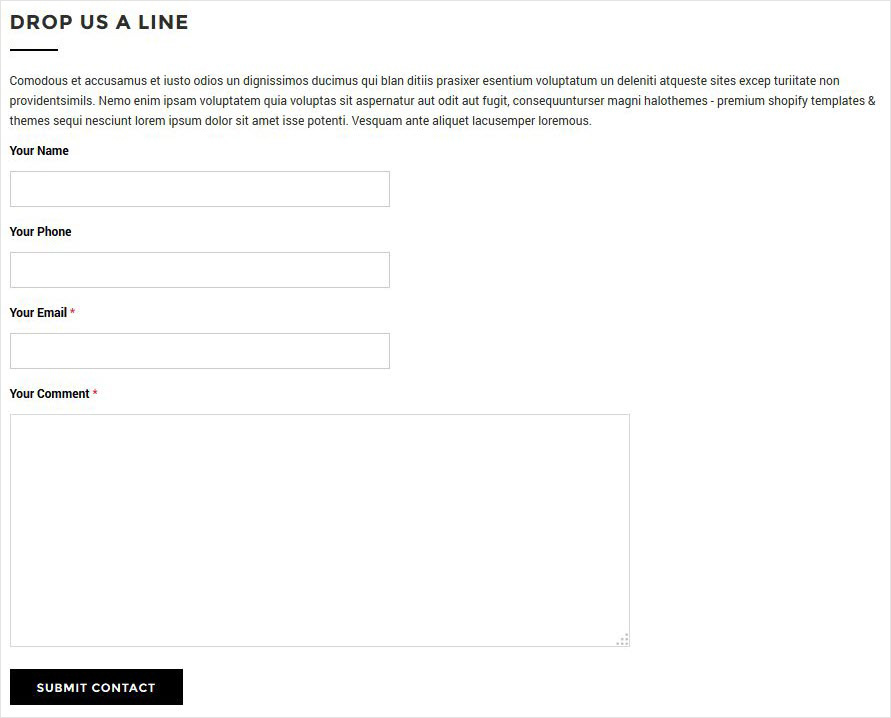
To add/edit contact field, please follow below guide:
Create Wishlist Page
Here is a video for your reference.
1. Login to your Shopify admin panel, click Online Store--> Pages--> Add page.
2. From the template page, enter a Title and choose the Template look like the below image.
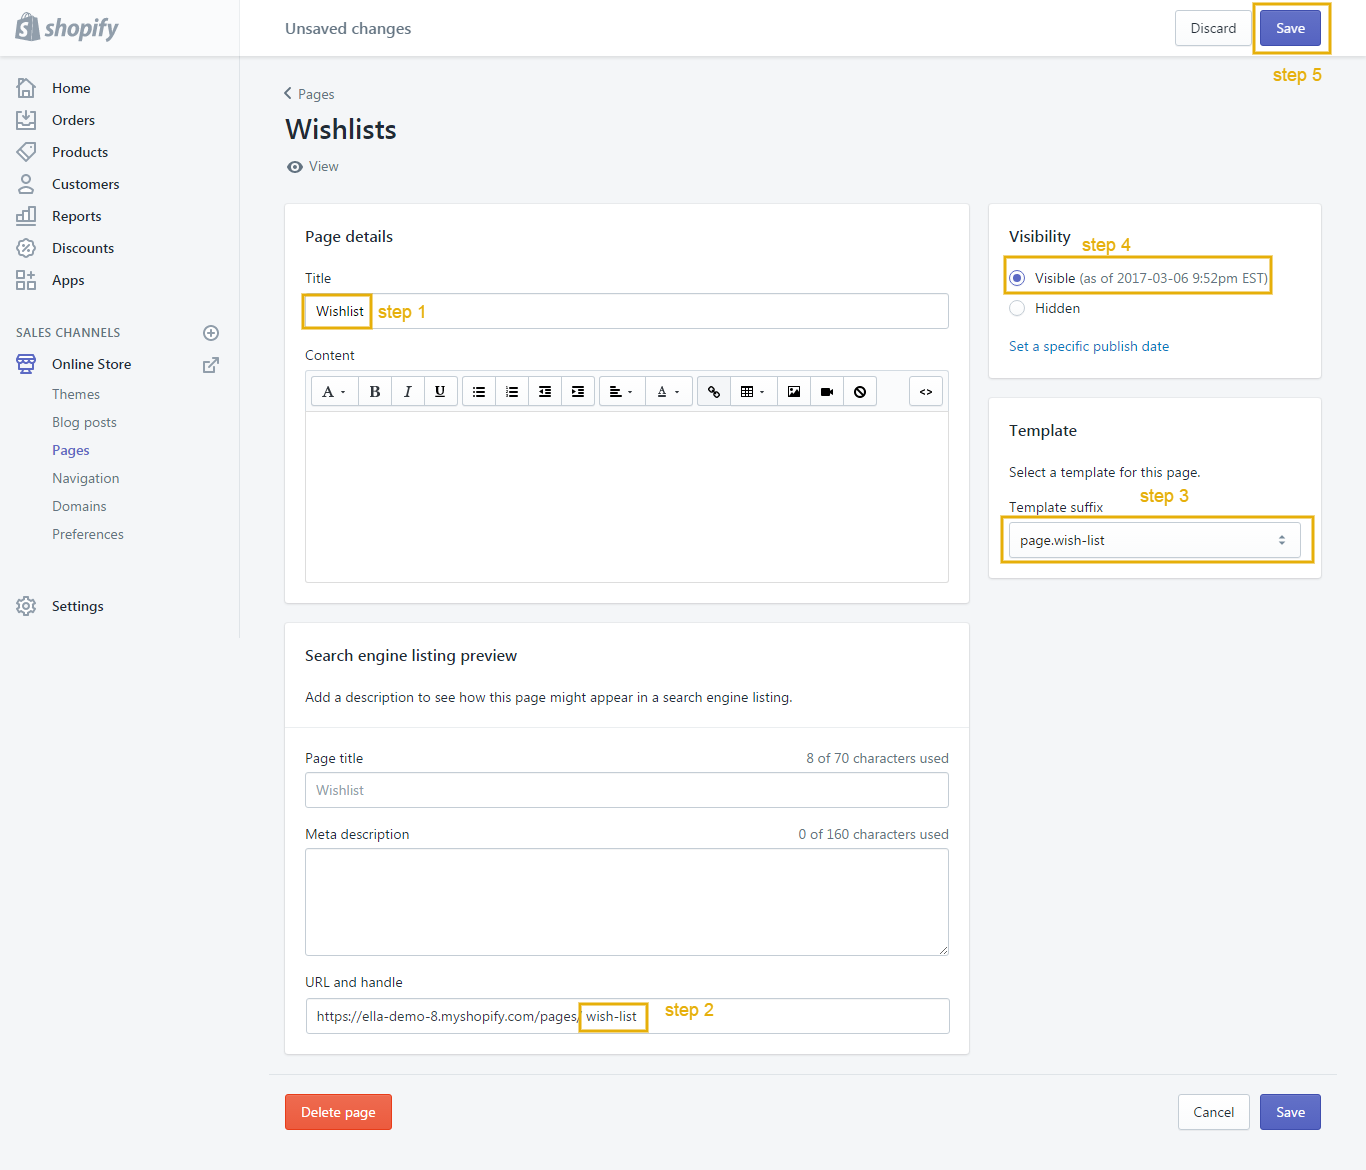
3. Click Save.
Create FAQs Page
Here is a video for your reference.
1. Login to your Shopify admin panel, click Online Store--> Pages--> Add page.
2. From the template page, enter a Title and choose the Template look like the below image.
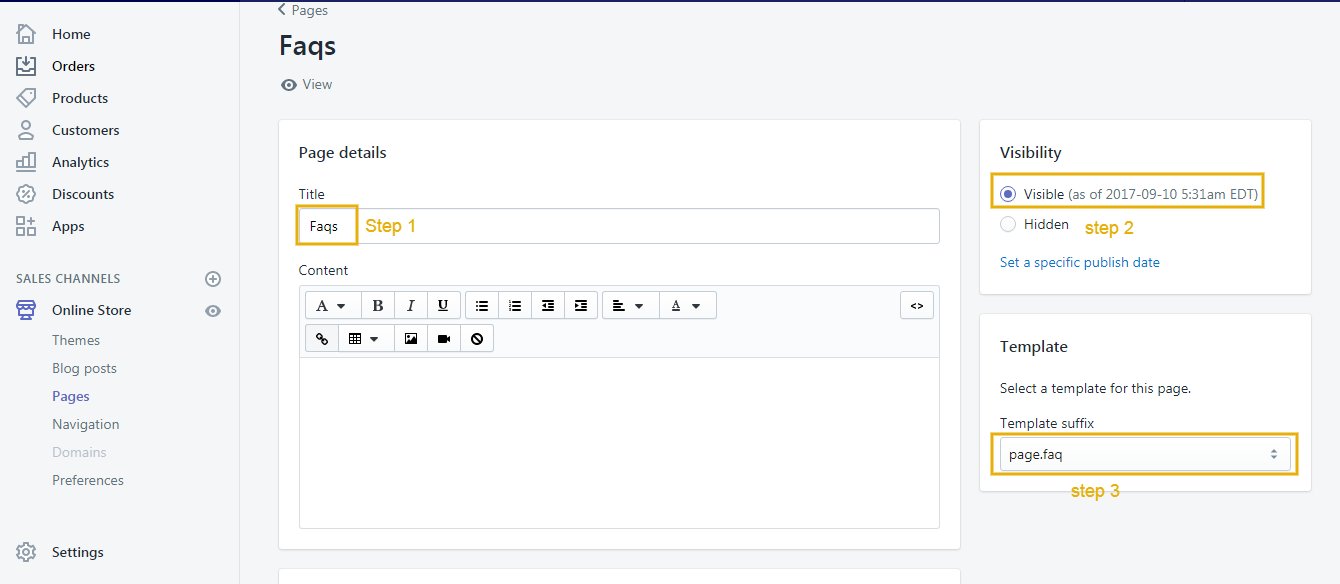
3. Click Save.
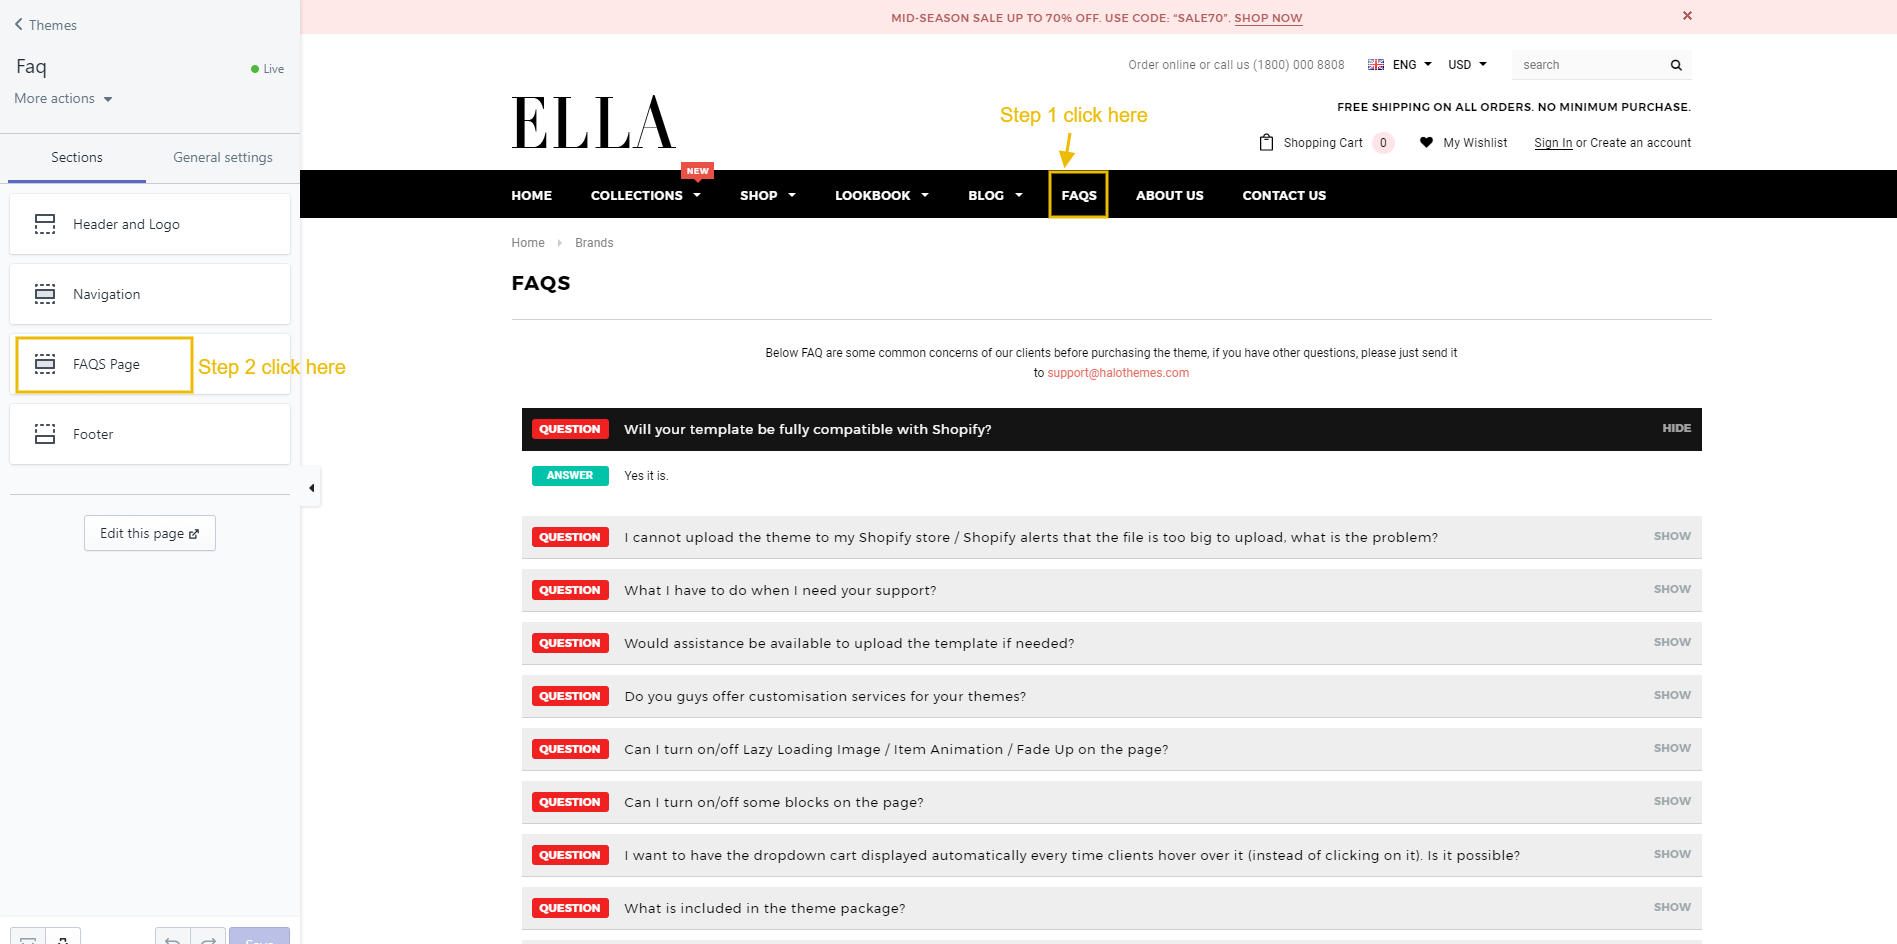
4. Then go to Themes > Customize theme > FAQs. Click FAQs Page sections.
After you create FAQs page successfully, please go to Themes > Customize theme > Click FAQs page which you just created at navigation to show Sections for this.
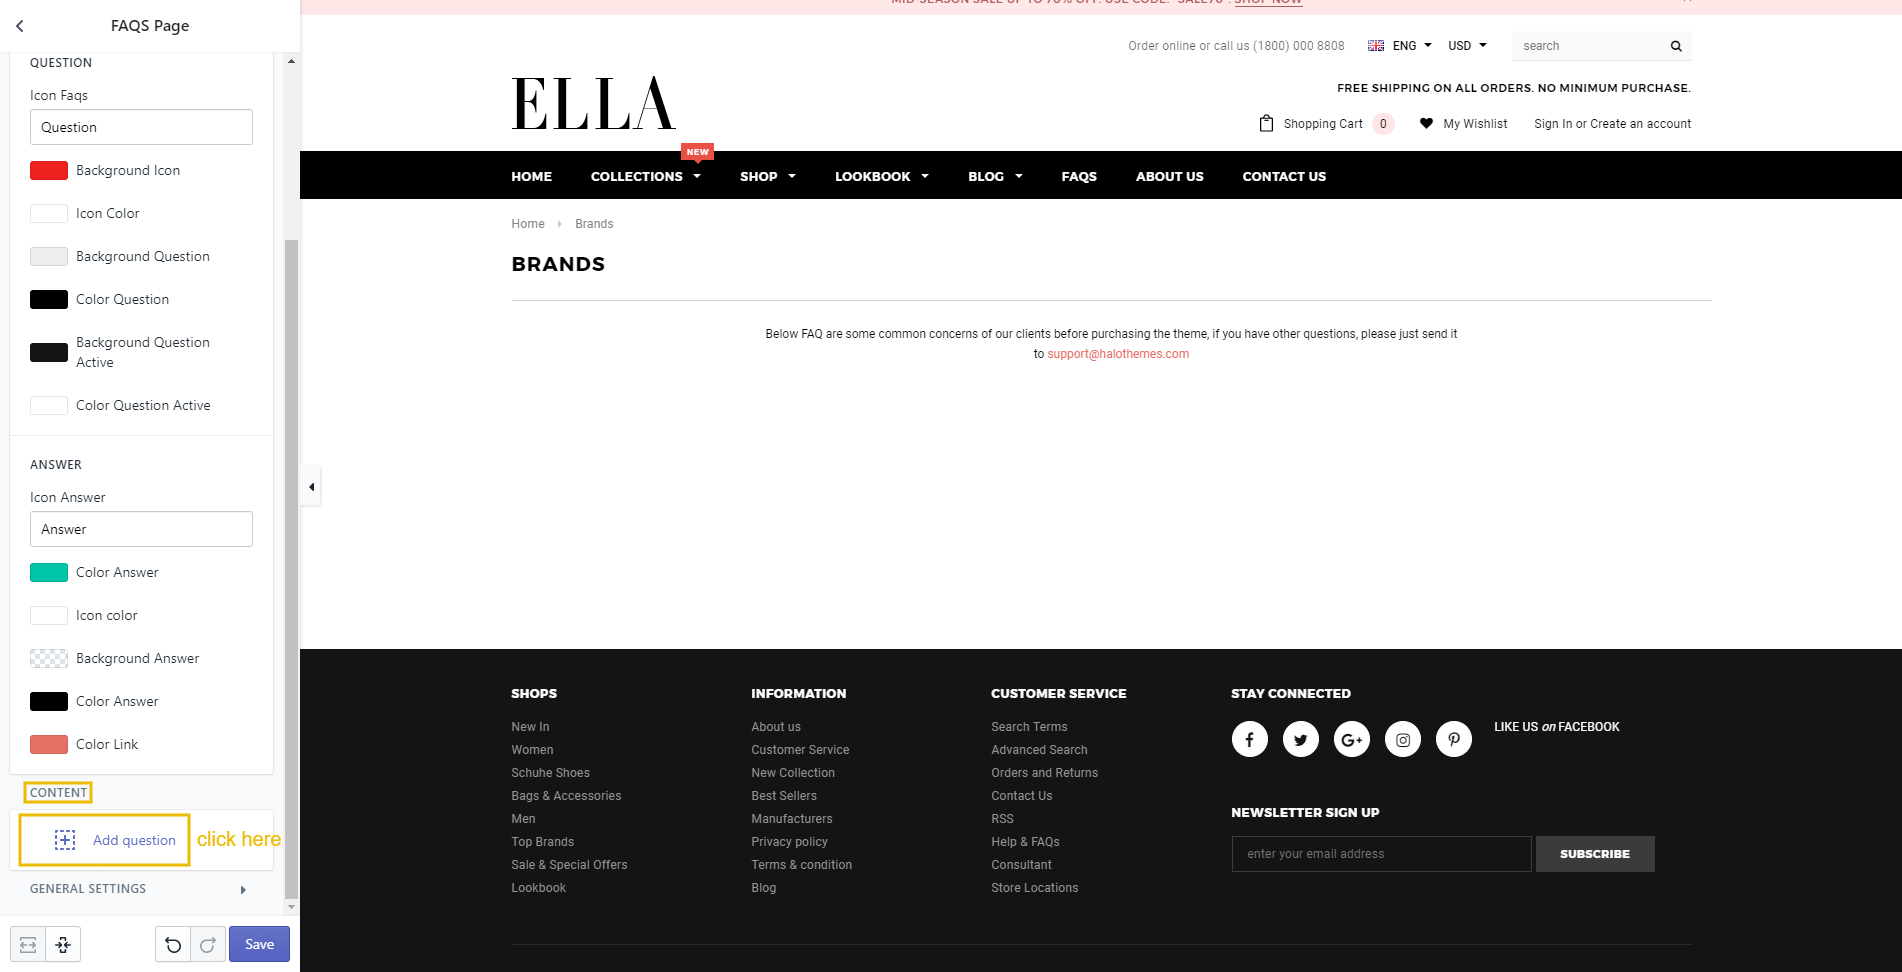
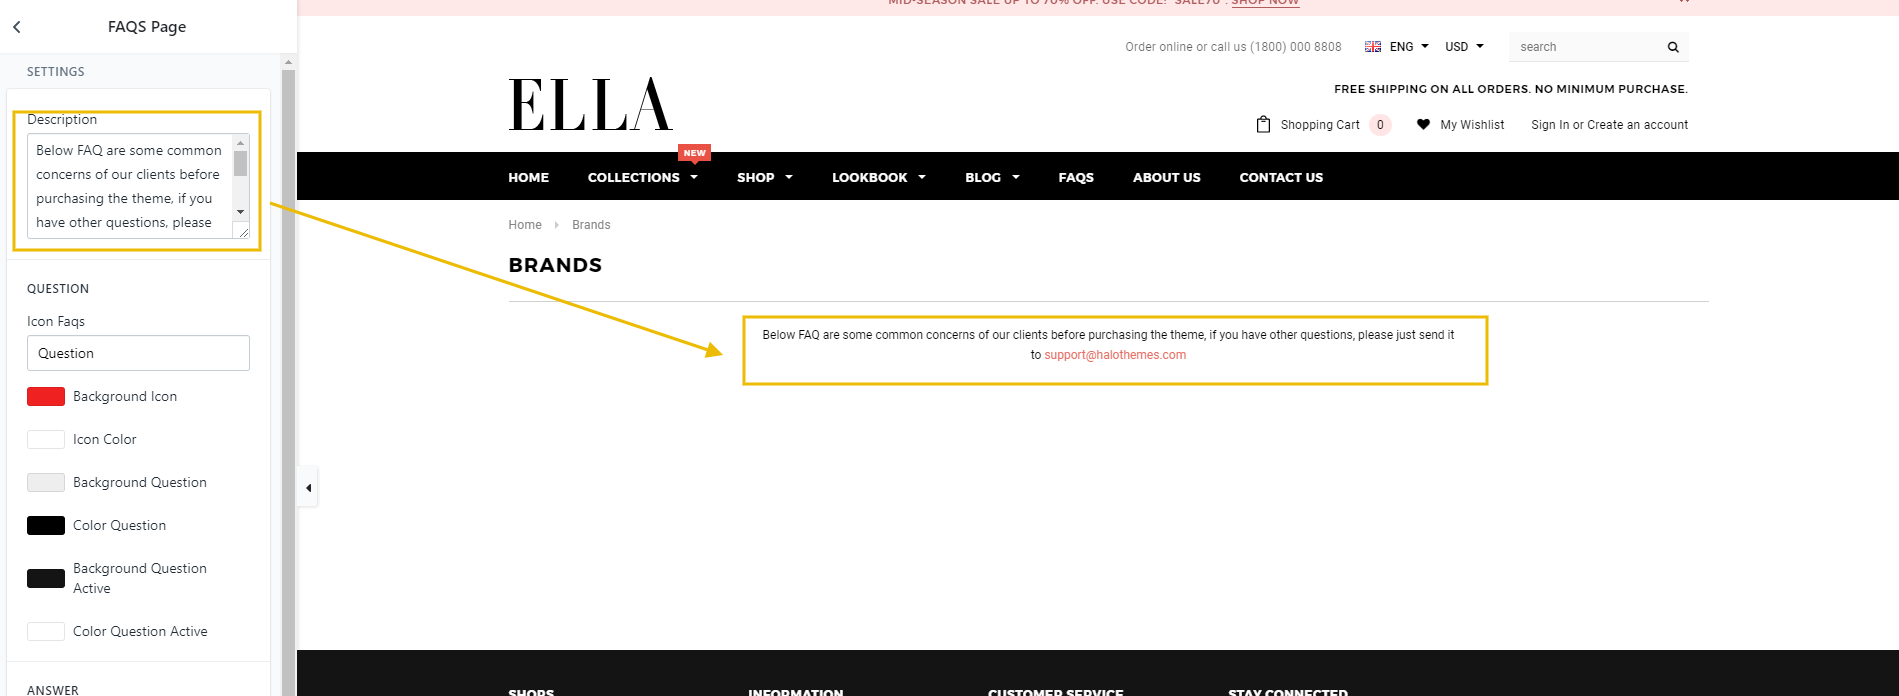
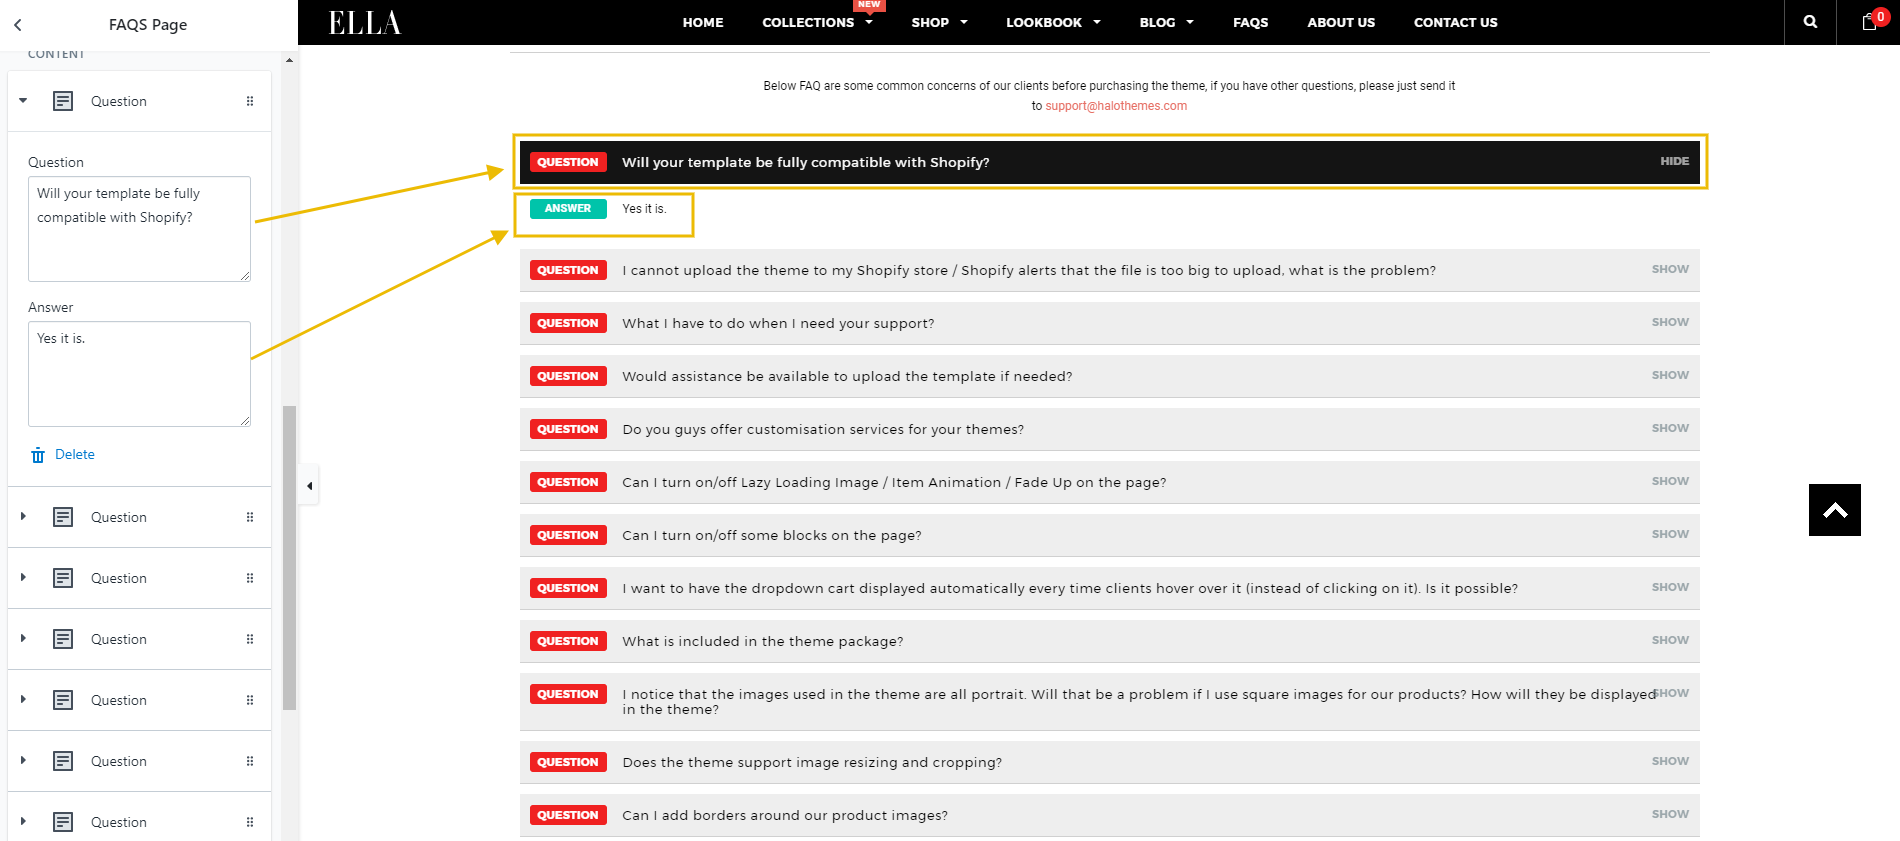
5. In settings, at "Content" click add question, please do follow the below image.
Create Lookbook page
Here is a video for your reference.
1. Login to your Shopify admin panel, click Online Store--> Pages--> Add page.
2. From the template page, enter a Title and choose the Template look like the below image.
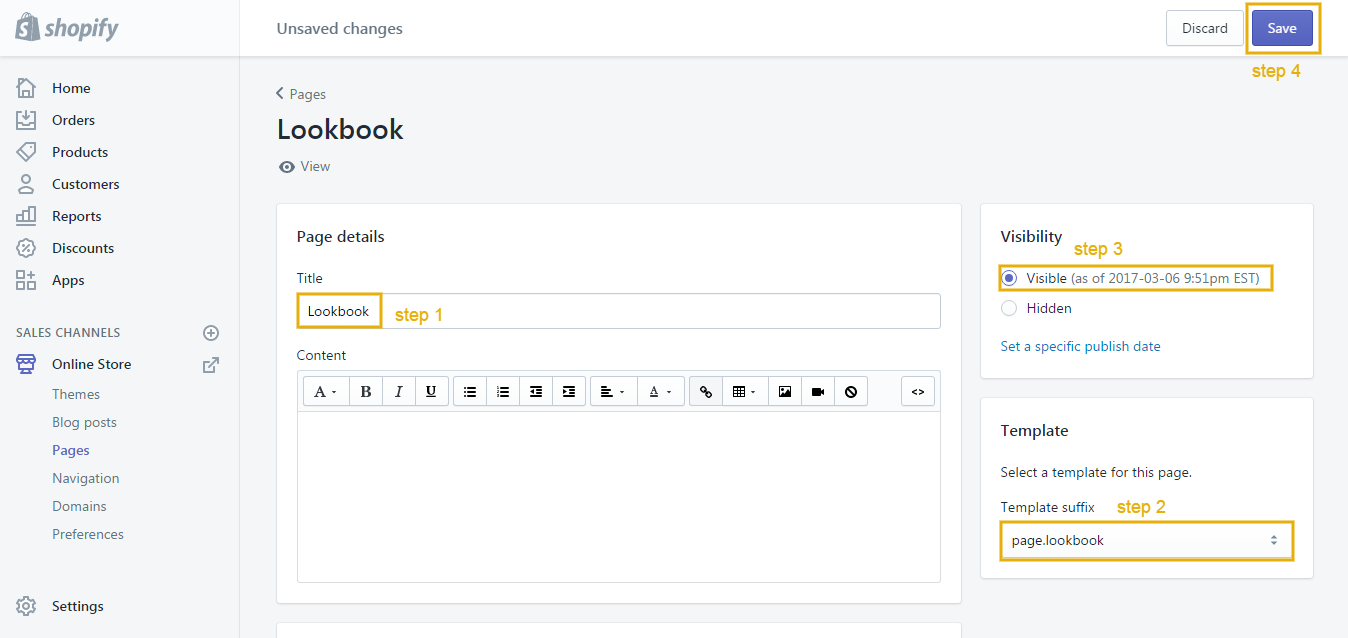
3. Click Save.
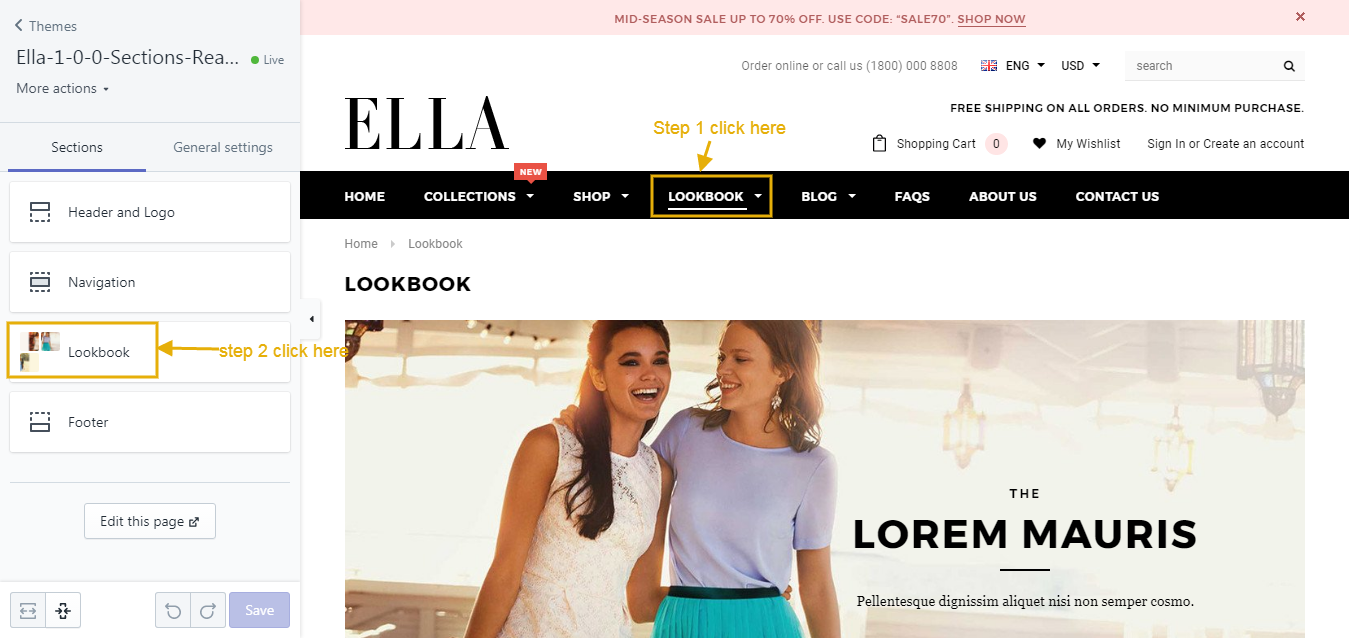
4. Then go to Themes > Customize theme > Lookbook. Click lookbook sections.
After you create Lookbook page successfully, please go to Themes > Customize theme > Click Lookbook which you just created on navigation to show Sections for this.
At this Sections, you can start adjusting like in this image below:
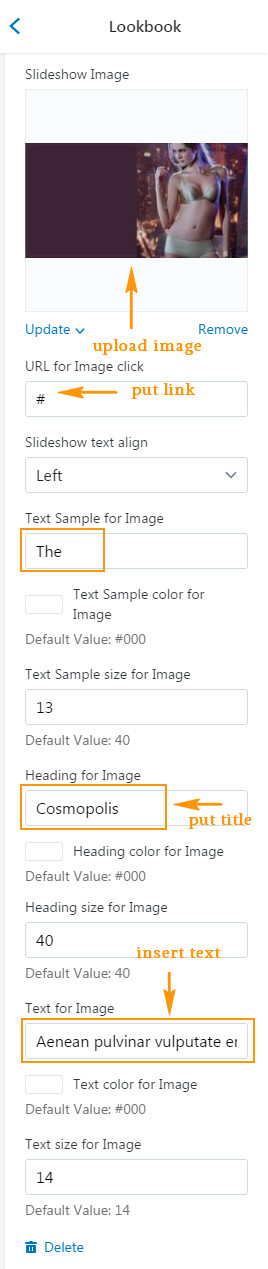
5. In settings, at "Content" click add banner, please do follow the below image.
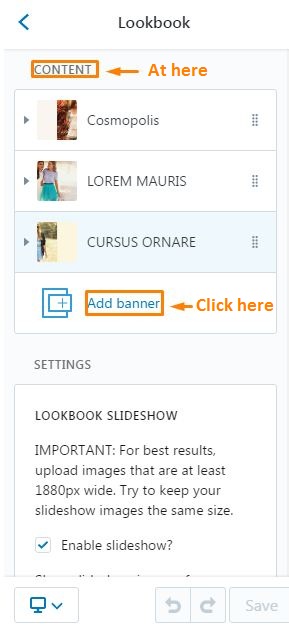
6. In Content, please do follow the below image.
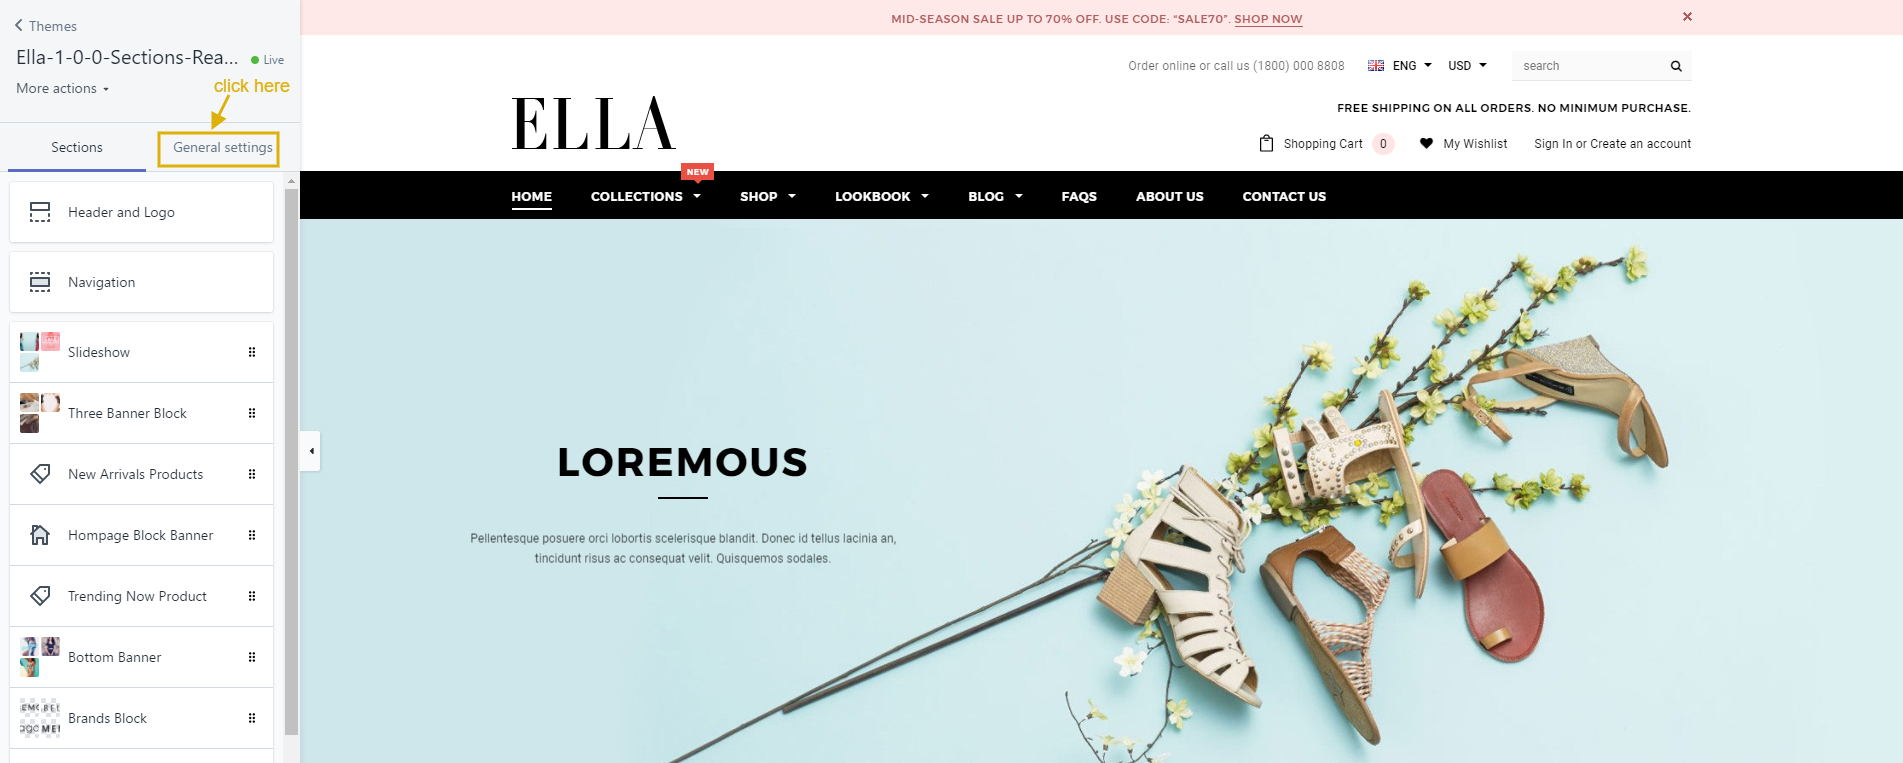
General settings
From your Shopify admin, click Online Store. Click Customize theme for the theme you want to customize. Click General Settings.
Social media
In General Settings Tab. Click Social Tab. You can enable/disable social block.
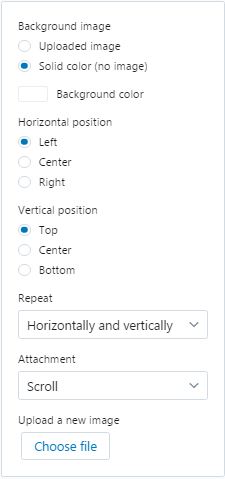
Background
From your Shopify admin, click Online Store. Click Customize theme for the theme you want to customize. In General Settings Tab -> Background.
This below box will allow you to choose between using a background color and a background image. If you select the background images, you can upload it using the upload form below.
General
From your Shopify admin, click Online Store. Click Customize theme for the theme you want to customize. In General Settings Tab -> General.
Button
From your Shopify admin, click Online Store. Click Customize theme for the theme you want to customize. In General Settings Tab -> Button.
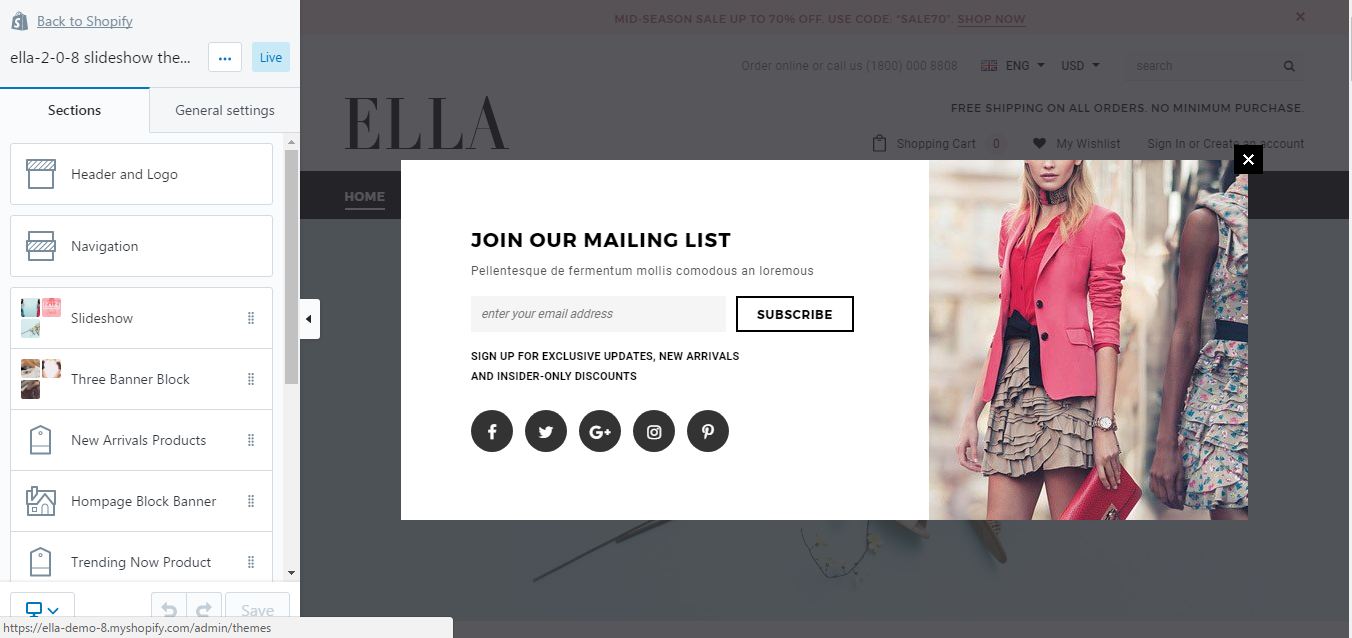
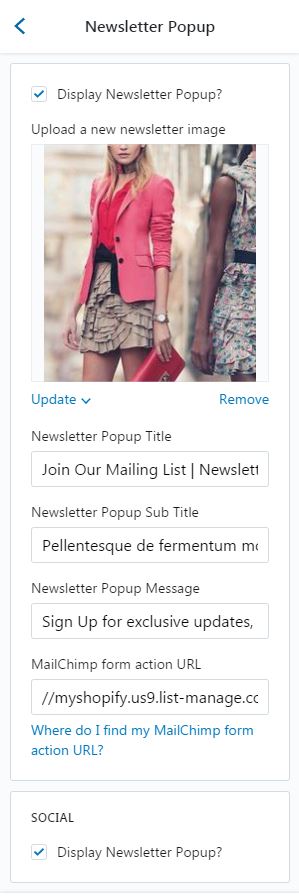
Newsletter Popup
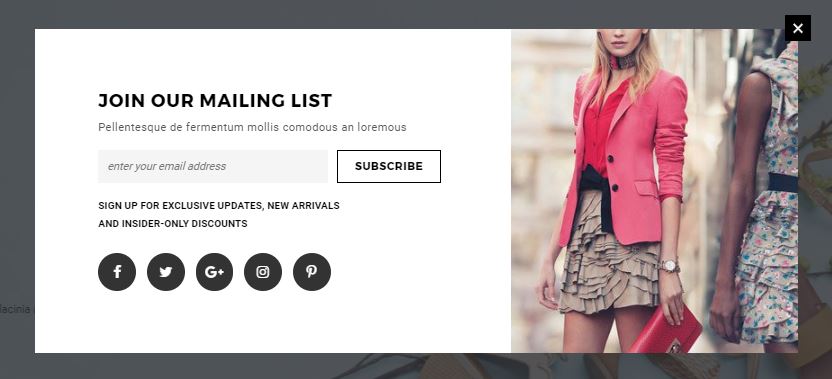
In General Settings Tab. click Newsletter Popup. Follow to enable/disable popup and edit text in popup.
Wishlist
You can enable/disable wishlist

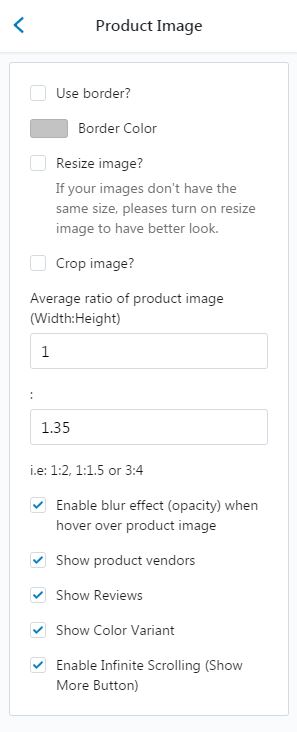
Product Image
In General Settings Tab. Click Product Image Tab, you can setting.
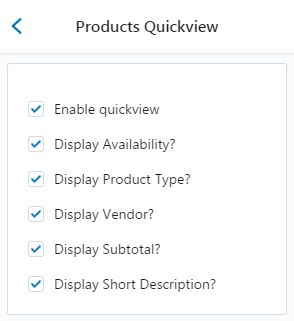
Products Quickview
In General Settings Tab. Click Products Quickview Tab
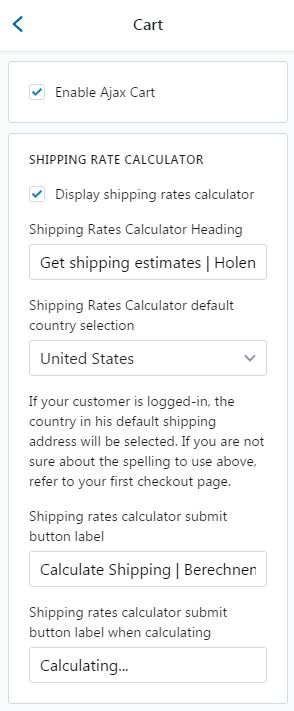
Cart
In General Settings Tab. Click Cart
Register Page
In General Settings Tab. Click Register Page Tab

Money options
In General Settings Tab. Click Money Options Tab
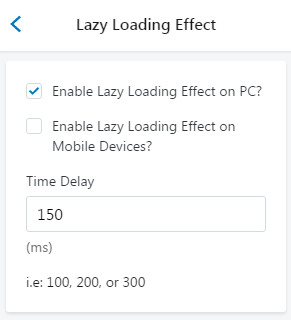
Lazy Loading Effect
In General Settings Tab. Click Lazy Loading Effect Tab
Fonts
In General Settings Tab. Click Fonts Tab
Checkout
In General Settings Tab. Click Checkout Tab
Multiple Languages
How are you going to create a website where can show multiple pages of the same thing, but in different languages? It's easy to use this function in our theme.
Before we begin setting up Multiple Language, you need to read these below parts.
How to use Multiple Languages
-
From your Shopify admin, click Online Store.
-
Click Customize theme for the theme you want to customize.
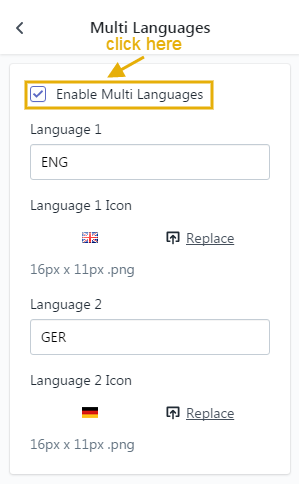
-
At Multi Languages sections, check Enable Multi Languages, then fill in the name of 2 languages and upload icons you'd like to show at Language 1 and Language 2.
- After that, choose the language from the Languages page.
Multiple Languages in Menu & Theme Setting
-
From your Shopify admin, click Online Store, then click Navigation.
-
Click Edit menu at the menu you'd like to show multiple languages.
-
After that, change text by following this structure: Lang 1 | Lang 2

- Then click Save to save a menu.
Do the same for Theme Setting.
Multiple Languages in Product Title
-
From your Shopify admin, click Products, then click on the product you'd like to show multi languages.
-
After that, change Product title by following this structure: Title Lang 1 | Title Lang 2 .
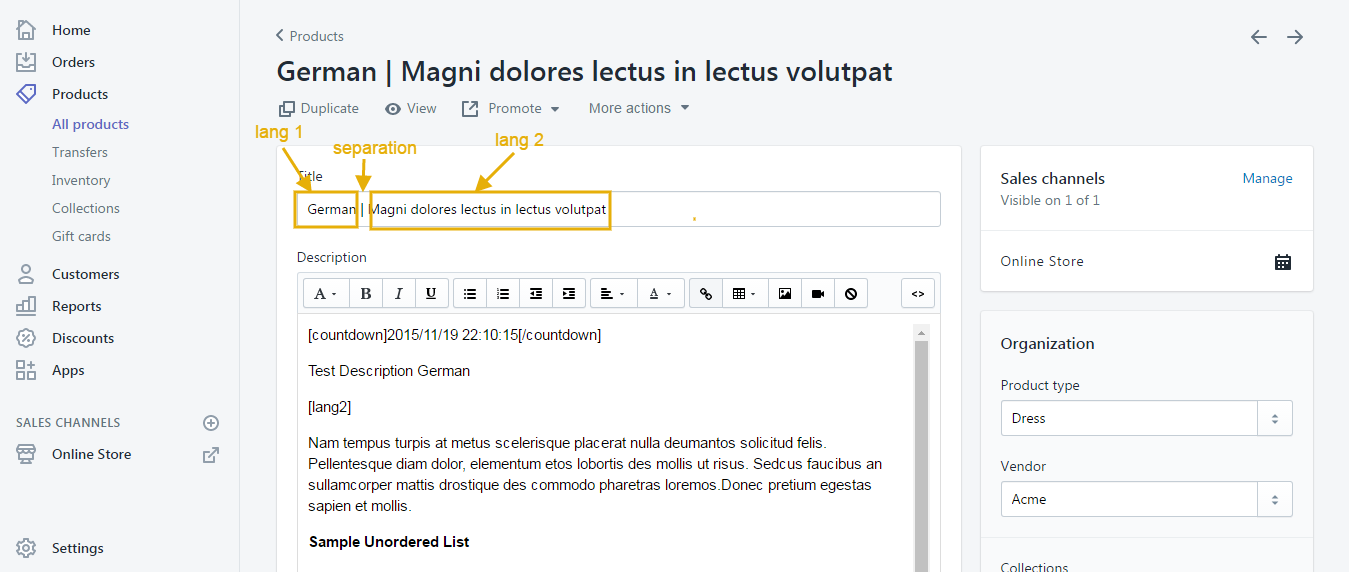
- Then click Save to save product.
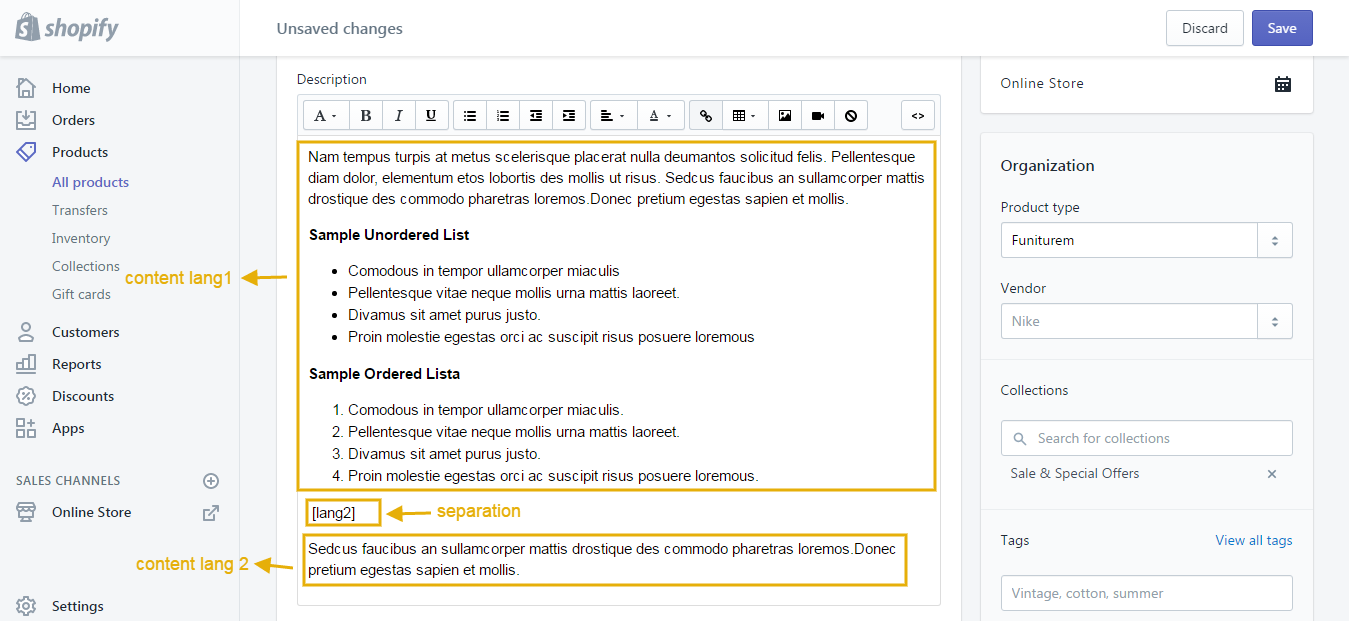
Multiple Languages in Product Description
The Product Description of product needs to be put by following this structure: Content Lang 1 [lang2] Content Lang 2 .
Multiple Languages in Page content
The Page content of product needs to be put by following this structure: Page content Lang 1 [lang2] Page content Lang 2 .
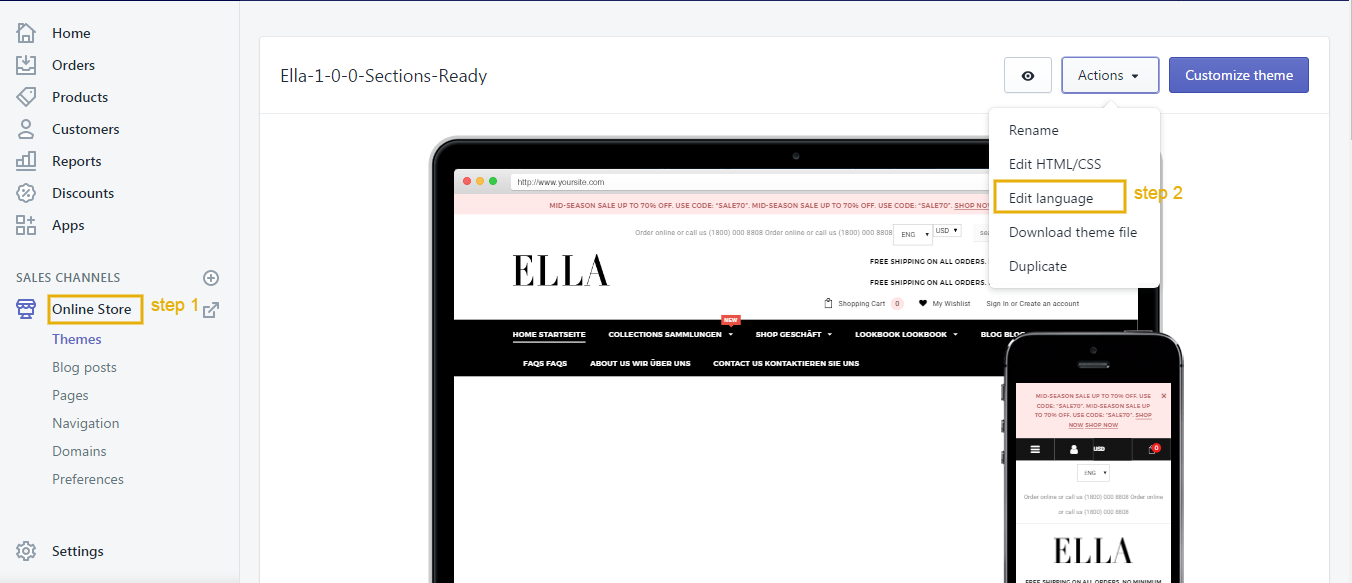
How to translate
Here is a video for your reference.
Login to your Shopify admin panel and go to Online Store --> Edit language
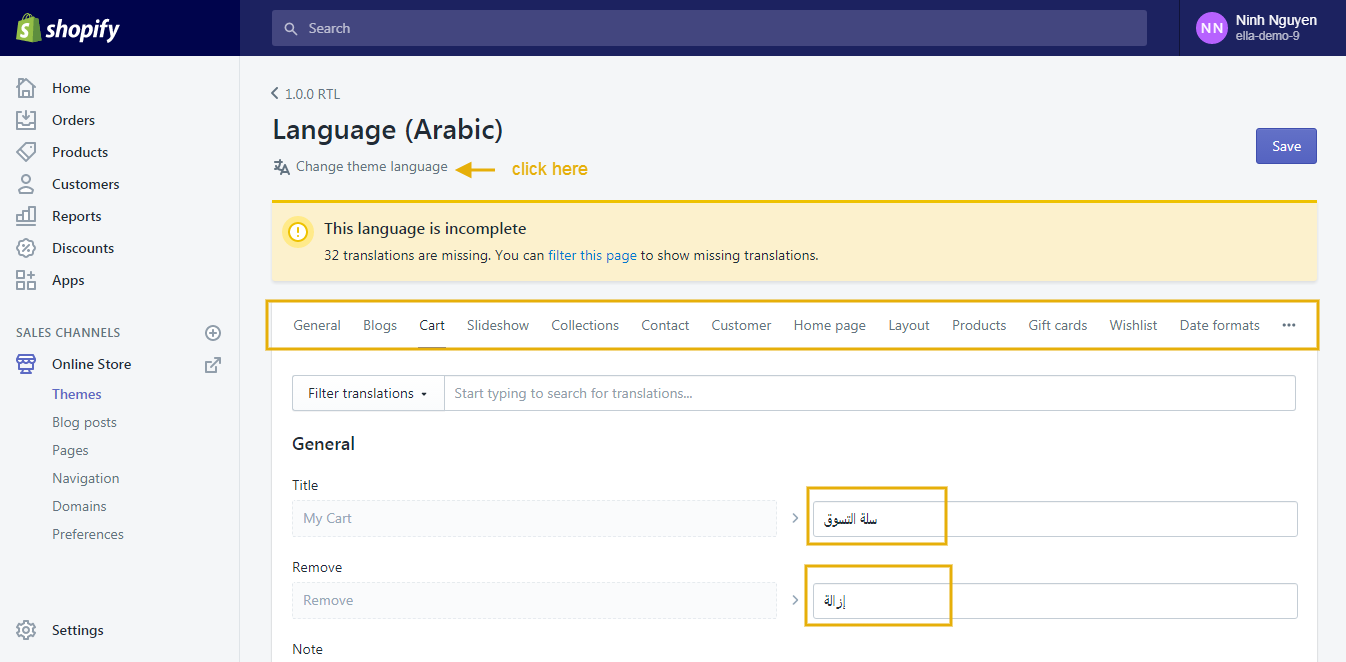
- If your languages which you'd like to show are created before, you need to complete the translation of them. (You can read here to view or update a translation.)
- If your languages which you'd like to show didn't create before, you need to create the new translation. (You can read here to know how to create the new translation.)
After completing the translation, you need to:
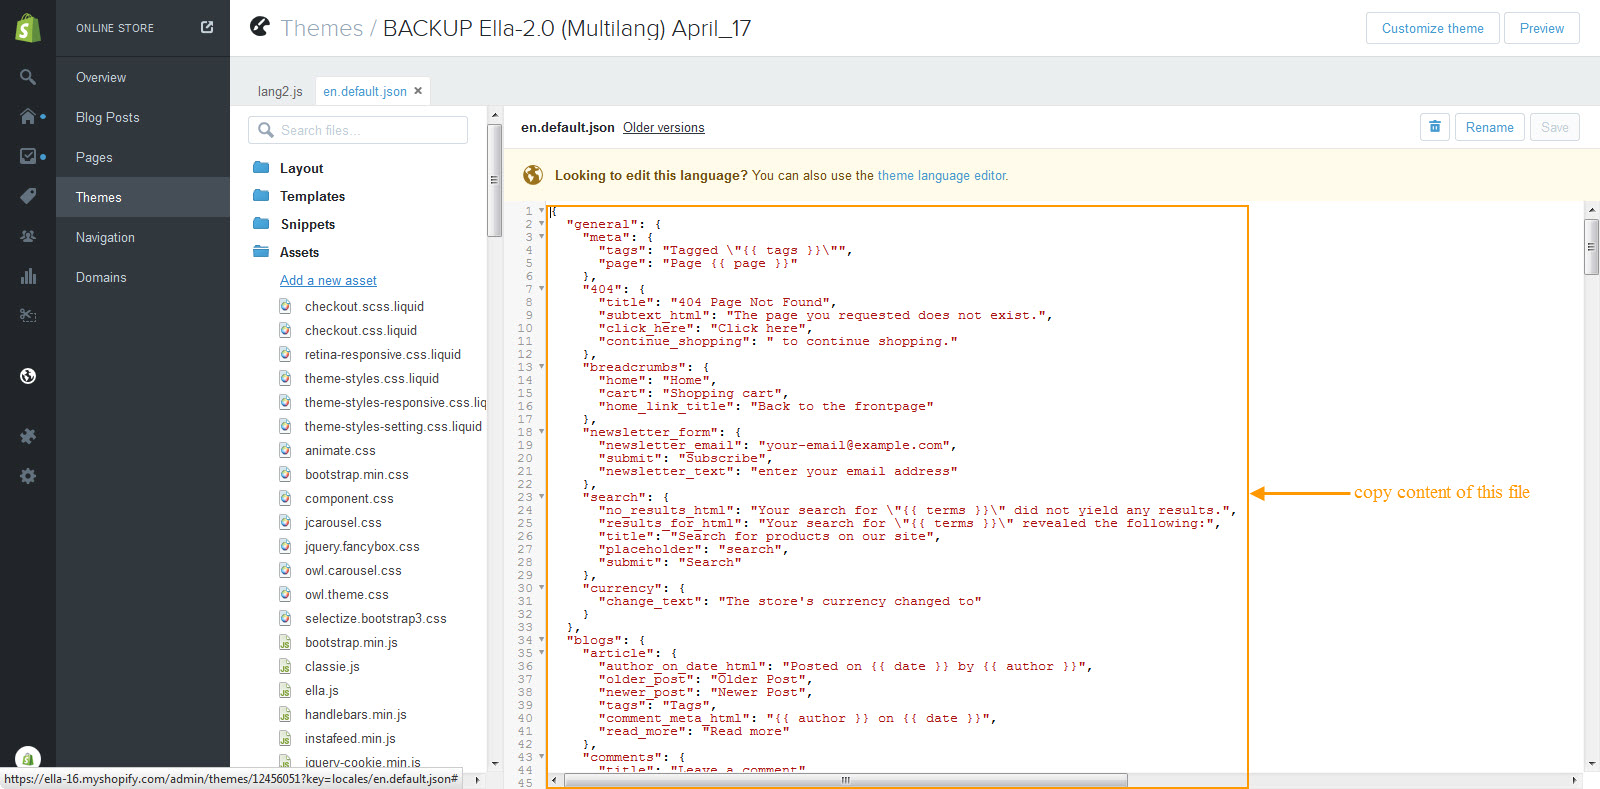
- Go to Themes --> Edit HTML/CSS.
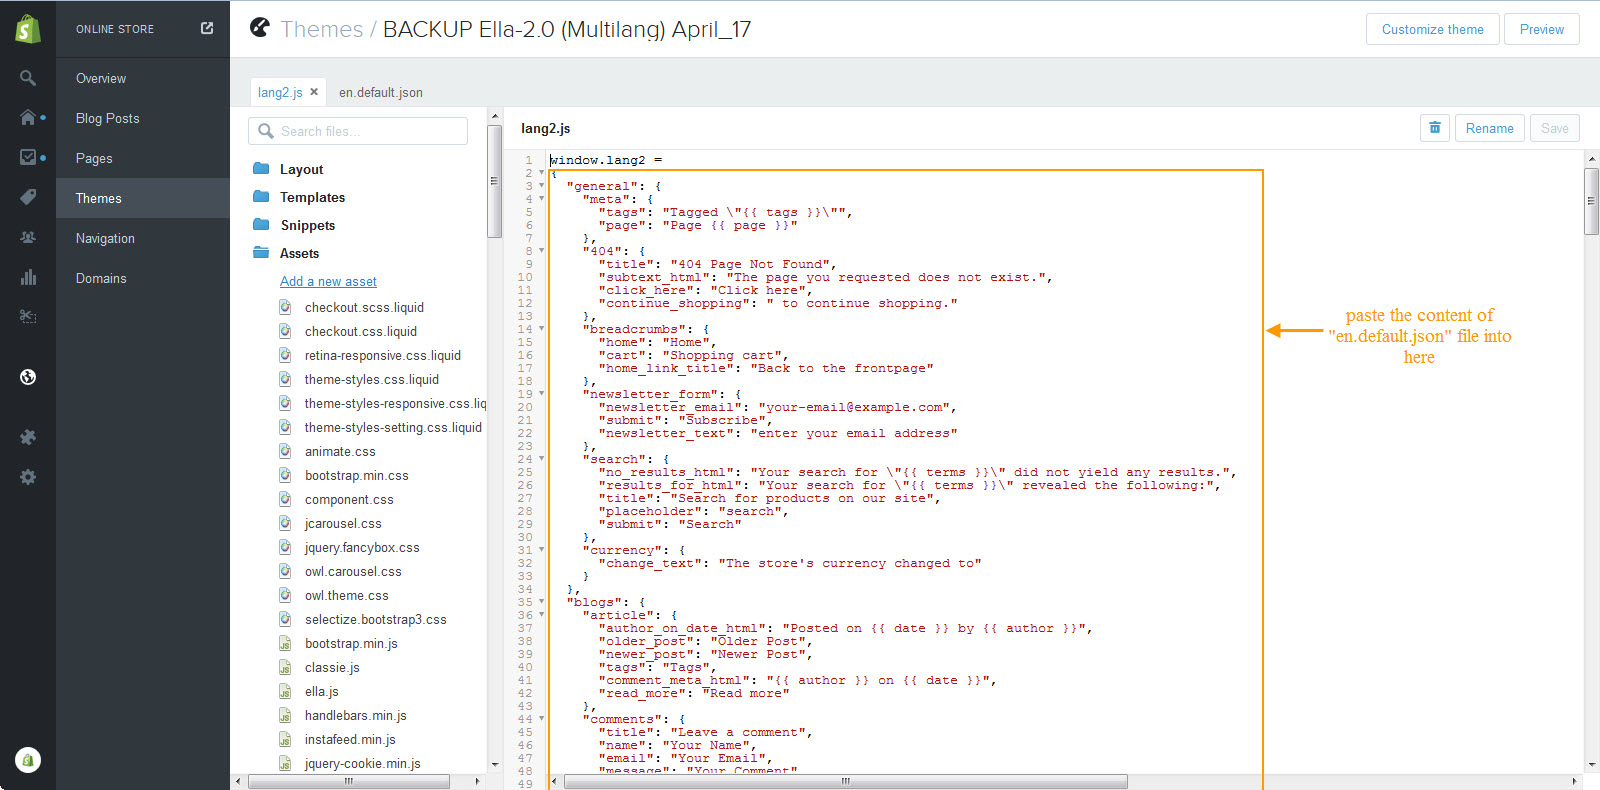
- At Locales folder, it contains files of translation. Please open the file of Lang 2 (for example: open en.default.json file), copy the content of this file.
- After that search & open lang2.js file, paste the content of en.default.json file into this file from the second line.
Credits
- jQuery Library
- Bootstrap v3.2.0
- Flexslider
- OWL Carousel
- Google Maps
Need Help?
If you have any questions, please do not hesitate to contact us at support@halothemes.com. We are happy to help!